

If you are an MSP working with Pax8 today, I believe you should be leveraging their API to automate workflows from a procurement and subscription management perspective. Many Pax8 partners don’t know Pax8 has an API but essentially it can be used at no additional cost and has the following endpoints:
There is a ton you can do here with this API. Most commonly, you might think of adding this as part of a user onboard/offboard process where you are modifying seat counts. You might also take this a step further and integrate directly into QuickBooks Online or some other ERP where you bill out today instead of relying on Pax8’s fixed set of integrations. That is the great part about a vendor being open.
I personally rely on many workflows generated from Power Automate because of the no code/low code benefits. Right now, I have created a flow with Pax8’s API to automatically generate tickets in PSA when an NCE subscription is coming up for renewal. This allows my team to evaluate the license count before we are locked in again with these strict contract terms. This provides a ton of value since we have disparate renewal dates for NCE subscriptions on a per customer level currently.
In this article I will be showing you how to connect to the Pax8 API via Power Automate so hopefully you can start doing some cool things as well.
If you are interested in using Pax8 API as a powershell wrapper, shoutout to Luke Whitelock who has created and published that on github: lwhitelock/Pax8API: This is a powershell module used to access the Pax8 API (github.com)
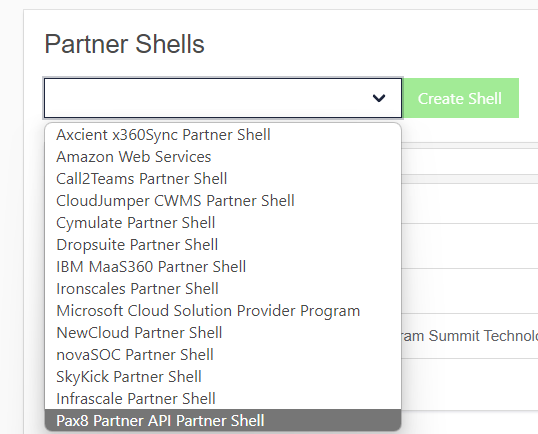
On the Pax8 Side:
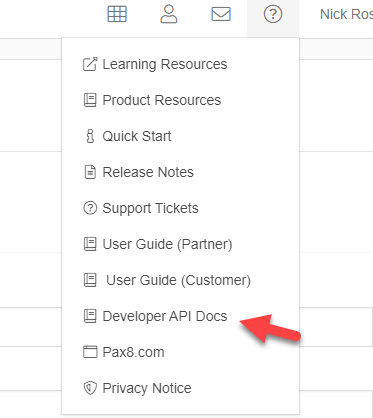
On the Microsoft side:
**If you are a Silver or Gold member in Microsoft’s Partner Program, it is possible you are already getting these licenses as part of your IURs.
Normally, I would recommend that you would set Pax8 up as a custom connector in Power Automate, much like I showed doing so in this article: Creating Syncro as a Custom Connector in Power Automate – (tminus365.com) where we connected Synco. Unfortunately, Pax8’s API uses client credentials for the grant type to create a new accessToken which isn’t currently supported for custom connectors. This basically inhibits our ability to authenticate if we were going to try to build that flow. For this reason, you have to make calls to get access tokens directly within the flow itself. Let’s do that now:
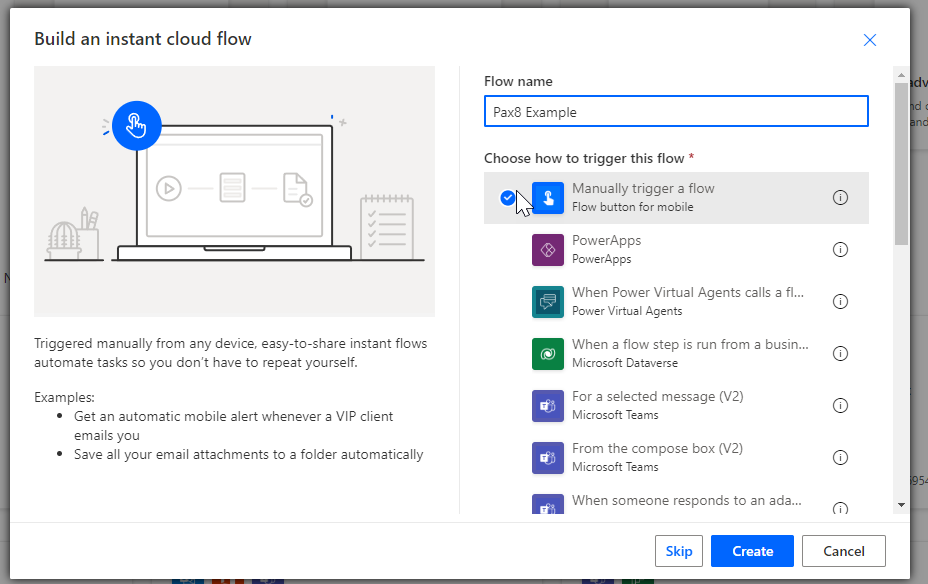
3. Give it a name and chose Manually trigger a flow (this is just for testing and the purposes of this example, you could give this any trigger you want.)
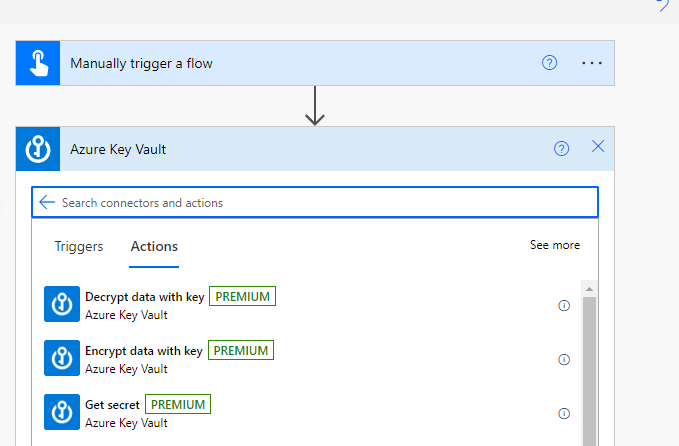
4. We will be using our ClientID and Secret to get a new access token during the flow. For security purposes it is best not to expose those in plain text. For this reason I have stored them in Azure Key Vault so we can populate them dynamically. Click New Step>Search Azure Key Vault>Click Get Secret under actions
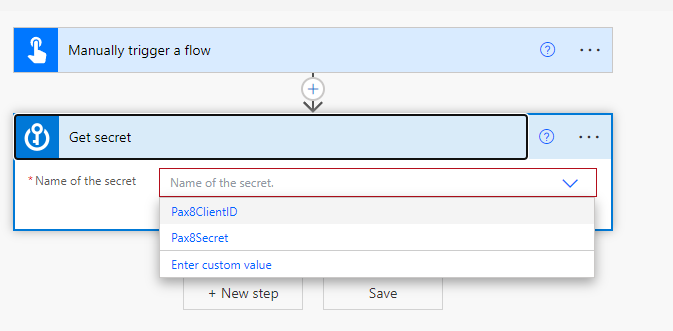
5. Populate your Client ID
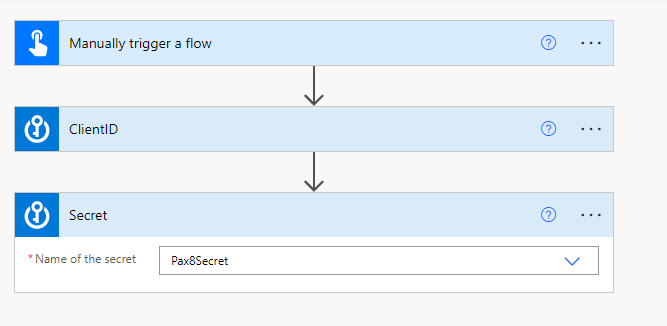
6. Perform the same step to add the Secret
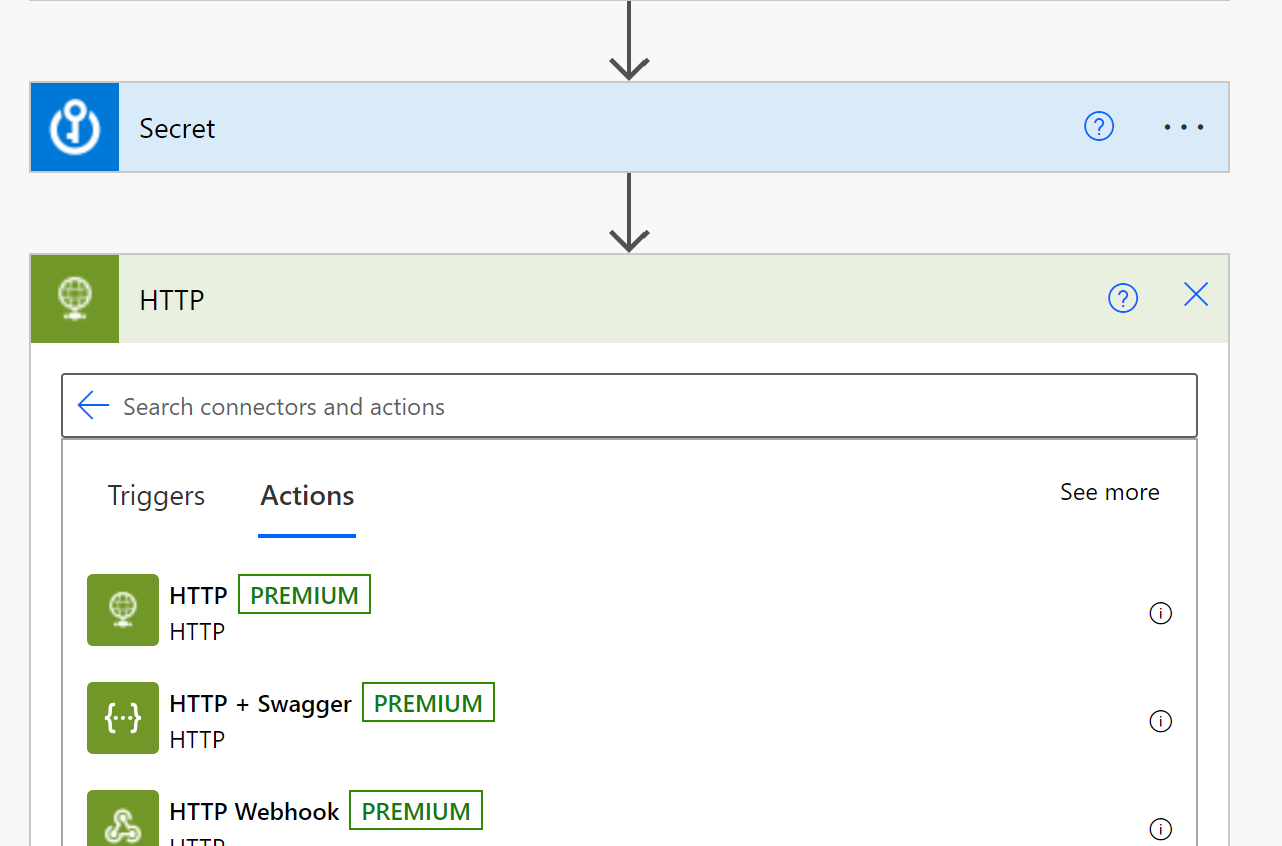
7. Click New Step>Search HTTP >Choose HTTP under actions
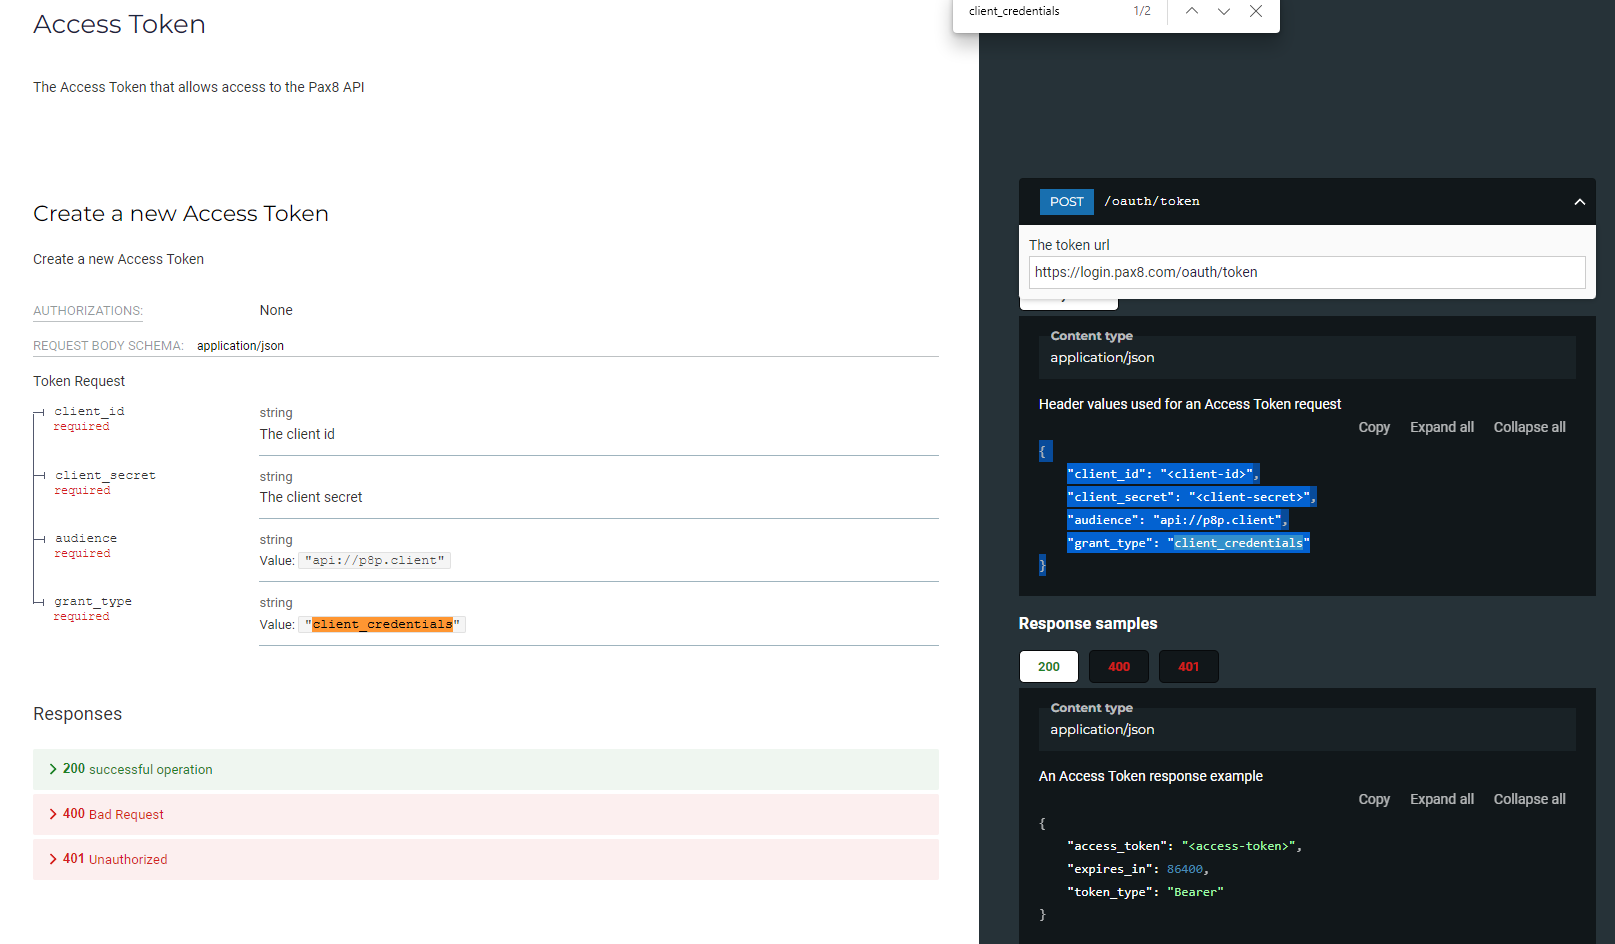
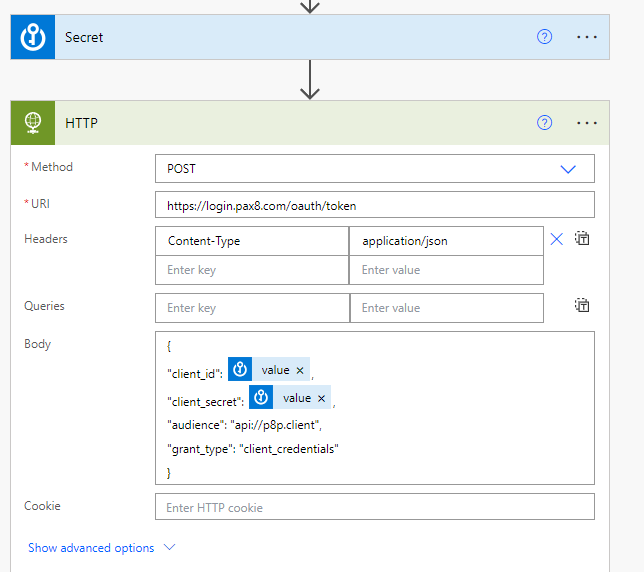
8. Here we are going to make the POST call to get the Access Token per the Pax8 API documentation. (Remember you can view this from their portal). Add the URL and the body directly by copying it from the documentation.
10. Adjust the body to populate the client_id and client_secret with your dynamic values coming from Azure Key Vault. Add the header of Content-Type.
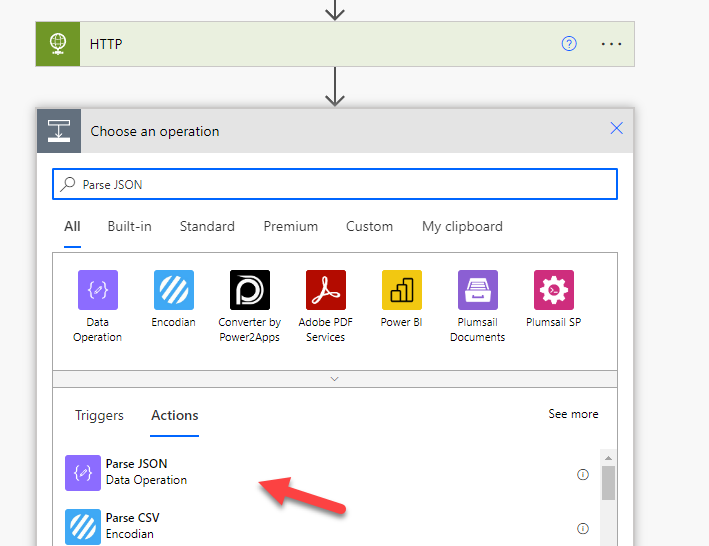
11. Now we need to Parse out the JSON to get the access-token used to make other calls. Search for this value in the next step and chose Parse JSON
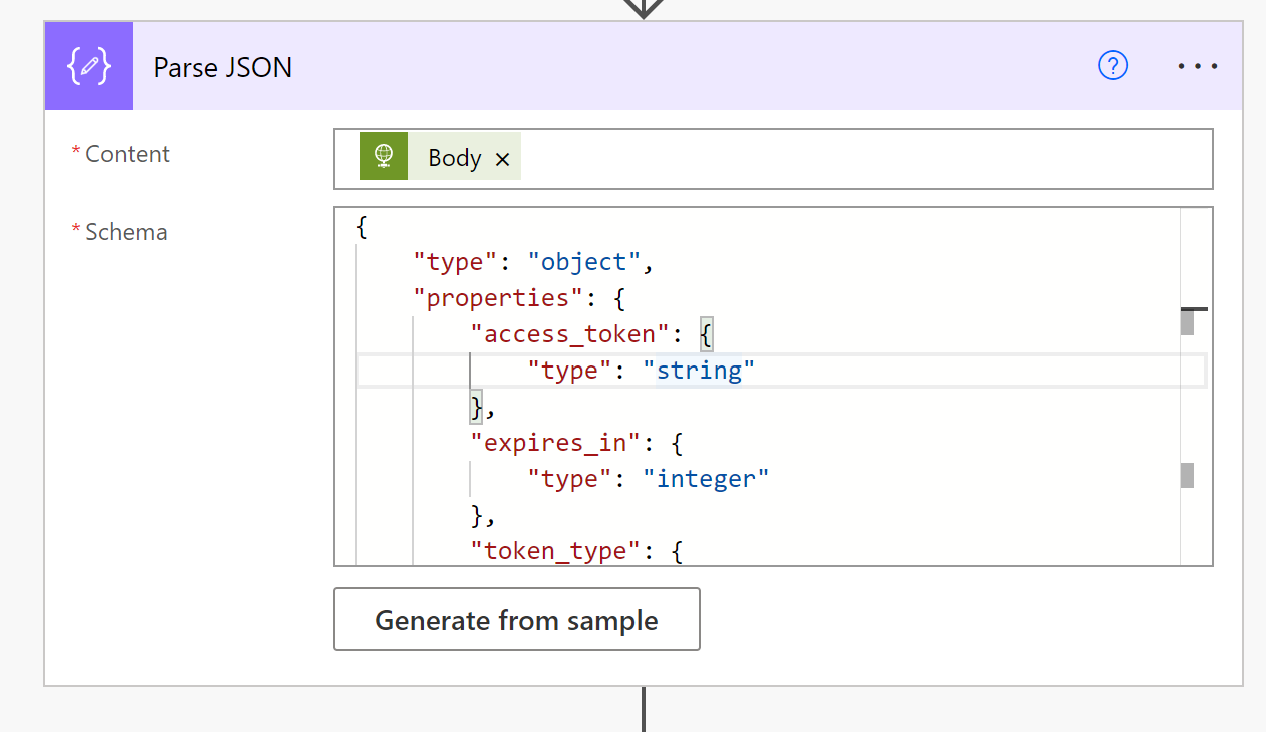
12. For the Content section, dynamically populate the Body Value from the previous step. Copy the Access Token response example from the Pax8 API documentation>Click on Generate from Sample back in the Power Automate flow>Paste in the value. The schema will be generated from this sample.
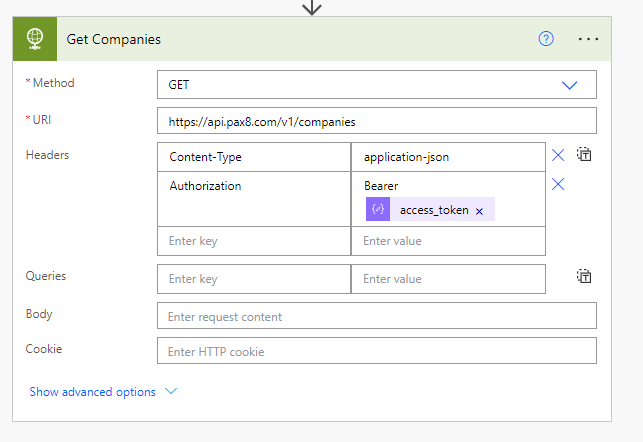
13. Now we can make calls to all other API endpoints because we have an accessToken. Here we will just call the company endpoint to test. Select the HTTP action for the next step. Again, use the Pax8 API documentation to populate these records. We will use the Fetch a paginated list of your companies GET request. One of the headers we add is Authorization. Here will we dynamically add our access_Token with the following format “Bearer <space><AccessToken>”
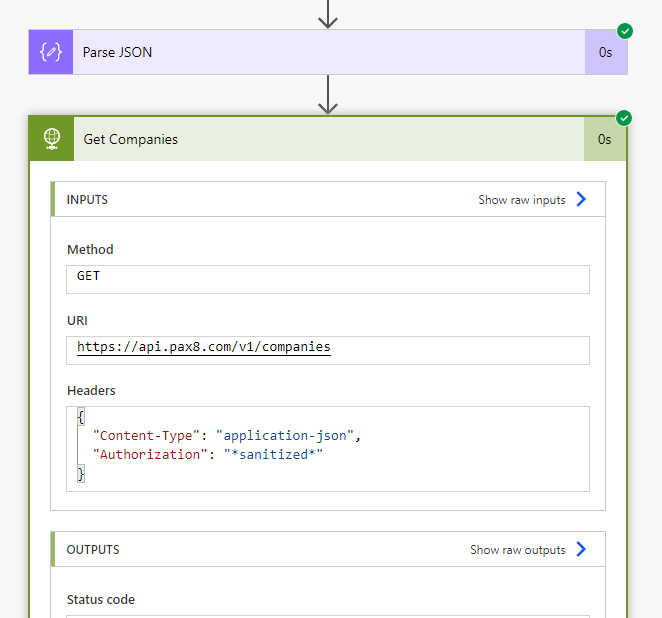
14. Save the flow and Run a Test. Here we can see the flow run successfully and the output of our company records.
So that is it! You can use the Parse JSON action to pull out values from these calls and dynamically populate them in other steps. I will post future article showing more examples leveraging the API in future content. Post any questions to the YouTube video: