
Many of you may be using the native integrations within Huntress today to automate certain flows to your PSA tool like:
The Huntress API provides access to various endpoints that you can leverage for even more automation capabilities. In this article, I will show you how to set up Huntress as a custom connector in Power Automate so you can begin to create your own custom automation flows. You can get creative but here are some reasons why you would want to set this up:
I am currently using it to perform the aggregations:
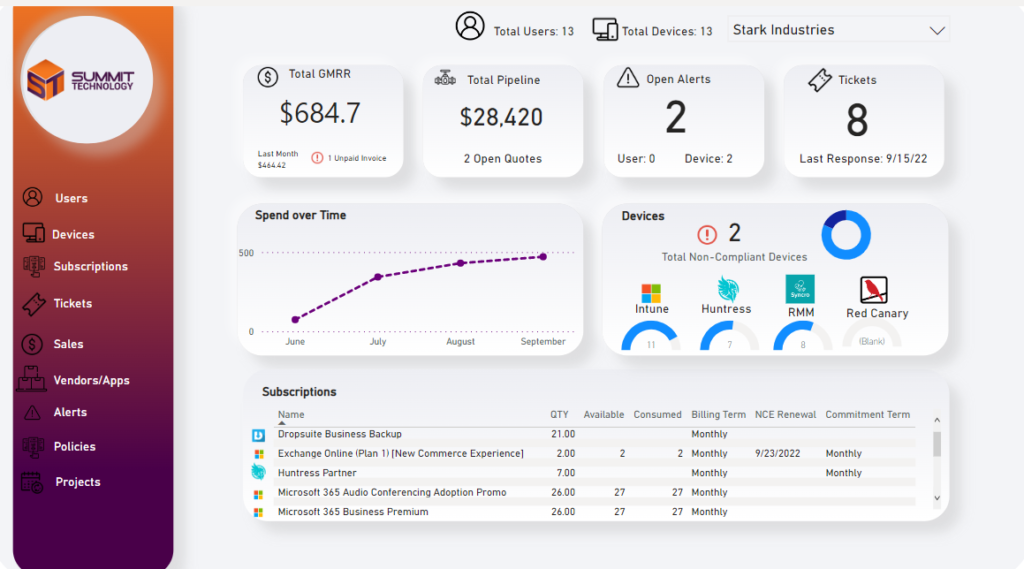
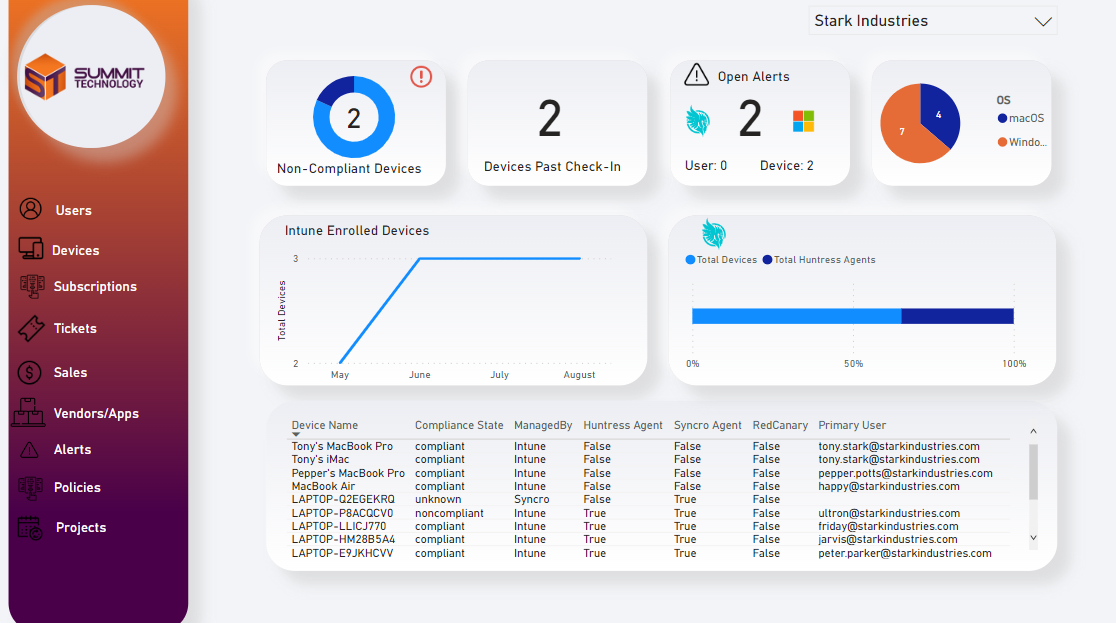
This is a Power BI report in which we can see device information across vendors. I wanted see if there were any disparities between what is reporting out of Intune, our RMM, and Huntress. Additionally, I wanted to pull in subscription information so I can aggregate it at a customer level.
1. Go to https://make.powerautomate.com/ > Data>Custom Connectors>+New Custom Connector>Create from blank
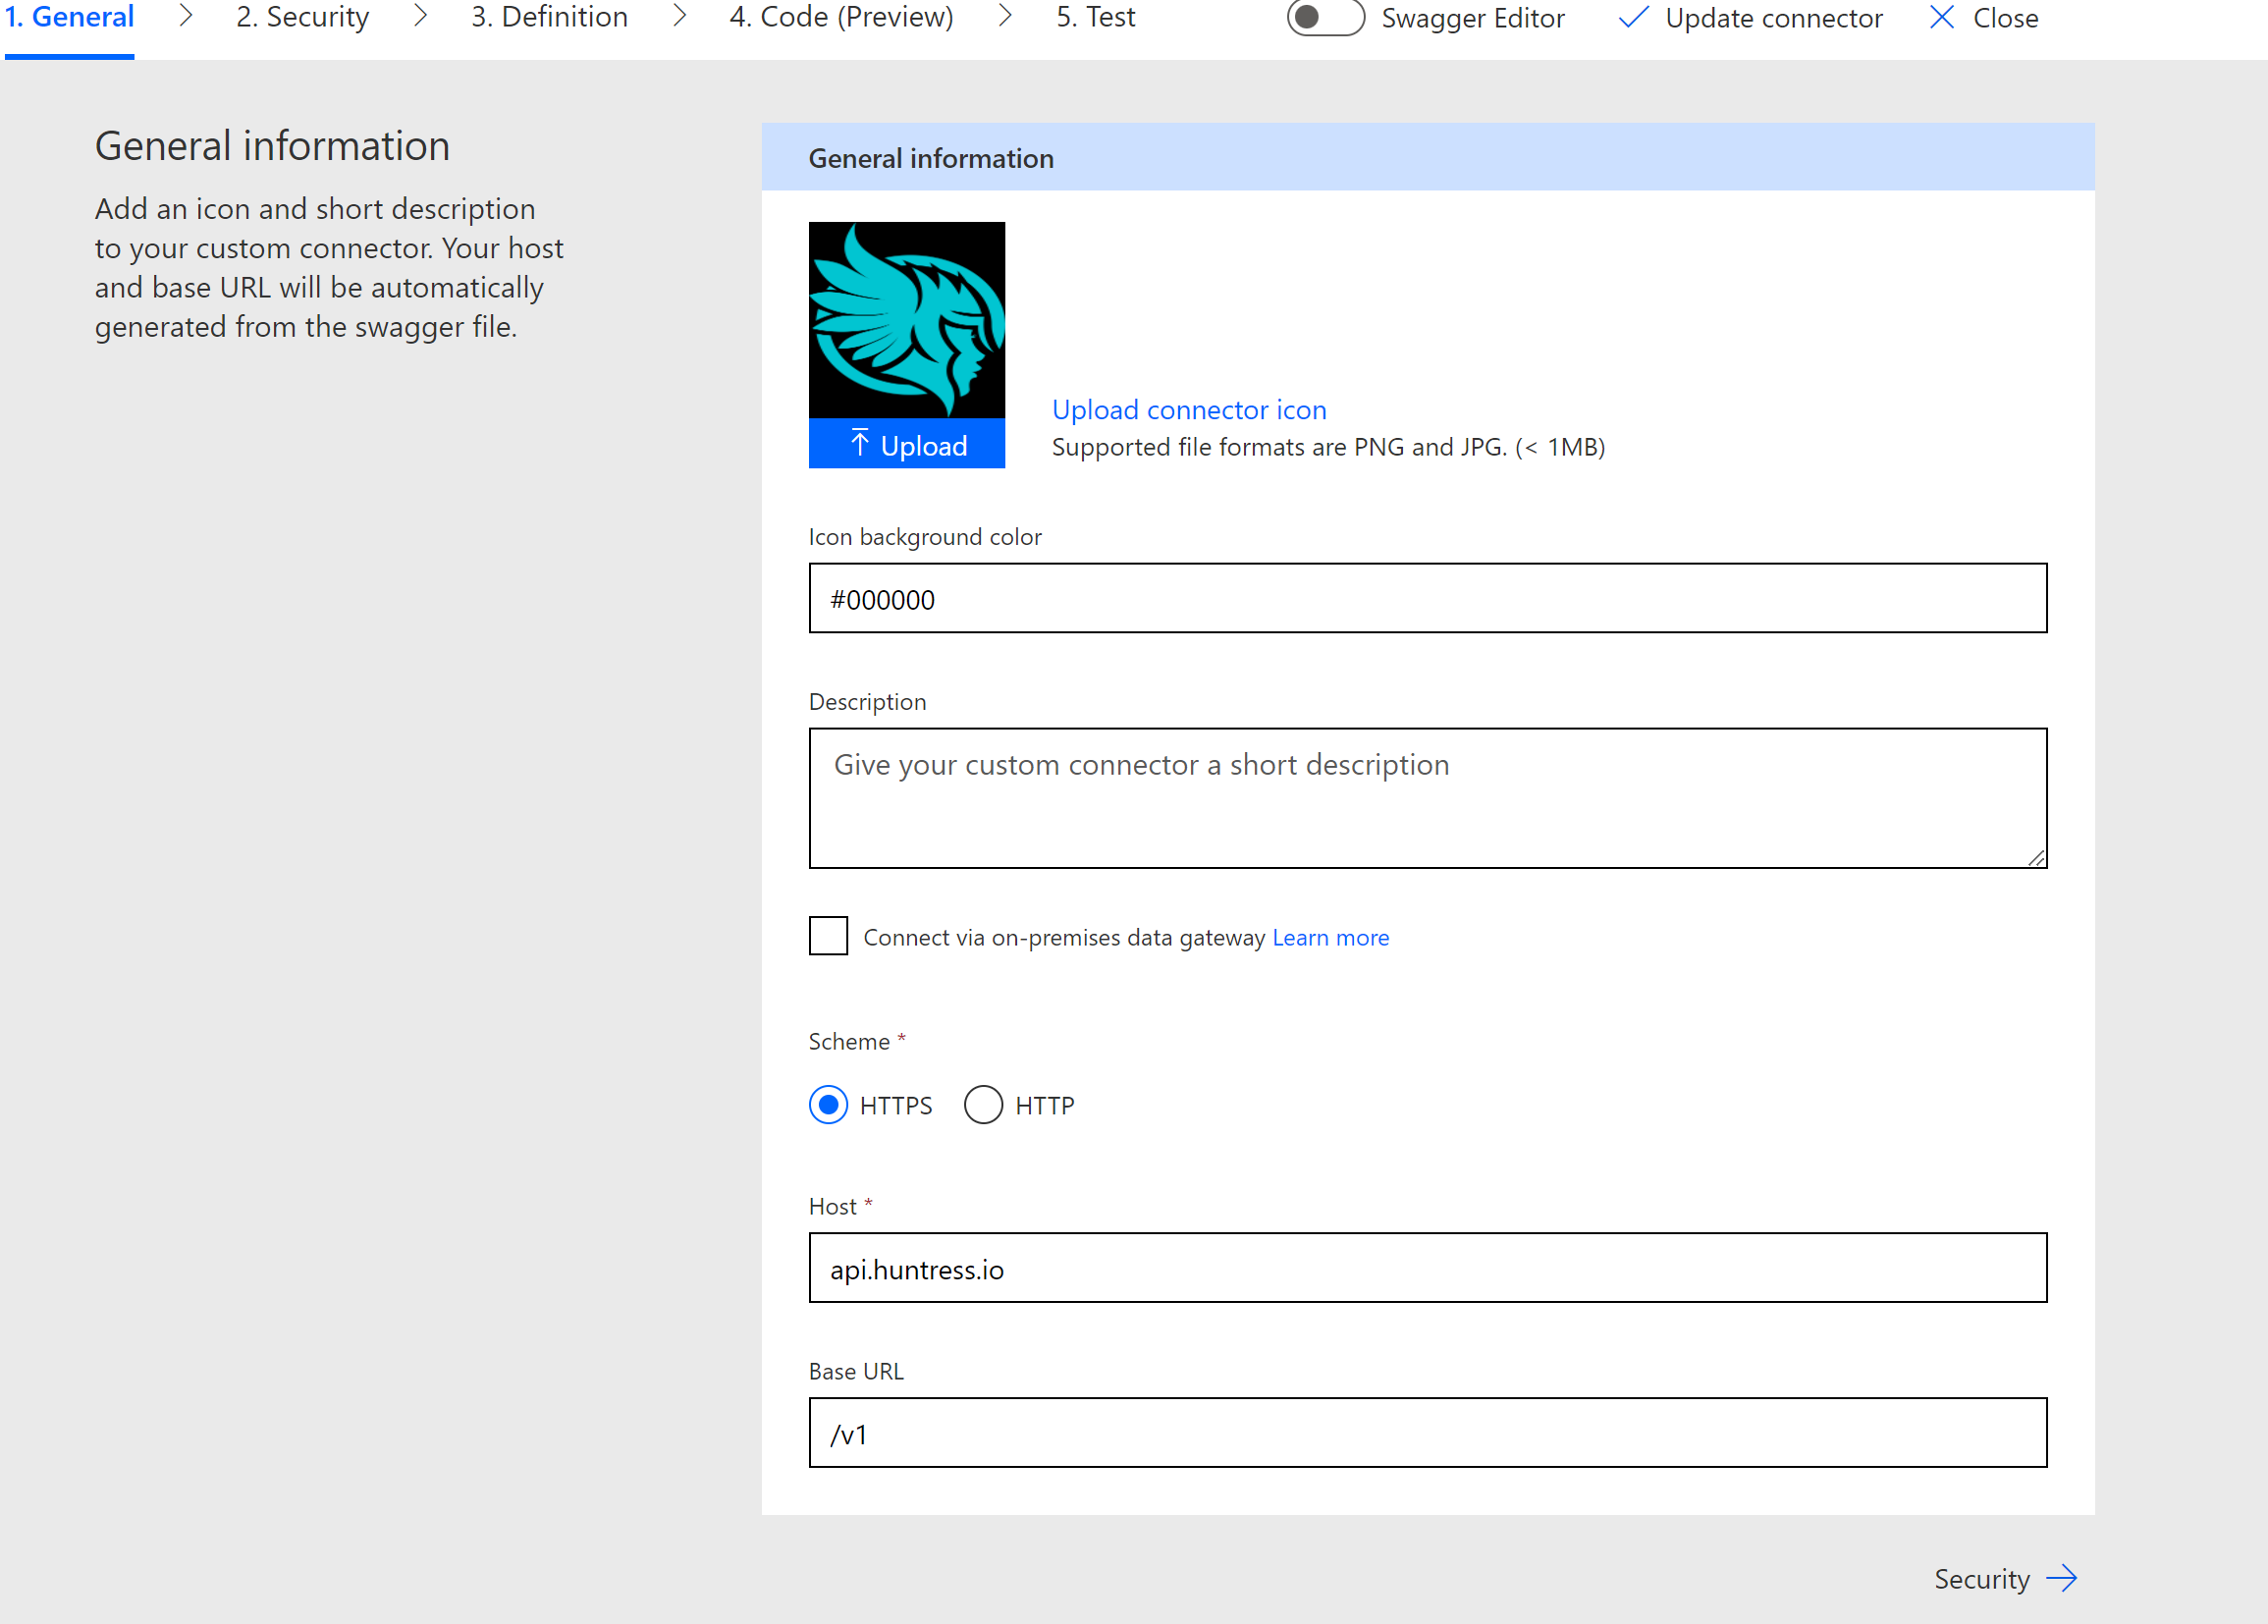
2. You can upload the Huntress Logo and add the following info:
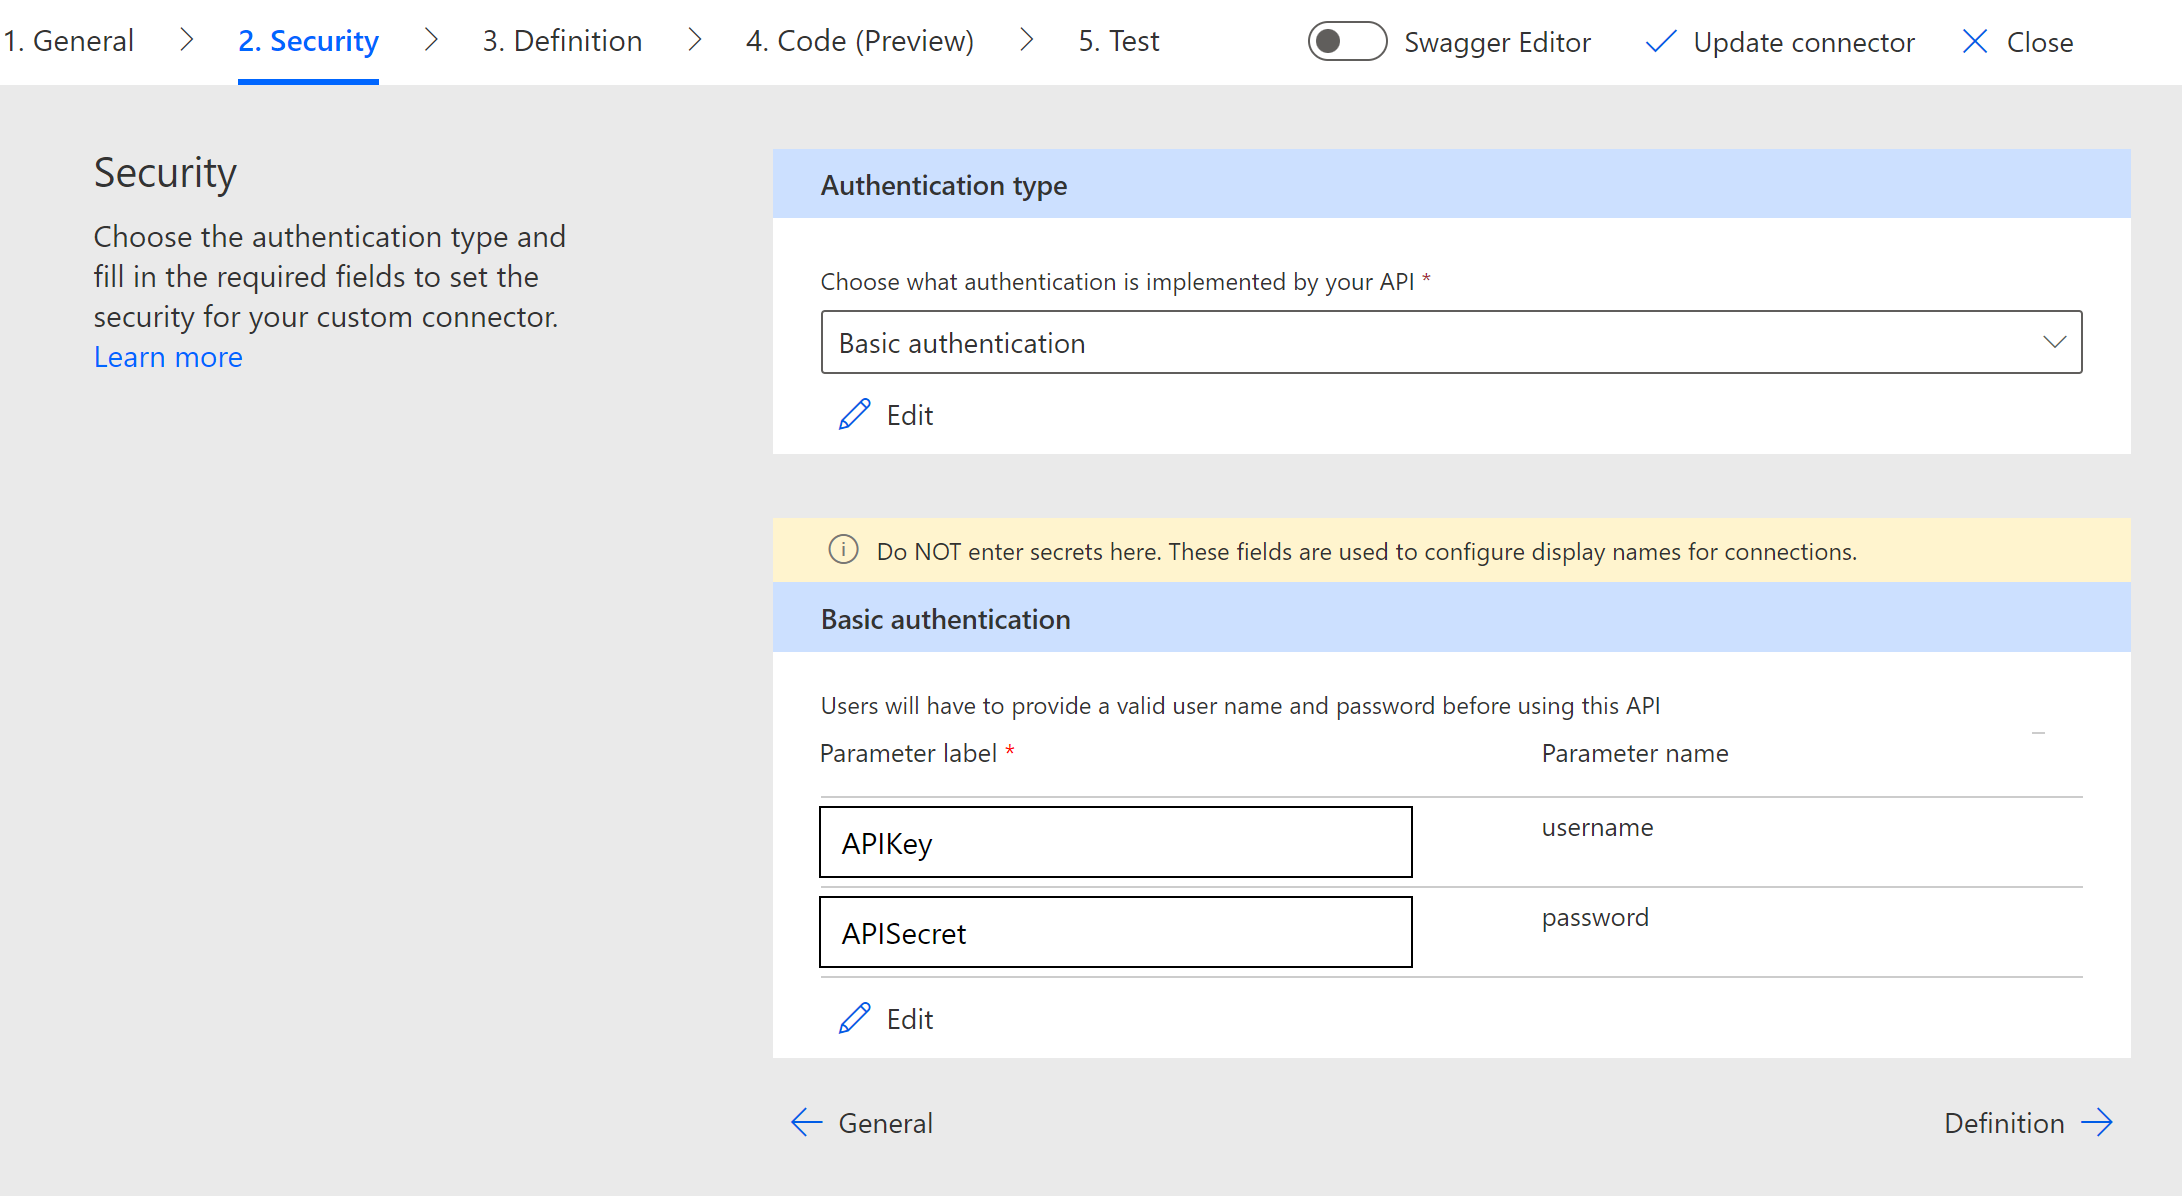
3. On the Security Page, select Basic Authentication. Add the labels of APIKey and APISecret. You will not add your information yet on this page, these are just labels:
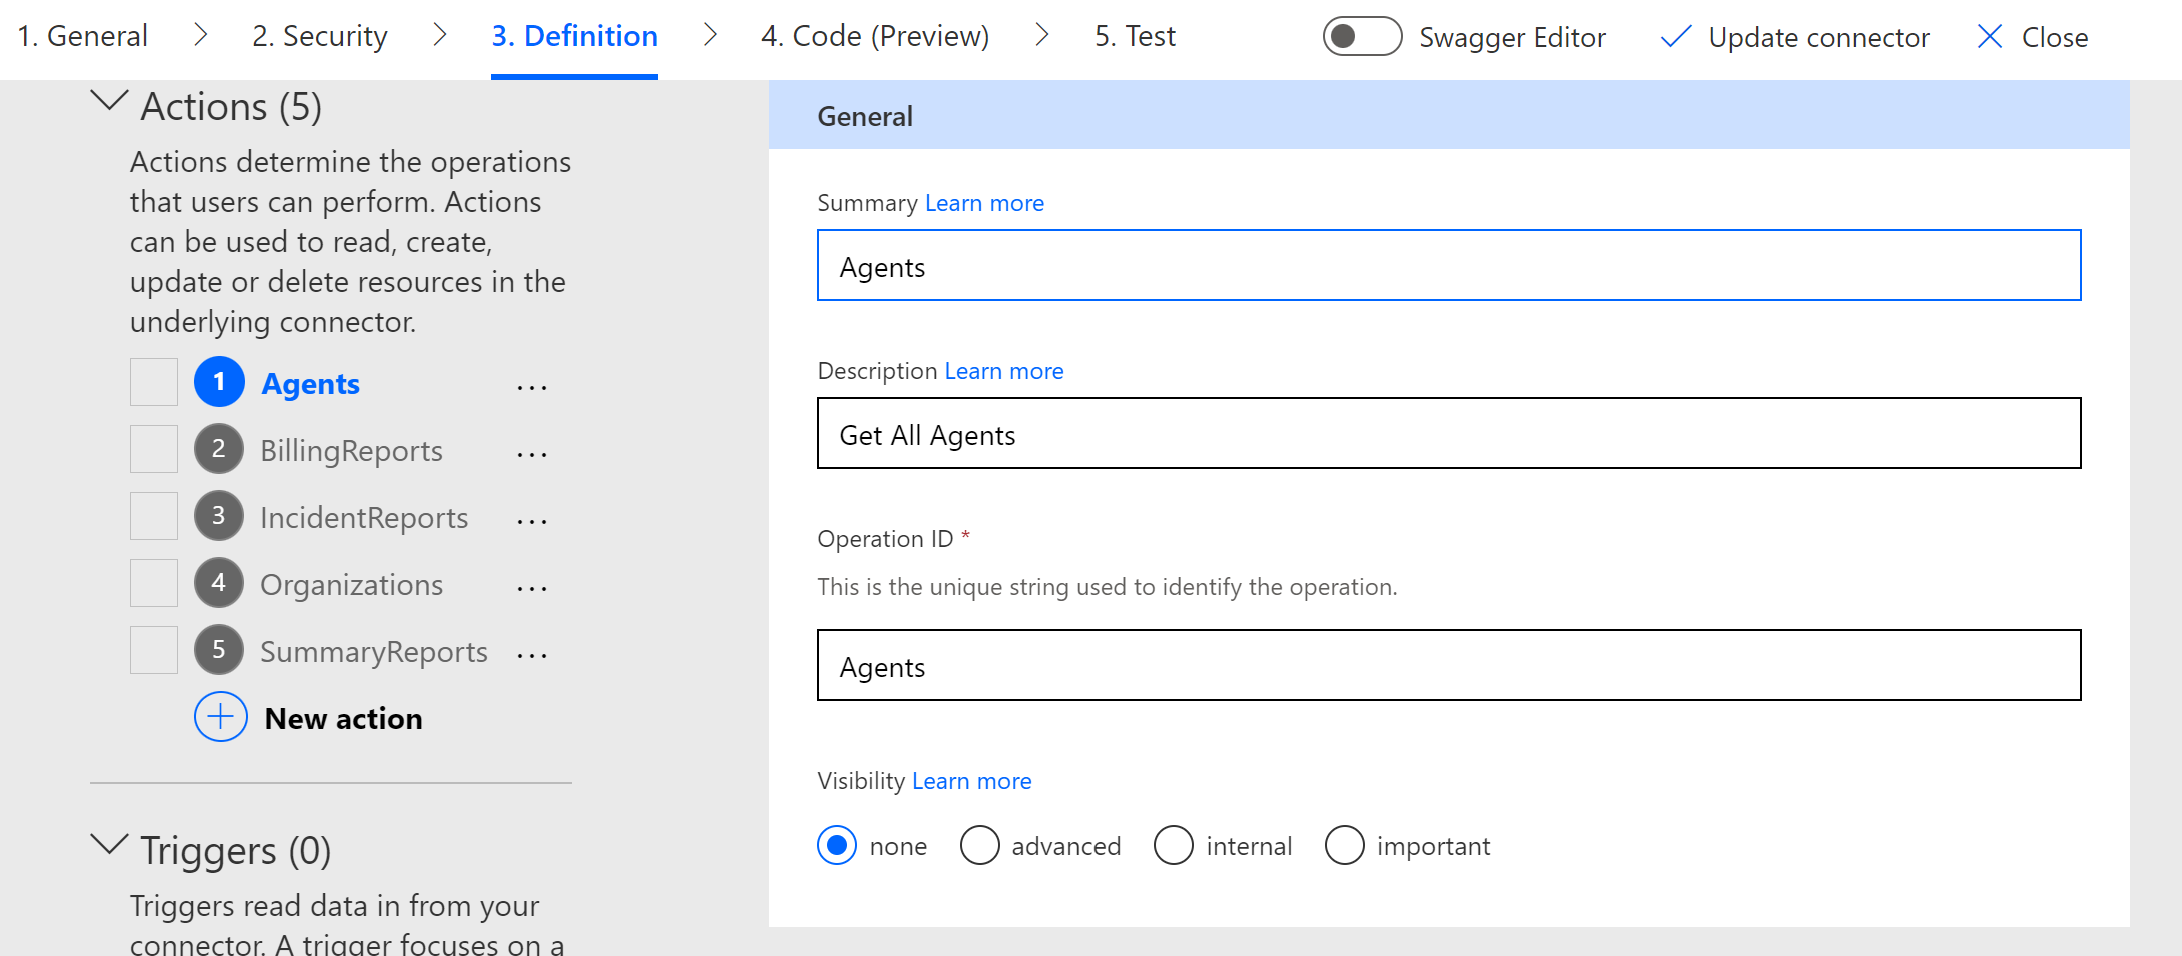
4. For the Definitions, you will add the Endpoints you want to leverage in your Power Automate flows.
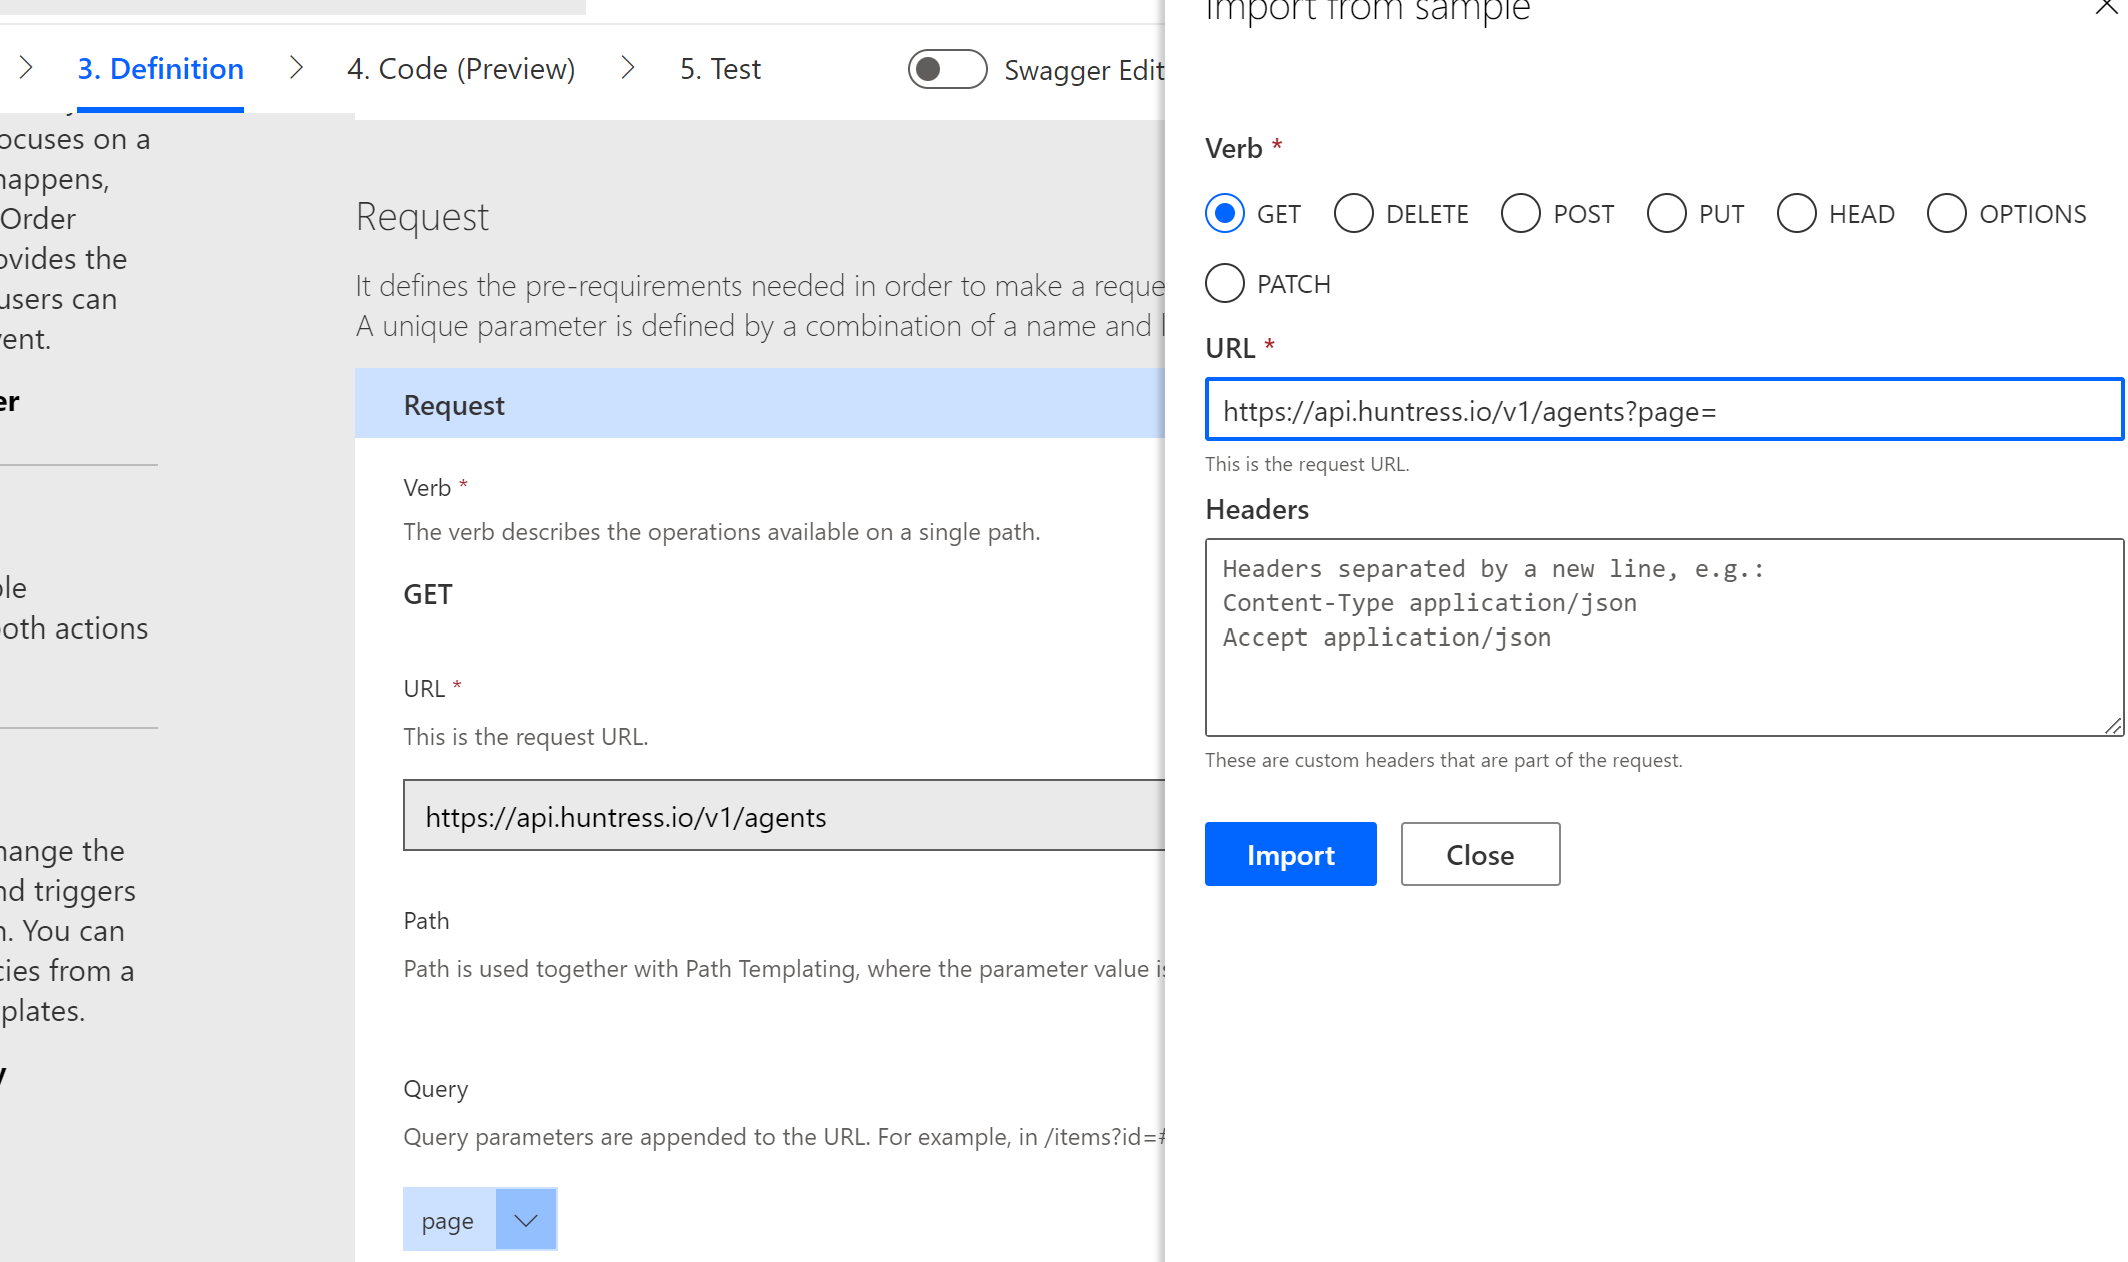
Follow the API documentation to add the correct request URL. You can add parameters as well too if you want. At a minimum, you might want to add the page parameter to facilitate pagination for endpoints that return multiple pages (which is very common with the API).
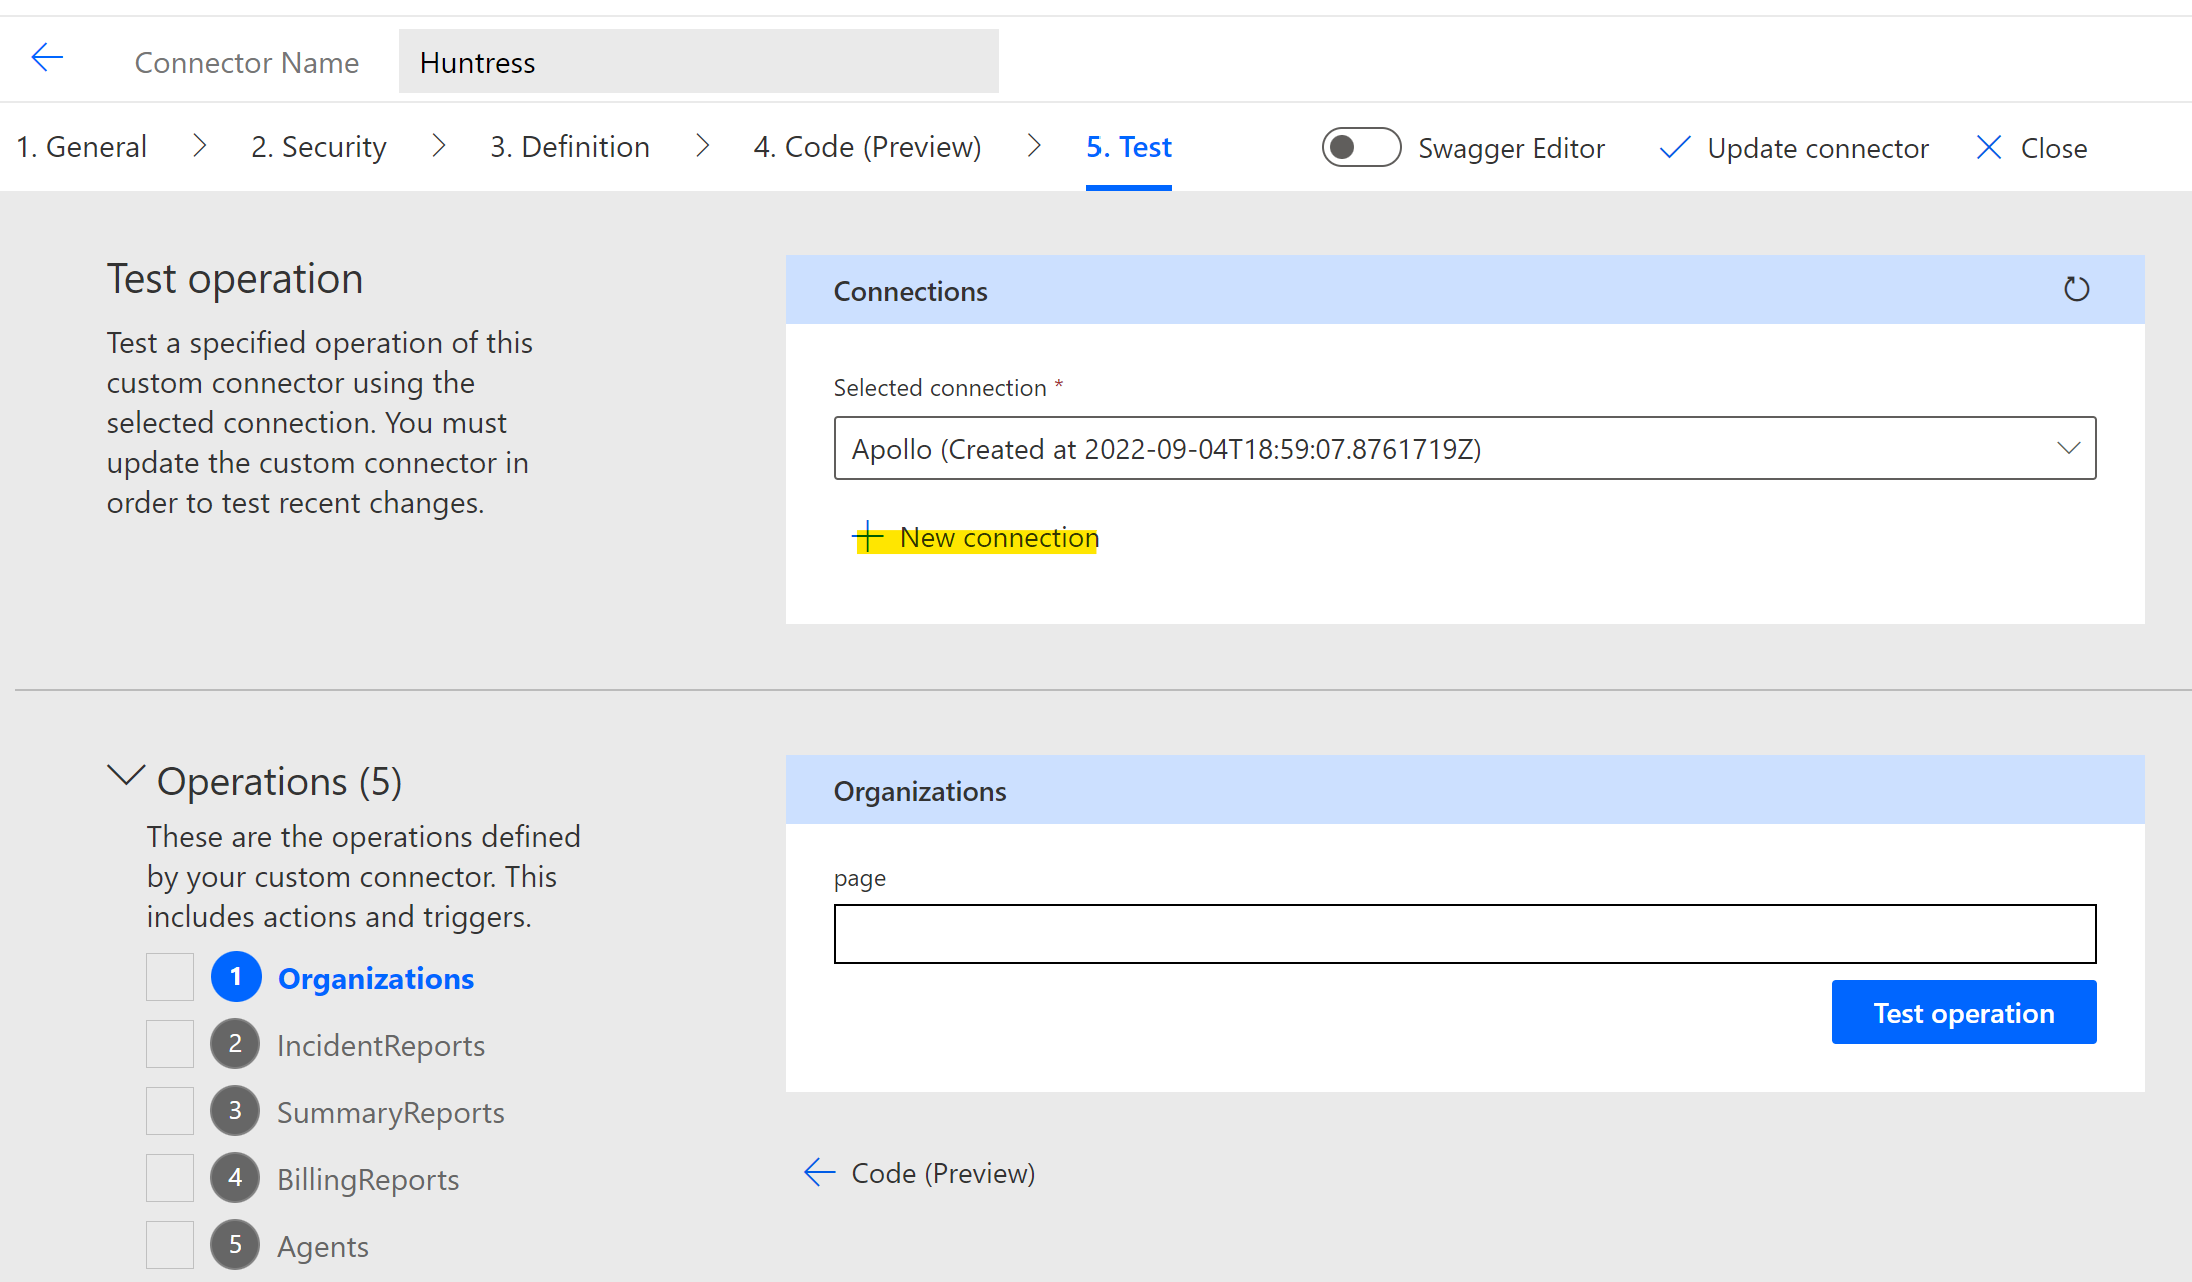
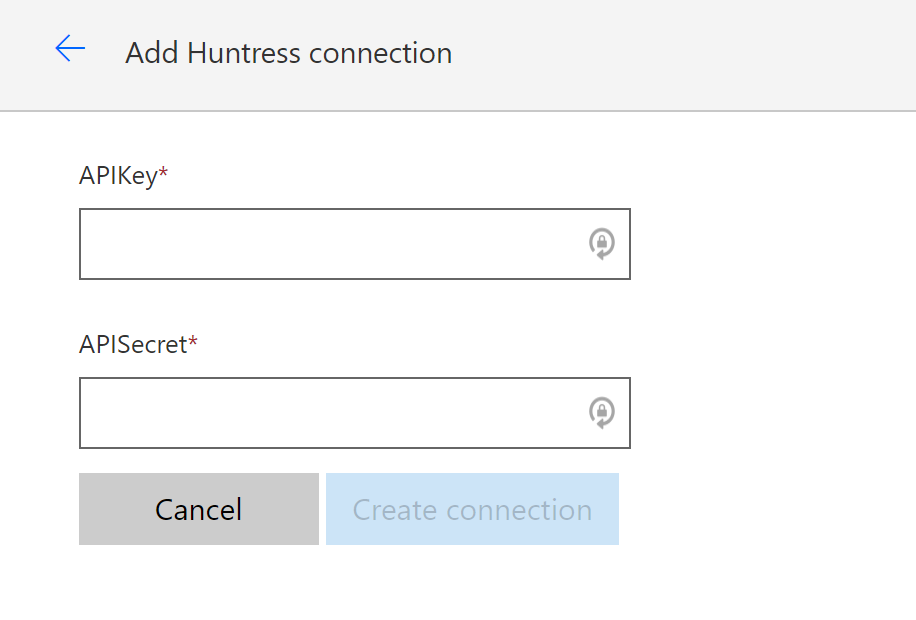
5. Go to the Test tab, click on + New Connection. Here you will enter your Huntress API Key and Secret
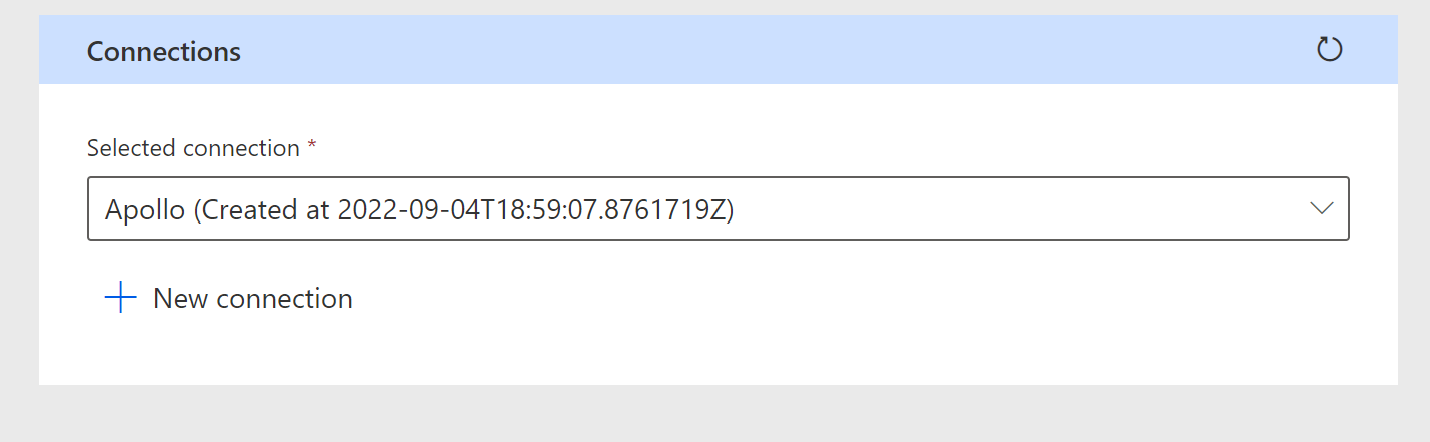
6. After the connection is entered you will be redirected back to the Test page. Here you can click on the refresh button to generate the connection you just created.
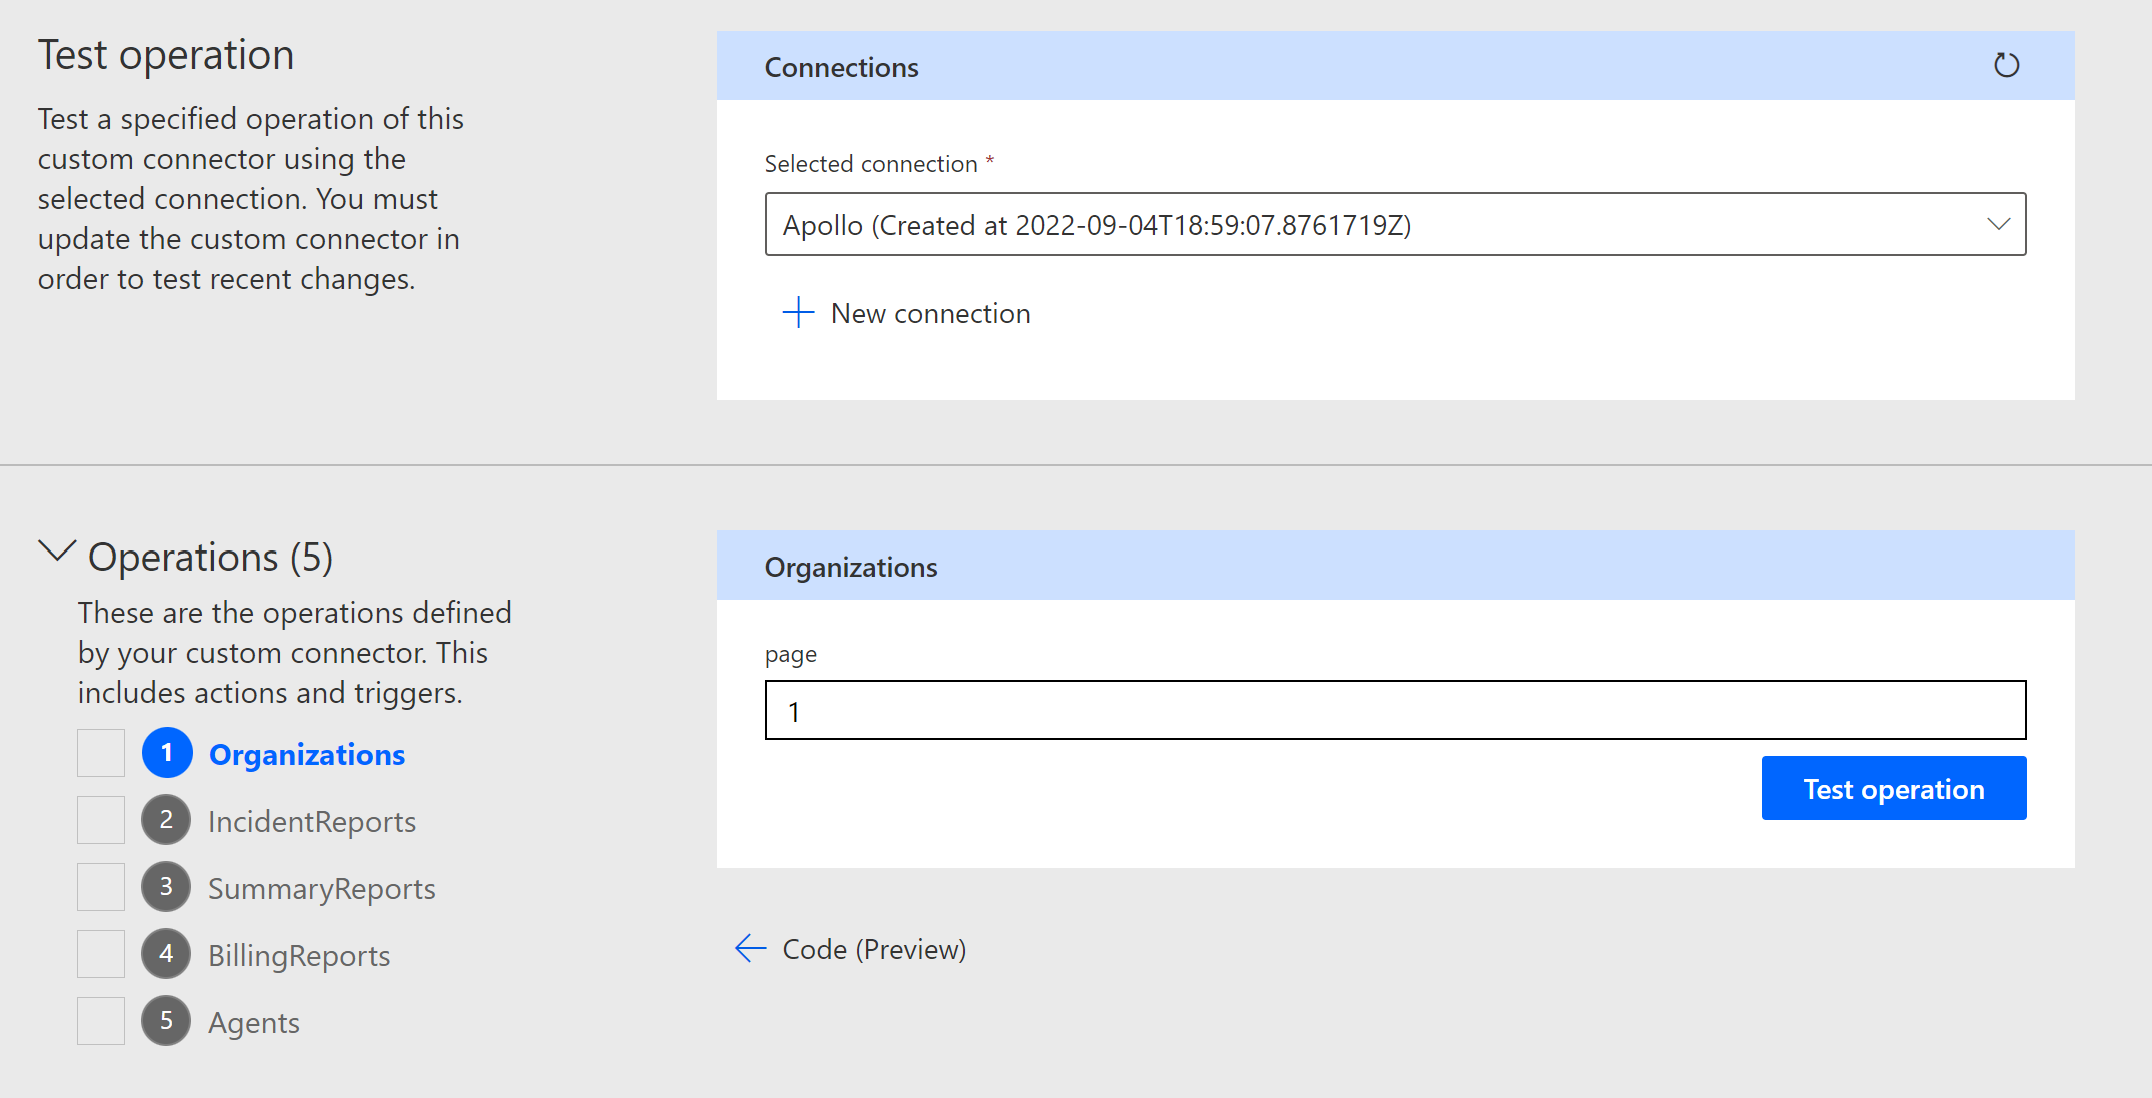
7. Finally, you can test the connection by selecting an operation and clicking Test Operation
8. If successful, you will get a 200 response.
9. Create the Connector
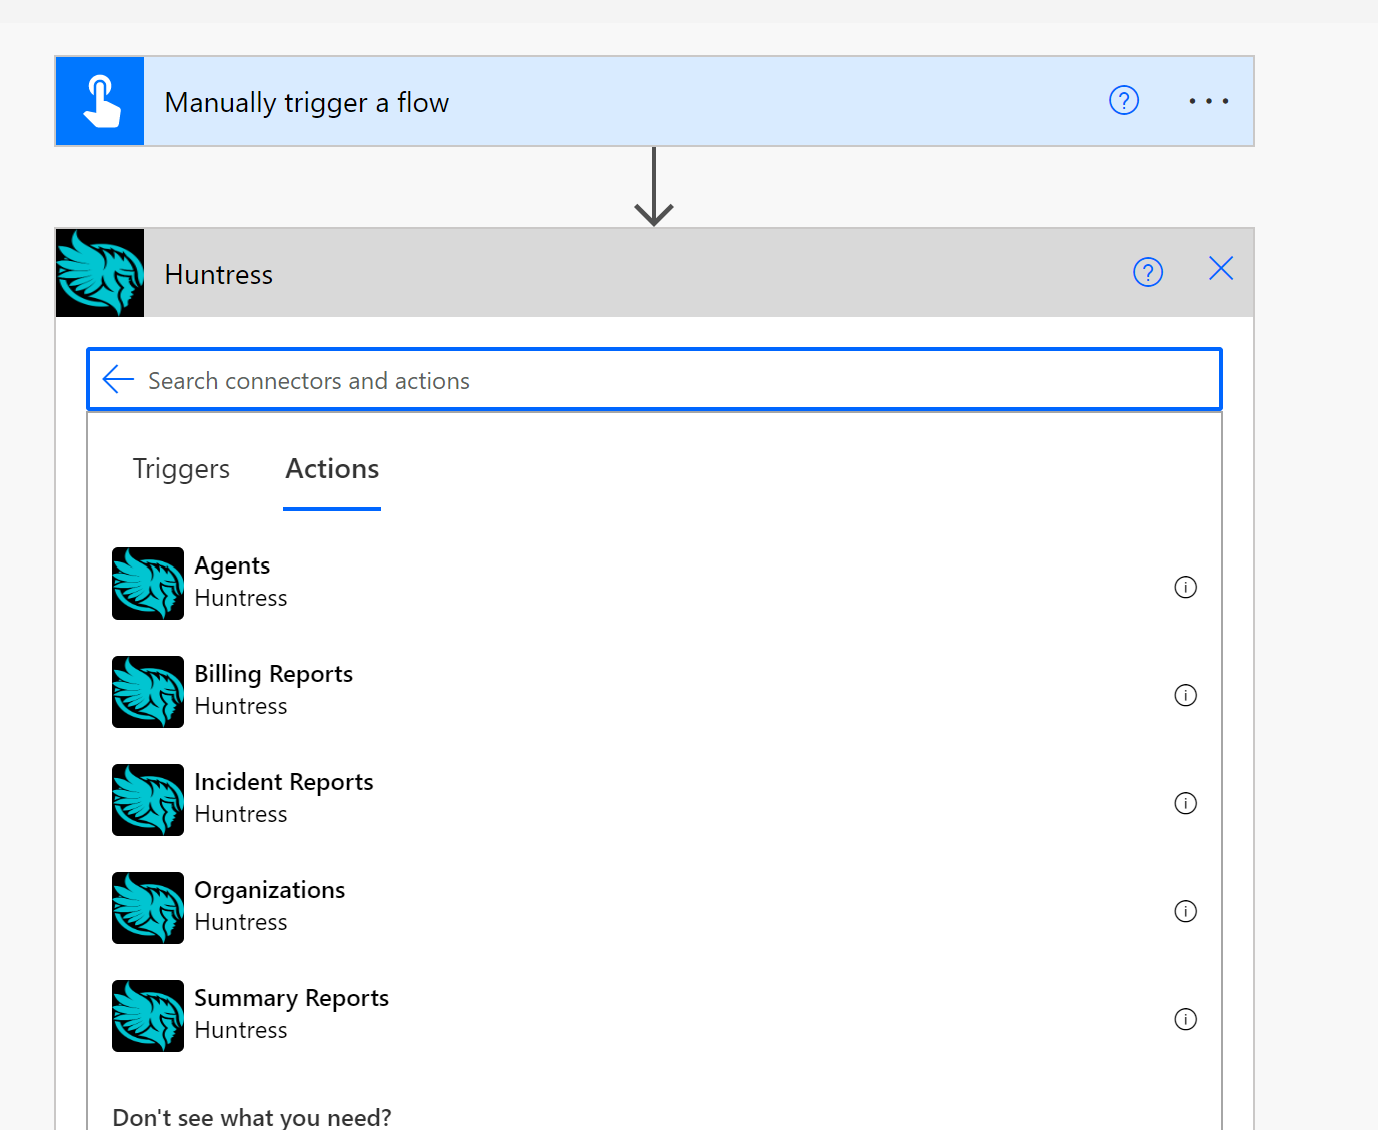
10. Now when you go to create a flow, you will have the Huntress connector as an option under Custom. All Endpoints you created under the Definitions section will be included
Happy Automating! For the full tutorial, check out my YouTube Video. Feel free to leave any questions or comments on the video: