
I’ve been blogging about GDAP for over a year now. If you are not familiar with GDAP, I suggest you check out some of my earlier articles to get a breakdown. Its very important to understand GDAP before reading this article:
As a CSP Partner with Microsoft, many of us are leveraging the delegated access we have to our downstream customer environments to perform some type of automation. This can come in the form of:
- PowerShell Scripts
- Power Automate Flows
- Graph API calls
The key benefit to leveraging delegated access is that we do not have to login directly to each customer tenant in order to perform automations in bulk across our customers. We were able to perform these automations by creating an application registration within our own tenant with the list of permissions we needed. This is commonly known as the Secure Application Model with Microsoft. With the introduction of GDAP, you will find that your automations break. In this article, I will be breaking down the reason why that is and the steps you need to take in order to still leverage app registrations for your customers moving forward.
Why do my automations break?
Accessing tenants as a Microsoft partner has traditionally been done with Delegated Access Permissions or DAP. DAP provides you Global Administrator access to all of the downstream tenants. Whenever you set up an app registration using the Secure Application model, you would add that service principal to the Admin Agents group in Partner Center. By doing so, you were able to generate refresh tokens and access tokens into all of your customer environments. We have been leveraging this model for years now to create automation workflows. This model of consent is known as a “pre-consent” since there were no additional steps you needed to take in order to leverage the app registration in these tenants.
Shifting to GDAP, the core benefit is the additional layers of security provided to help protect yourself and your downstream customers against supply chain attacks. As part of the shift to this new model, the “pre-consent” concept is no longer in play. We now need to take additional steps to consent for applications in our downstream customer tenants. The good news is that this can still be done in bulk using an “on-behalf of” consent model, meaning you do not need to grant consent to your application registration on a per customer basis. The bad news is that it now requires many more additional steps and gets confusing. Hence this article 😊
The Steps:
Create a Service Account for Automations
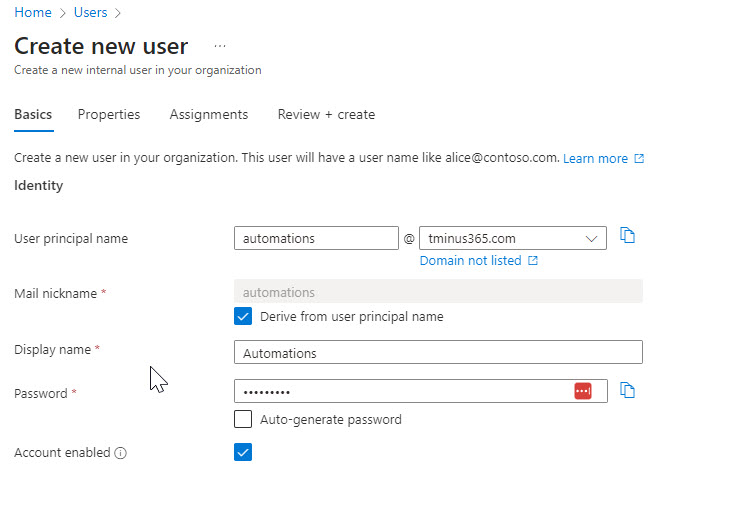
The first thing we want to do is set up a new service account for our automations. I think it is important to have a dedicated account here so that nothing breaks over time if you have users leaving your organization. As a best practice, do not use a regular user account for your automations. Here are some requirements for this service account:
- They need to be a Global Administrator initially. We will need this service account to have the GA role when we acquire access tokens in future steps. This user does not need to have perpetual GA rights so it is recommended to leverage Privileged Identity Management (PIM) so that you can make this user eligible for the role when you need it and reduce your attack surface.
- This user requires MFA. This can be enforced through Conditional Access or Per User MFA settings. This MFA has to be with Microsoft and cannot be from a 3rd party like Duo
- This user needs to be added to the Admin Agents group in Azure AD
In this example, I made a user called Automations:
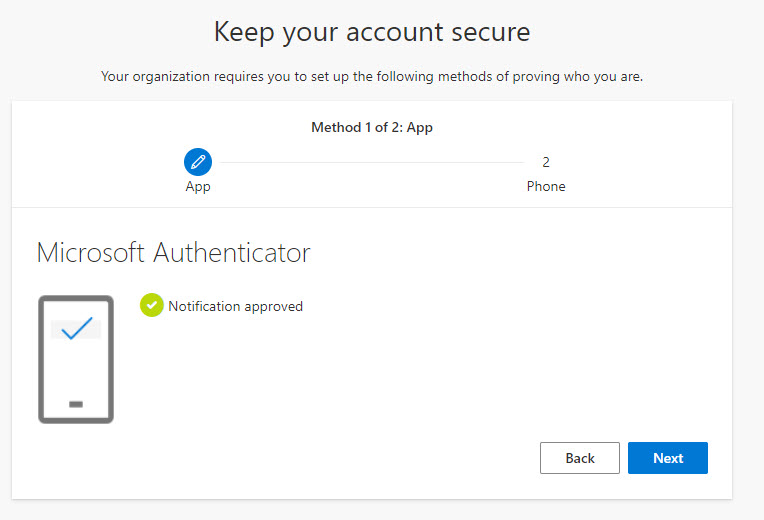
After creation, I walked through setting up MFA for this user by logging in for the first time. In this tenant, I have Conditional Access Policies that enforce MFA
Setting up an App Registration (Secure Application Model aka SAM)
The next step is setting up an Application Registration that leverages the Secure Application Model from Microsoft. This allows us to generate access tokens and defines the levels of permissions we will be leveraging in our customer environments.
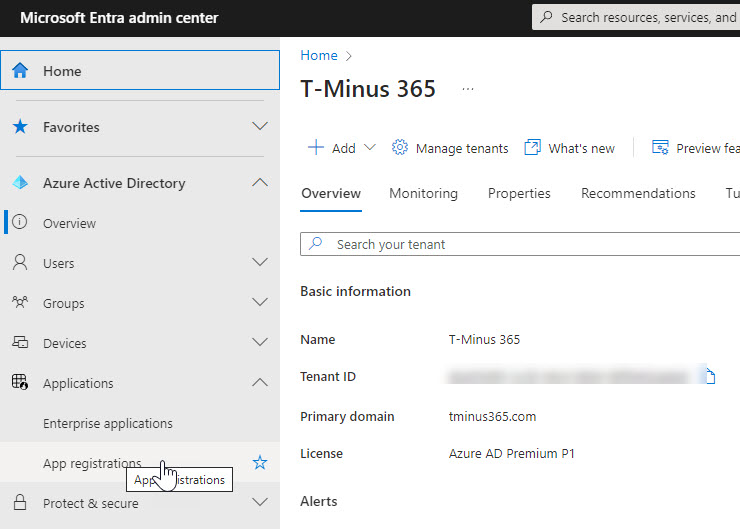
Login to your AAD portal. This is the Azure AD Portal connected to your Partner Center environment. Go to the App Registration section. In the Entra Admin Center>Applications>App Registration
+New Registration. Add a Name, Multi-tenant app, and Redirect URI
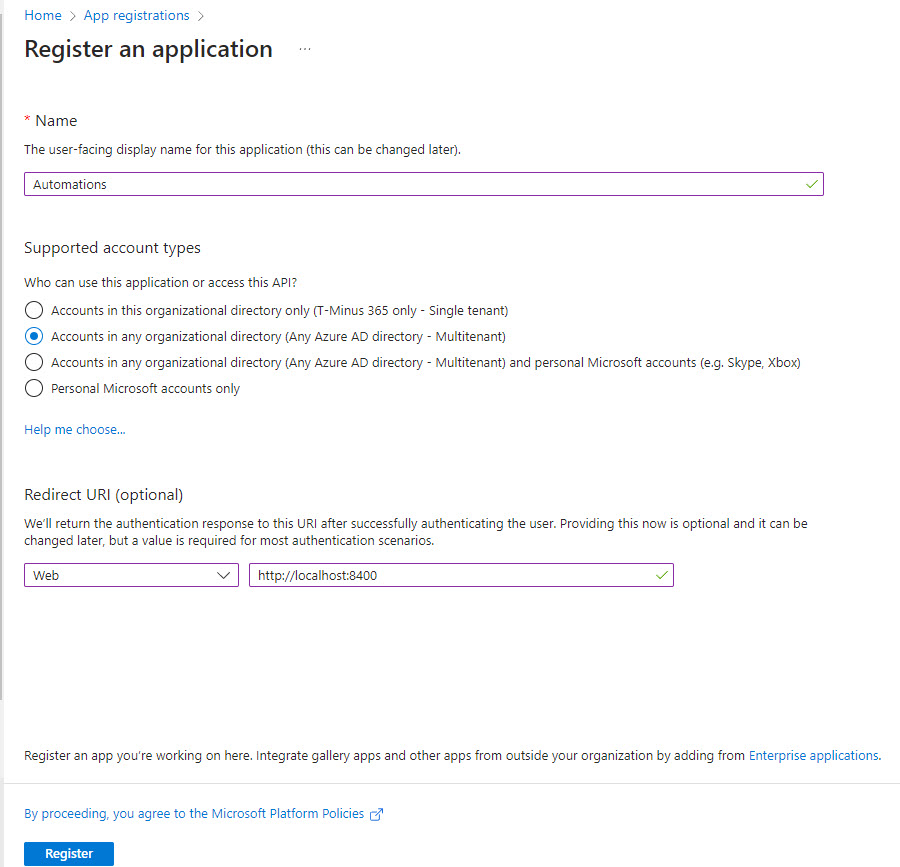
After the application is created, we will want to generate a Client Secret. From this main page, also grab the Application (client) ID and Directory (tenant) ID. We will use them later
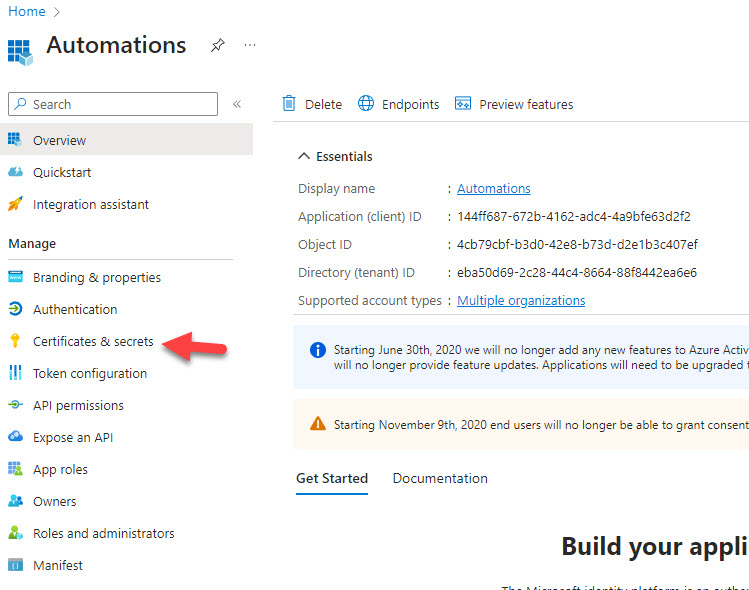
Add a New Secret, Choose the Name and Timeline till expiration. Copy the value and store it in a secure location (Documentation Tool/Azure Key Vault)

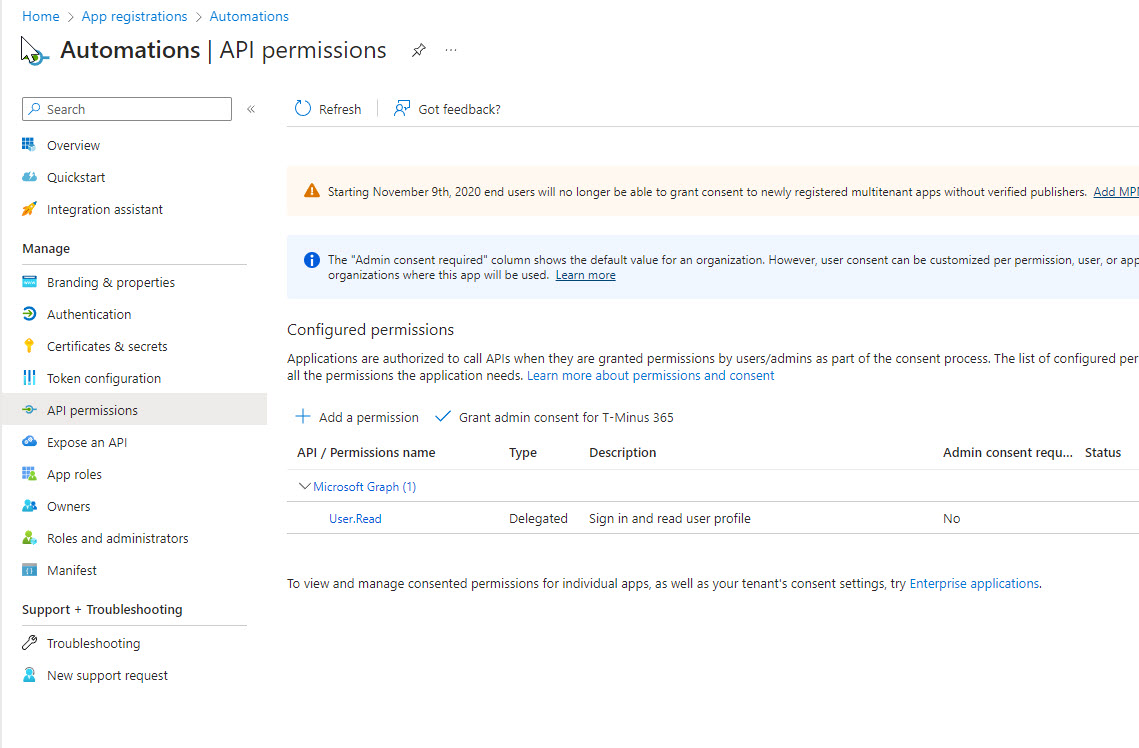
Next, we will need to add all of the necessary permissions. These are the permissions that allow you to perform automations either through API calls or via PowerShell cmdlets. When you click on + Add a permission, you will be able to select your scope. Most of the time, you will leverage Microsoft Graph as it is the most extensive API library. I will not be covering what permissions should be delegated vs application in this article but this is where you would want to add all of the graph permissions for the API calls you want to make.
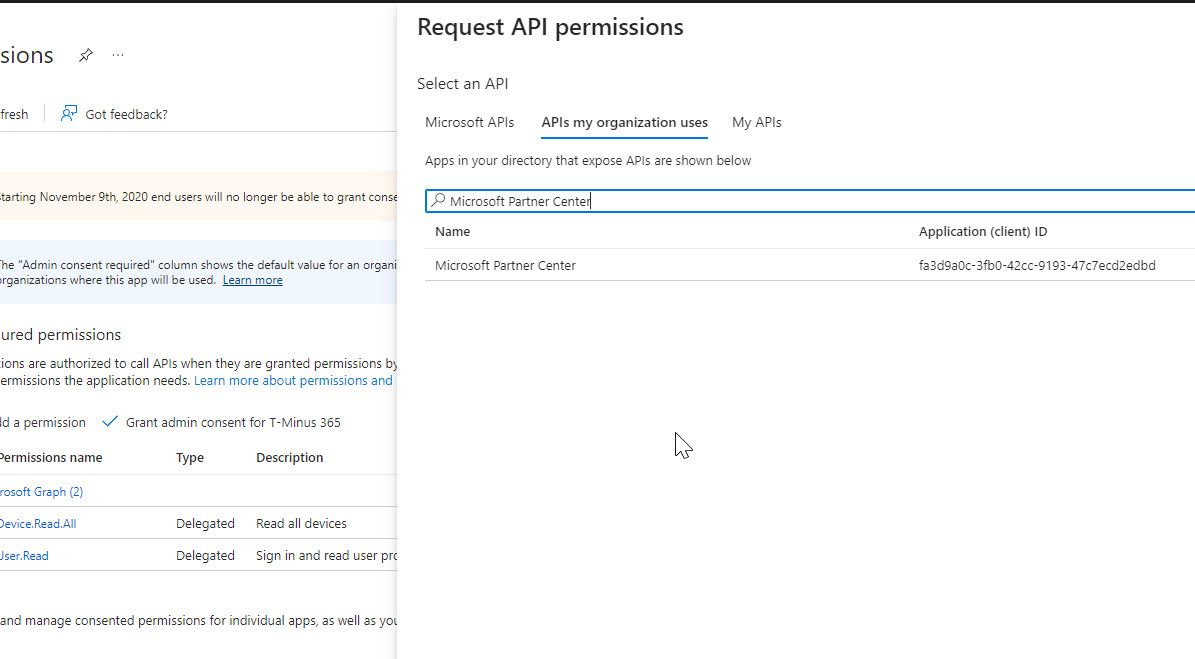
You will also want to add Microsoft Partner Center APIs for user impersonation
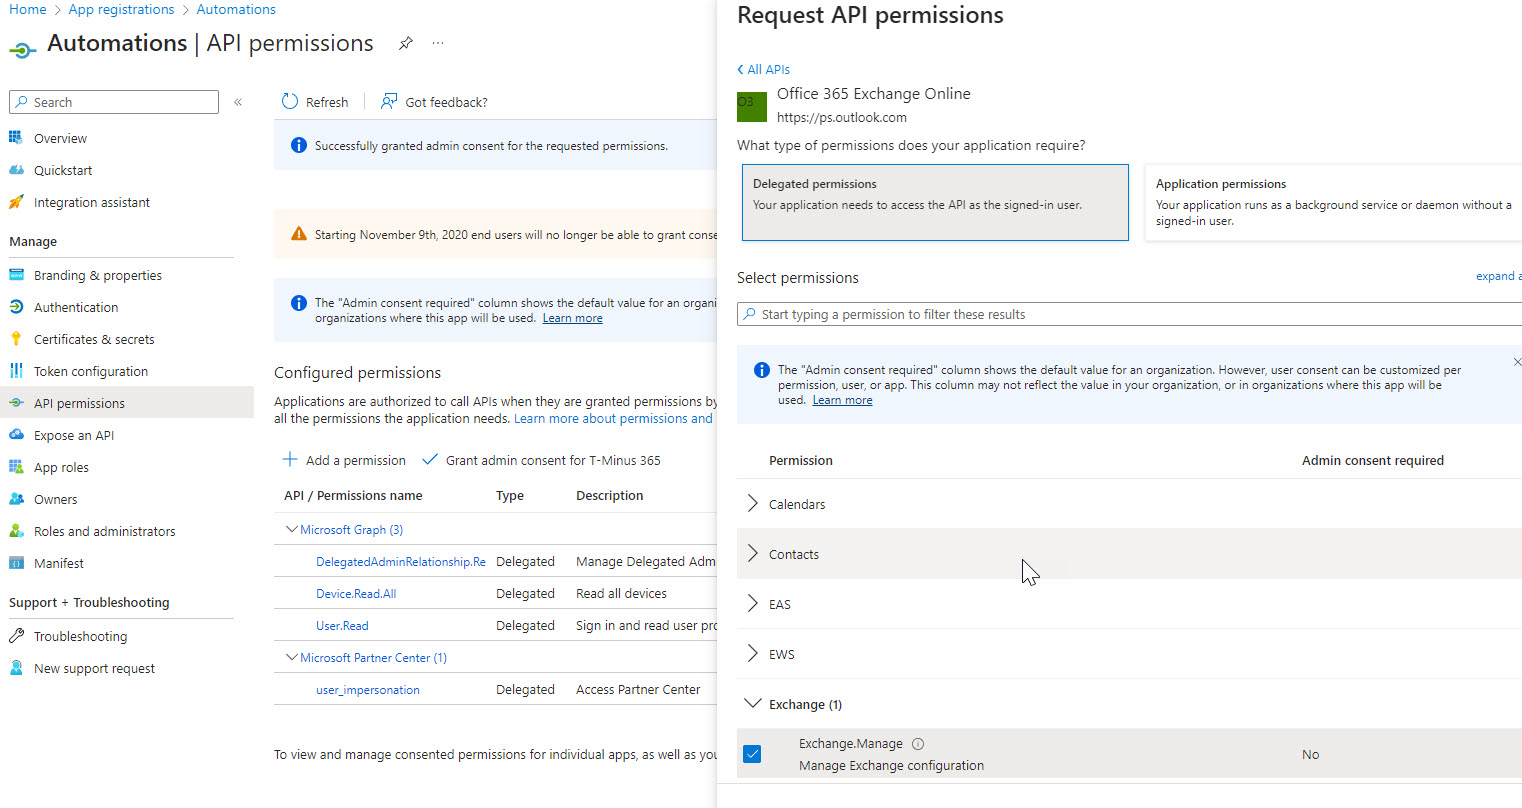
Lastly, if you want to leverage automations for Exchange, you will want to add the Exchange Online APIs. Use this code for the search:00000002-0000-0ff1-ce00-000000000000
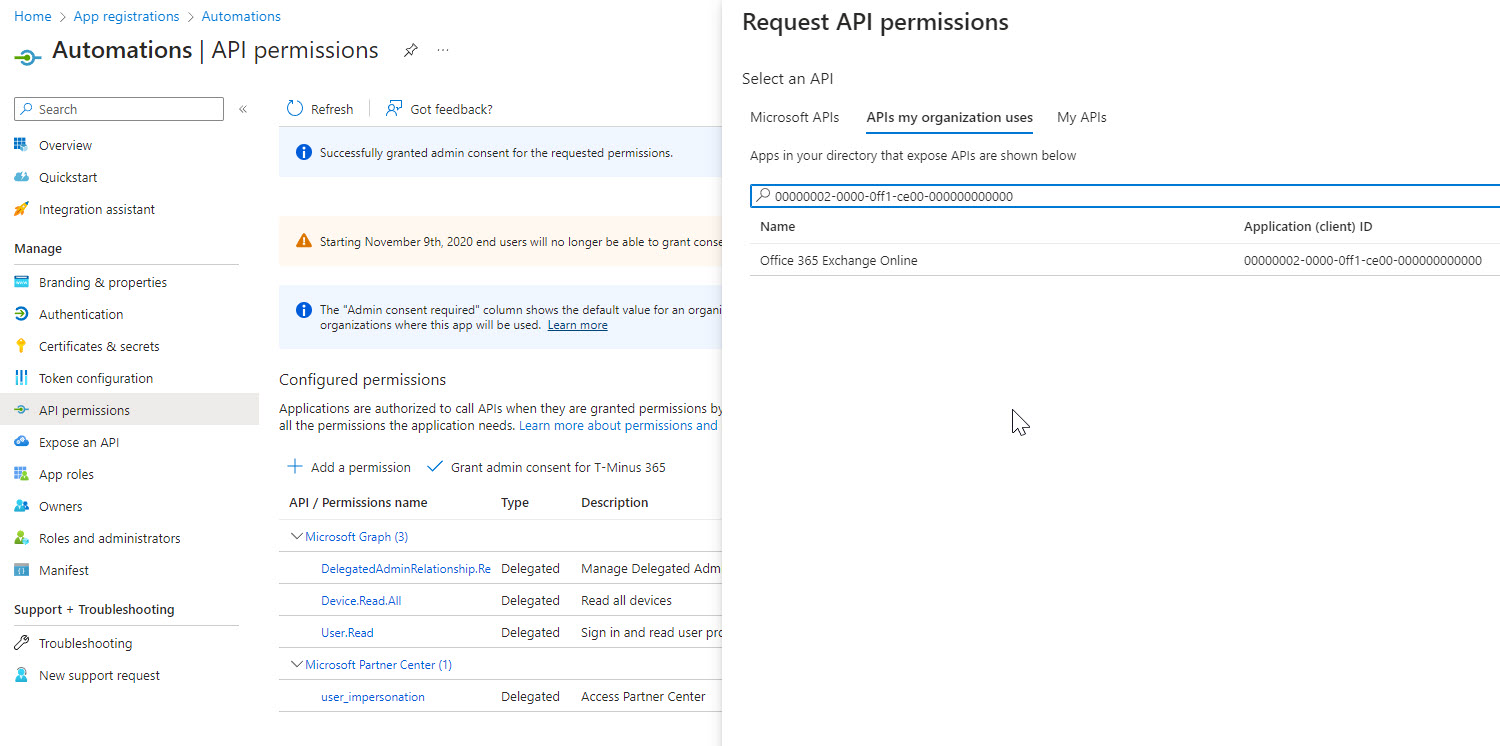
The main permission you need here is Exchange.Manage
When you are done adding your permissions here, you will want to click on the Grant Admin Consent for <Your Org>.
Note that you will need to be signed in as a Global Admin in order to perform this operation. The permissions shown below are just an example, you will likely have many more Microsoft Graph permissions.

Configuring GDAP Relationships
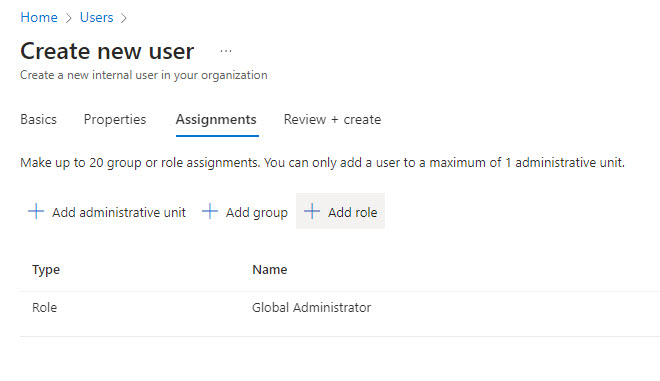
Another prerequisite for this working is that you have added a GDAP relationship for all of your customers. The roles scoped as part of those relationships is very important. There are two major concepts that you have to consider:
- In order to leverage the on-behalf consent model to grant our application rights into our downstream customer environments, we need the relationship to have one of the following roles:
- Global Admin
- Application Admin
- Cloud Application Admin
- Additionally, in order to make specific API calls, the GDAP relationship needs to include roles that would encompass those permissions. i.e. if you added a permission to your app registration to read configuration profiles in Intune, you would need the Intune Administrator role as part of the GDAP relationship.
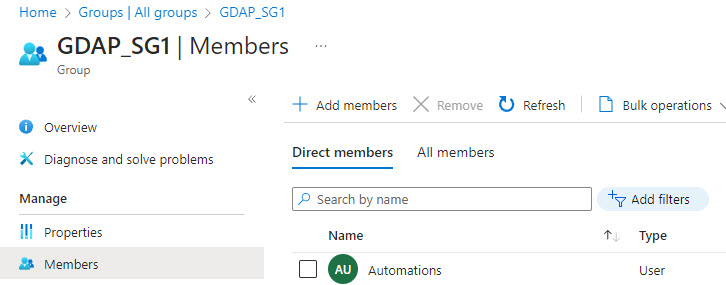
In Partner Center, you will need to ensure that this security group is assigned to each GDAP relationship and has at least one of the following permissions:
- Global Admin
- Privilege Role Admin
- Cloud Application Admin

The next steps will not work if this is not configured correctly.
Acquire a Partner Access Token
In this step we will leverage our application registration to generate a refresh token and access token which will be used to consent to our application for our customers. In this example, I am using PowerShell but you could use the API calls as well: Secure partner application for CSP and CPV – Partner app developer | Microsoft Learn
Using the below script, you will fill in the variables from the variables generated earlier when you created the application registration.
$AppId = 'Your Application ID'
$AppSecret = 'Your Application/Client Secret'
$consentscope = 'https://api.partnercenter.microsoft.com/user_impersonation'
$AppCredential = (New-Object System.Management.Automation.PSCredential ($AppId, (ConvertTo-SecureString $AppSecret -AsPlainText -Force)))
$PartnerTenantid = 'Your TenantID'
$AppDisplayName = 'Your Application Display Name'

# Get PartnerAccessToken token
$PartnerAccessToken = New-PartnerAccessToken -serviceprincipal -ApplicationId $AppId -Credential $AppCredential -Scopes $consentscope -tenant $PartnerTenantid -UseAuthorizationCode
When you run this script in PowerShell you will be promoted to sign in. This is where you will use your service account you created (and have the Global Admin role activated if using PIM). If successful, you should be able to call the $PartnerAccessToken variable to see your refresh token and access token
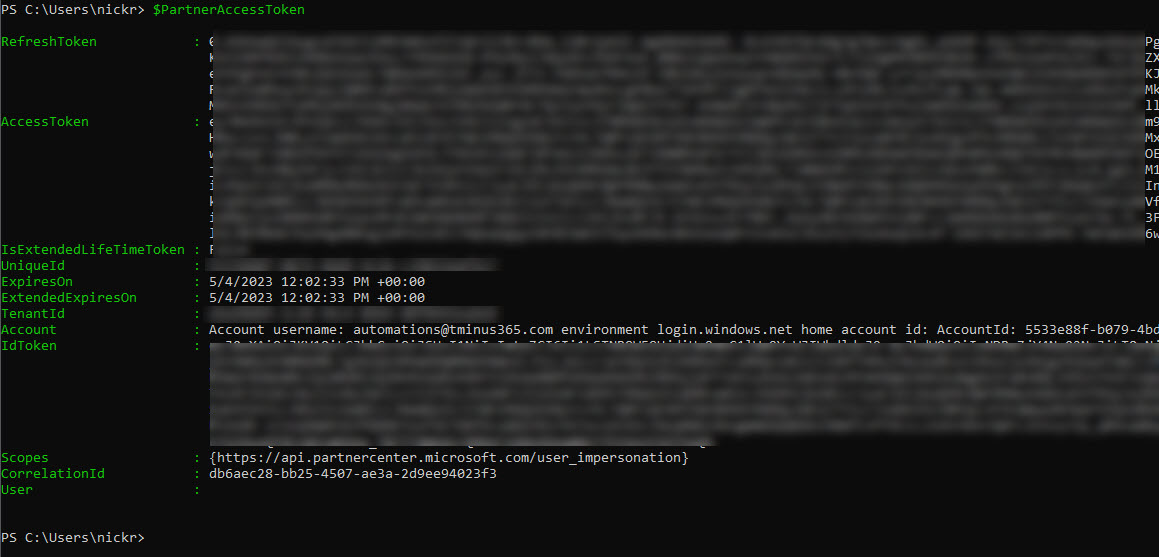
You should store your RefreshToken in a secure location like Azure Key Vault. It can be used to get new access tokens and will need to be renewed every 90 days. Check out this great article from Gavin that shows you how to store and retrieve these secrets from Azure Key Vault:
There is also speculation that Microsoft does not intend to maintain the Partner Center module with PowerShell. For this reason, you can use the following code which calls the REST API directly. Sample Code:
# Define variables
$appId = 'your Azure AD application client ID'
$appSecret = 'your Azure AD application client secret'
$tenantId = 'your Azure AD tenant ID'
$scope = 'https://api.partnercenter.microsoft.com/.default'
$redirectUri = 'your redirect URI'

# Construct authorization endpoint URL
$authEndpoint = "https://login.microsoftonline.com/$tenantId/oauth2/v2.0/authorize?client_id=$appId&response_type=code&redirect_uri=$redirectUri&scope=$scope"

# Navigate to authorization endpoint and obtain authorization code
Start-Process $authEndpoint
$code = Read-Host "Enter authorization code"

$body = "grant_type=authorization_code&client_id=$appId&client_secret=$appSecret&code=$code&redirect_uri=$redirectUri&scope=$scope"
$headers = @{ 'Content-Type' = 'application/x-www-form-urlencoded' }
$tokenEndpoint = "https://login.microsoftonline.com/$tenantId/oauth2/token"
$response = Invoke-RestMethod -Method POST -Uri $tokenEndpoint -Body $body -Headers $headers

$AccessToken = $response.Access_Token
In this script, you can grab the code from the URL

Consent on Behalf of your Customer
Now that we have an Access Token, we can leverage the new API Microsoft Created to consent to our application. We will be using PowerShell again for this example, but behind the scenes, the new “CPV consent” API is being used. Do not worry about Control Panel Vendor lingo. CSPs are able to access this API as well.
PS Cmdlet: New-PartnerCustomerApplicationConsent (PartnerCenter) | Microsoft Learn
API: Control Panel Vendor APIs for customer consent – Partner app developer | Microsoft Learn
$CustomerTenantId = 'Your Customer TenantID'
# Connect using PartnerAccessToken token
$PartnerCenter = Connect-PartnerCenter -AccessToken $PartnerAccessToken.AccessToken
#Grants needed
$MSGraphgrant = New-Object -TypeName Microsoft.Store.PartnerCenter.Models.ApplicationConsents.ApplicationGrant
$MSgraphgrant.EnterpriseApplicationId = "00000003-0000-0000-c000-000000000000"
$MSGraphgrant.Scope = "Device.ReadWrite.All,User.Read"
$ExOgrant = New-Object -TypeName Microsoft.Store.PartnerCenter.Models.ApplicationConsents.ApplicationGrant
$ExOgrant.EnterpriseApplicationID = "00000002-0000-0ff1-ce00-000000000000"
$ExOgrant.Scope = "Exchange.Manage"
New-PartnerCustomerApplicationConsent -ApplicationGrants @($MSGraphgrant, $ExOgrant) -CustomerId $CustomerTenantId -ApplicationId $AppId -DisplayName $appdisplayname
^In this script, you will enter the tenant ID of a customer you want to test the consent process with. The other key piece you will want to change is the MSGraphgrant.Scope. Here is where you will put all of the permissions you added to your application registration, comma separated. I just have a few for the sake of this example.
REST API Sample (Continued from Access Token retrieved in previous sections)
$CustomerTenantId = 'Your Customer TenantID'

$headers = @{
    Authorization = "Bearer $($AccessToken)"
    'Accept'      = 'application/json'
}

 # Consent to required applications
    $uri = "https://api.partnercenter.microsoft.com/v1/customers/$CustomerTenantId/applicationconsents"
    $body = @{
        applicationGrants = @(
            @{
                enterpriseApplicationId = "00000003-0000-0000-c000-000000000000"
                scope                   = "Directory.Read.All,Directory.AccessAsUser.All"
            },
            @{
                enterpriseApplicationId = "00000002-0000-0ff1-ce00-000000000000"
                scope                   = "Exchange.Manage"
            }
        )
        applicationId   = $AppId
        displayName     = $AppDisplayName
    } | ConvertTo-Json

    Invoke-RestMethod -Uri $uri -Headers $headers -Method POST -Body $body -ContentType 'application/json'

^If you get this error and your application ID is 100% correct, it is likely you are using an older version of PowerShell. I got this testing in PowerShell v3.

^If you get this error, its likely that the service account you created isn’t added to the Admin Agents group OR they aren’t added a part of the security group assigned to the GDAP relationship for the customer.

^If successful, you should get the following output.
We can doublecheck by going to the customer tenant that we granted this application consent for.
Login to the Entra admin center for the customer and go to Enterprise Applications. Click on the X for the filter by Application Type
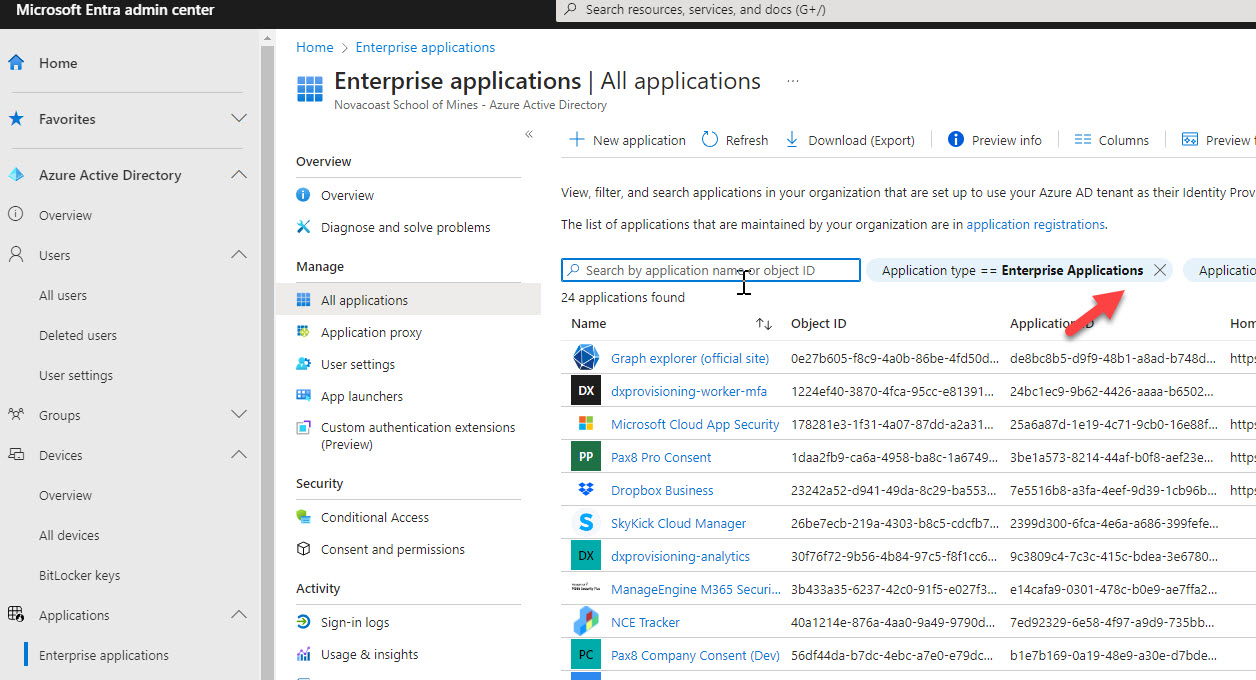
Search for your App Registration Name, its should be listed here:
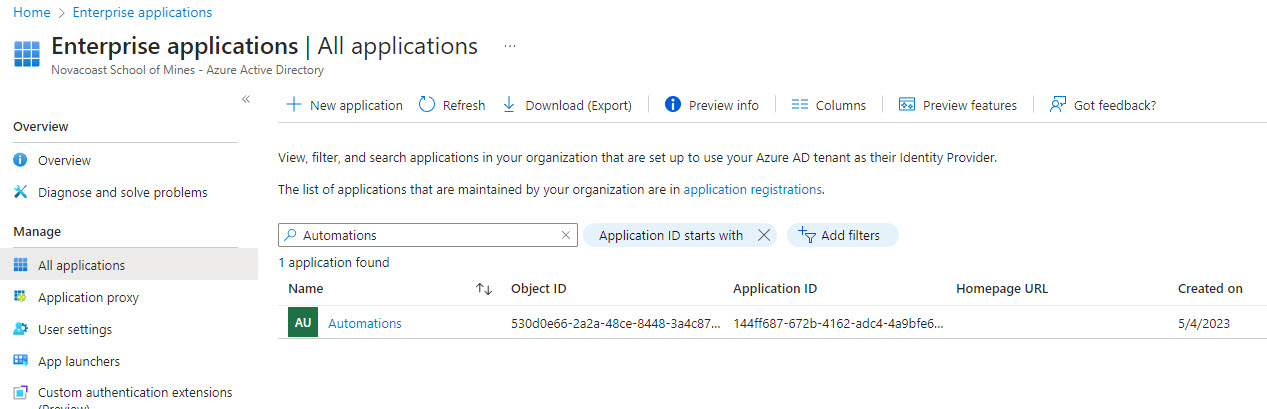
If you click into the permissions, you will see all the permissions defined from our script:
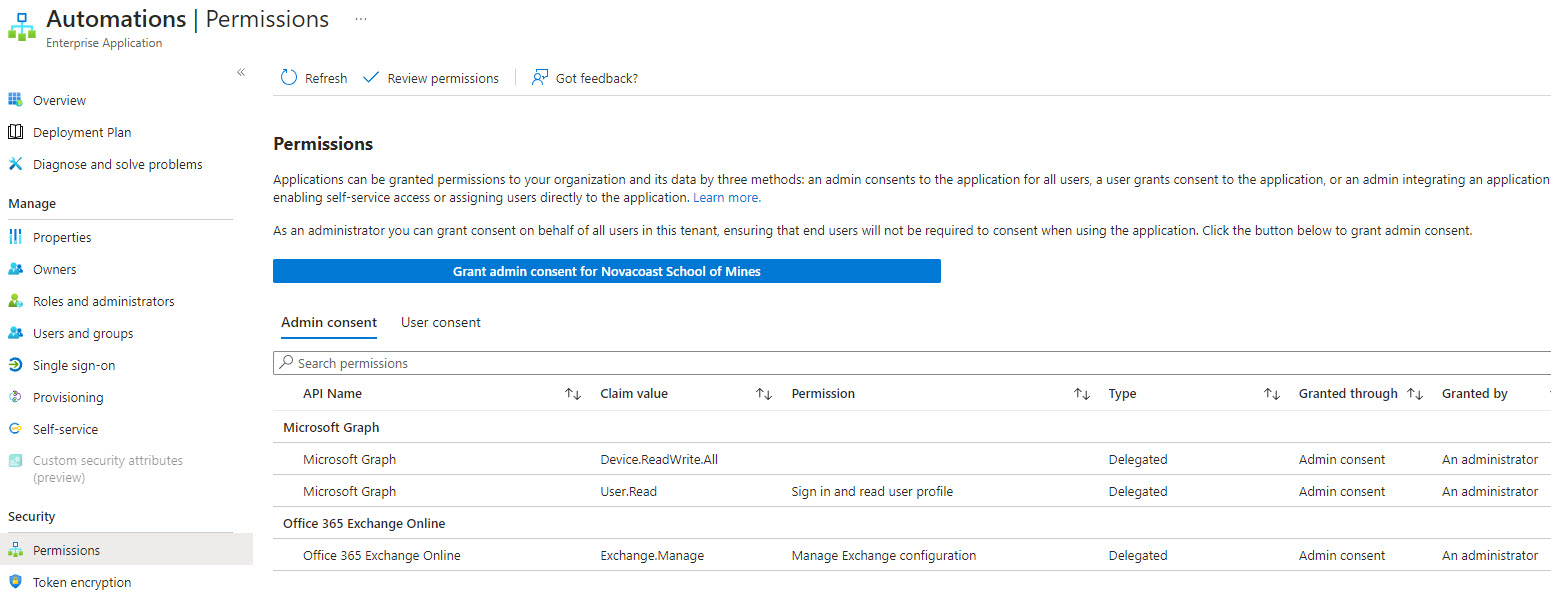
We are now able to generate access tokens and make API calls for this customer.
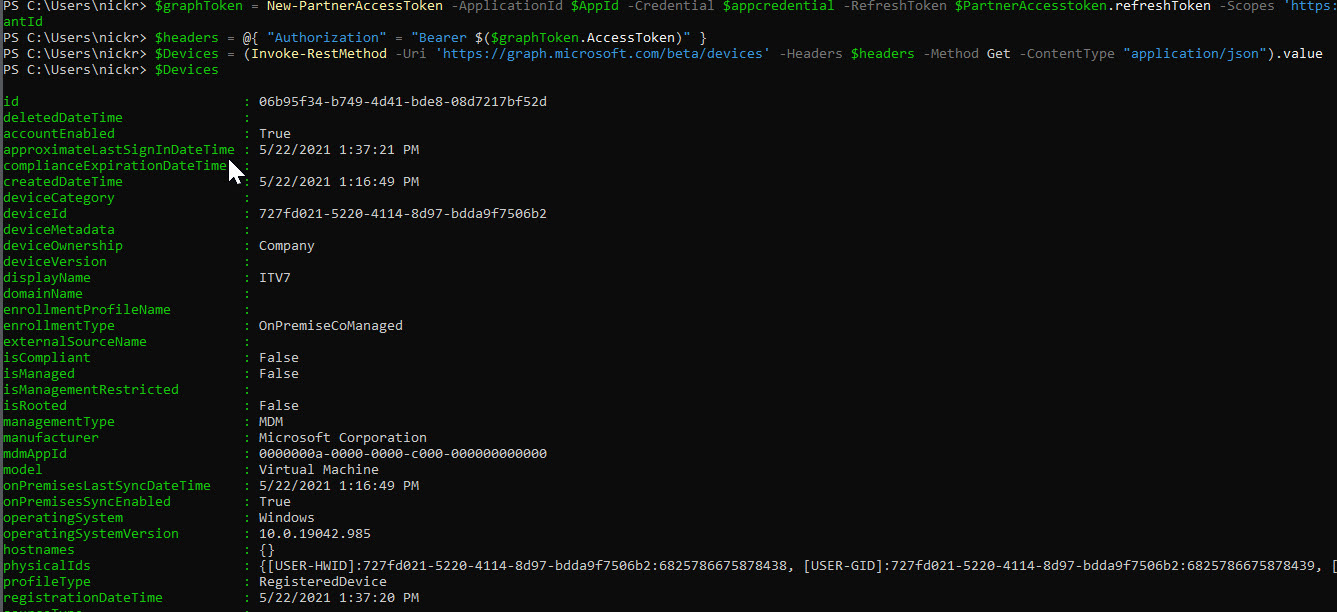
Sample PowerShell for getting Devices
$graphToken = New-PartnerAccessToken -ApplicationId $AppId -Credential $appcredential -RefreshToken $PartnerAccesstoken.refreshToken -Scopes 'https://graph.microsoft.com/.default' -ServicePrincipal -Tenant $CustomerTenantId
$headers = @{ "Authorization" = "Bearer $($graphToken.AccessToken)" }
$Devices = (Invoke-RestMethod -Uri 'https://graph.microsoft.com/beta/devices' -Headers $headers -Method Get -ContentType "application/json").value
PowerShell Samples for connecting to Exchange Online
$token = New-PartnerAccessToken -ApplicationId $AppId -Scopes 'https://outlook.office365.com/.default' -ServicePrincipal -Credential $appcredential -Tenant $CustomerTenantId -RefreshToken $PartnerAccesstoken.refreshToken
Connect-ExchangeOnline -DelegatedOrganization $CustomerTenantId -AccessToken $token.AccessToken
# Define ExchangeTokenSplat parameters
$ExchangeTokenSplat = @{
    ApplicationId = $AppId # AppID in CSP tenant
    Scopes = 'https://outlook.office365.com/.default'
    ServicePrincipal = $true
    Credential = (New-Object System.Management.Automation.PSCredential ($AppId, (ConvertTo-SecureString $AppSecret -AsPlainText -Force)))
    RefreshToken = $RefreshToken
    Tenant = $CustomerTenantId # Customer TenantID
}

# Get $ExchangeToken
$ExchangeToken = New-PartnerAccessToken @ExchangeTokenSplat

# Connect to MgGraph
Connect-ExchangeOnline -DelegatedOrganization $CustomerTenantId -AccessToken $ExchangeToken.AccessToken
Postman Examples
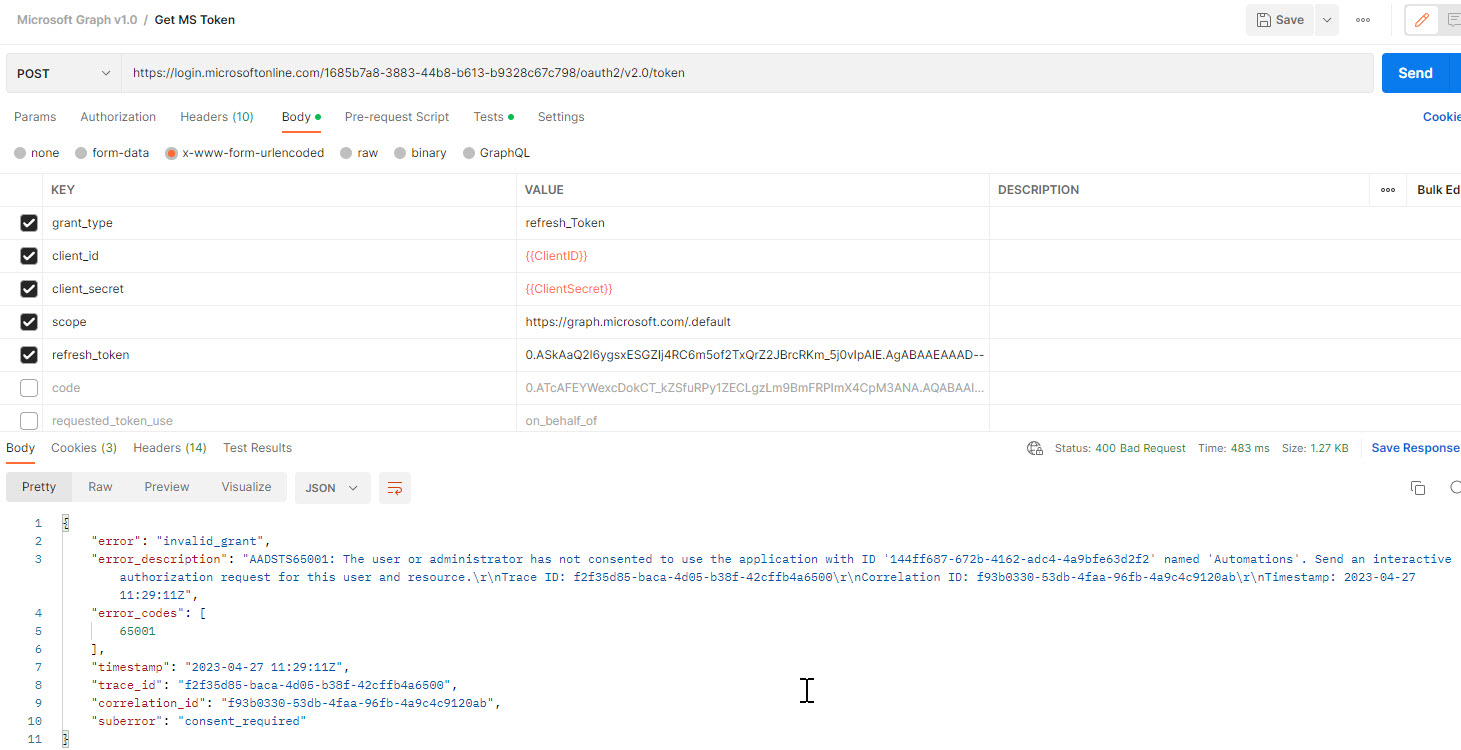
Trying to get an access token without Consent
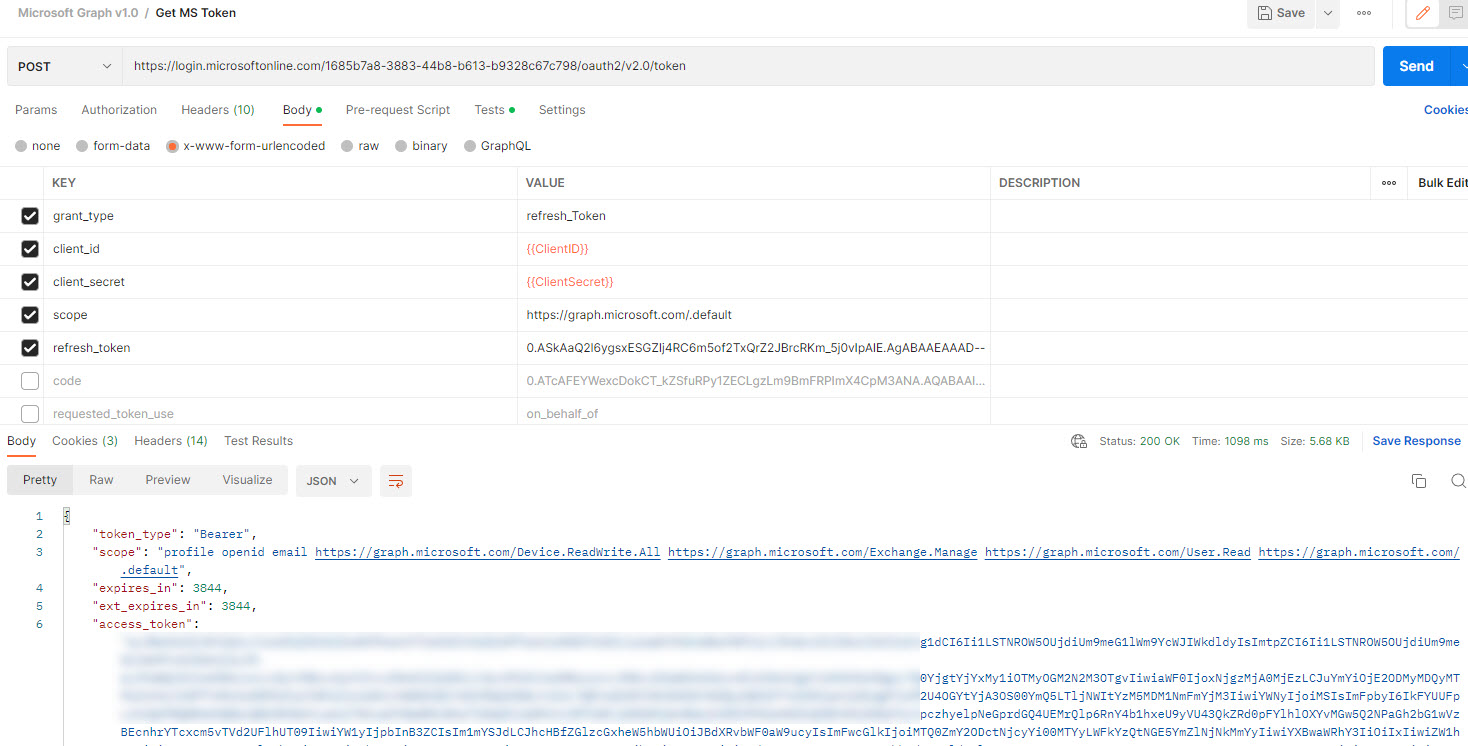
Successfully getting an access token
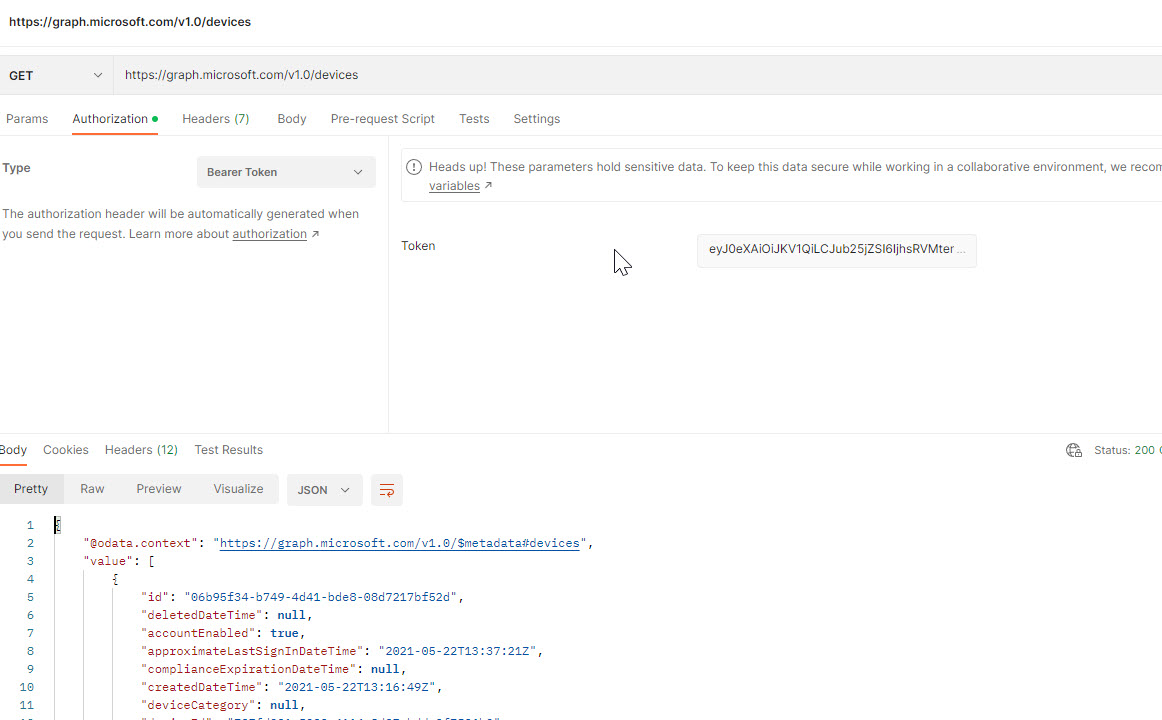
Successfully making an API call for a customer leveraging the permissions we defined for the app registration
Consenting in Bulk
There are a few different APIs you can use to get all of your customers so that we could loop through all of them to consent to our application.
Common:
- List contracts – Microsoft Graph v1.0 | Microsoft Learn
- Get-PartnerCustomer (PartnerCenter) | Microsoft Learn
New:
- List delegatedAdminCustomers – Microsoft Graph v1.0 | Microsoft Learn
- Requires that you have a Microsoft Lighthouse license
Here is a sample script to consent in bulk:
#variables $AppId = '' $AppSecret = ' ' $consentscope = 'https://api.partnercenter.microsoft.com/user_impersonation' $AppCredential = (New-Object System.Management.Automation.PSCredential ($AppId, (ConvertTo-SecureString $AppSecret -AsPlainText -Force))) $PartnerTenantid = ' ' $AppDisplayName = ' ' # Get PartnerAccessToken token $PartnerAccessToken = New-PartnerAccessToken -serviceprincipal -ApplicationId $AppId -Credential $AppCredential -Scopes $consentscope -tenant $PartnerTenantid -UseAuthorizationCode # Connect using PartnerAccessToken token $PartnerCenter = Connect-PartnerCenter -AccessToken $PartnerAccessToken.AccessToken #Grants needed $MSGraphgrant = New-Object -TypeName Microsoft.Store.PartnerCenter.Models.ApplicationConsents.ApplicationGrant $MSgraphgrant.EnterpriseApplicationId = "00000003-0000-0000-c000-000000000000" $MSGraphgrant.Scope = "Directory.Read.All,Directory.AccessAsUser.All" $ExOgrant = New-Object -TypeName Microsoft.Store.PartnerCenter.Models.ApplicationConsents.ApplicationGrant $ExOgrant.EnterpriseApplicationID = "00000002-0000-0ff1-ce00-000000000000" $ExOgrant.Scope = "Exchange.Manage" # Get list of customers $Customers = Get-PartnerCustomer # Loop through each customer and run the existing script foreach ($Customer in $Customers) { $CustomerTenantId = $Customer.CustomerId # Consent to required applications New-PartnerCustomerApplicationConsent -ApplicationGrants @($MSGraphgrant, $ExOgrant) -CustomerId $CustomerTenantId -ApplicationId $AppId -DisplayName $AppDisplayName }
REST API Sample
# Define variables
$appId = 'your Azure AD application client ID'
$appSecret = 'your Azure AD application client secret'
$tenantId = 'your Azure AD tenant ID'
$scope = 'https://api.partnercenter.microsoft.com/.default'
$redirectUri = 'your redirect URI'

# Construct authorization endpoint URL
$authEndpoint = "https://login.microsoftonline.com/$tenantId/oauth2/v2.0/authorize?client_id=$appId&response_type=code&redirect_uri=$redirectUri&scope=$scope"

# Navigate to authorization endpoint and obtain authorization code
Start-Process $authEndpoint
$code = Read-Host "Enter authorization code"

$body = "grant_type=authorization_code&client_id=$appId&client_secret=$appSecret&code=$code&redirect_uri=$redirectUri&scope=$scope"
$headers = @{ 'Content-Type' = 'application/x-www-form-urlencoded' }

$response = Invoke-RestMethod -Method POST -Uri $tokenEndpoint -Body $body -Headers $headers

$AccessToken = $response.AccessToken

$CustomerTenantId = 'Your Customer TenantID'

# Get list of customers
$uri = "https://api.partnercenter.microsoft.com/v1/customers"
$headers = @{
    Authorization = "Bearer $($AccessToken)"
    'Accept'      = 'application/json'
}

$Customers = Invoke-RestMethod -Uri $uri -Headers $headers

# Loop through each customer and run the existing script
foreach ($Customer in $Customers.value) {
    $CustomerTenantId = $Customer.id

    # Consent to required applications
    $uri = "https://api.partnercenter.microsoft.com/v1/customers/$CustomerTenantId/applicationconsents"
    $body = @{
        applicationGrants = @(
            @{
                enterpriseApplicationId = "00000003-0000-0000-c000-000000000000"
                scope                   = "Directory.Read.All,Directory.AccessAsUser.All"
            },
            @{
                enterpriseApplicationId = "00000002-0000-0ff1-ce00-000000000000"
                scope                   = "Exchange.Manage"
            }
        )
        applicationId   = $AppId
        displayName     = $AppDisplayName
    } | ConvertTo-Json

  Invoke-RestMethod -Uri $uri -Headers $headers -Method POST -Body $body -ContentType 'application/json'

  }
Updating Permissions
If you were to ever update permissions for the app registration, it would require that you have to re-consent across all of your customers. Right now, its not as simple as trying to re-run the above script. It does require that you remove the application and re-add it. There also does not seem to be a direct PS cmdelt to do this at this time either but it is available via the API:
Control Panel Vendor APIs for customer consent – Partner app developer | Microsoft Learn
Once you remove, you can re-consent with the updated scope.
Vendor Considerations
If you are working with a vendor that also leverages an app registration to access your downstream customers, you should be following some of the steps outlined here so that those integrations do not break. Specifically:
- Creating a service account specific to the integration
- Adding the service account to the GDAP relationships
- Ensuring the GDAP relationship roles encompass everything needed for the integration.
Check out more details here: Vendor Integrations Break with GDAP: The Fix! – (tminus365.com)
Helpful Aricles/Links
DAP to GDAP Application Consent and OBO-November-7 (2)
^Microsoft’s Official Doc
Enable secure application model – Partner app developer | Microsoft Learn
Secure partner application for CSP and CPV – Partner app developer | Microsoft Learn
Use the Exchange Online PowerShell v3 module with GDAP and App consent | Microsoft Learn
April 2023 announcements – Partner Center announcements | Microsoft Learn