


This month, Microsoft had a technical release of GDAP or Granular Delegated Admin Privileges for M365 workloads (Azure coming later this year). If you checked out my previous article, you know that GDAP is going to replacing existing delegated admin relationships with a true model of least privilege access. GDAP is ultimately going to improve security across the channel and reduce supply chain attacks like we saw last year with SolarWinds and Kaseya. In this article, I am going to show you how to establish these GDAP relationships in Partner Center.
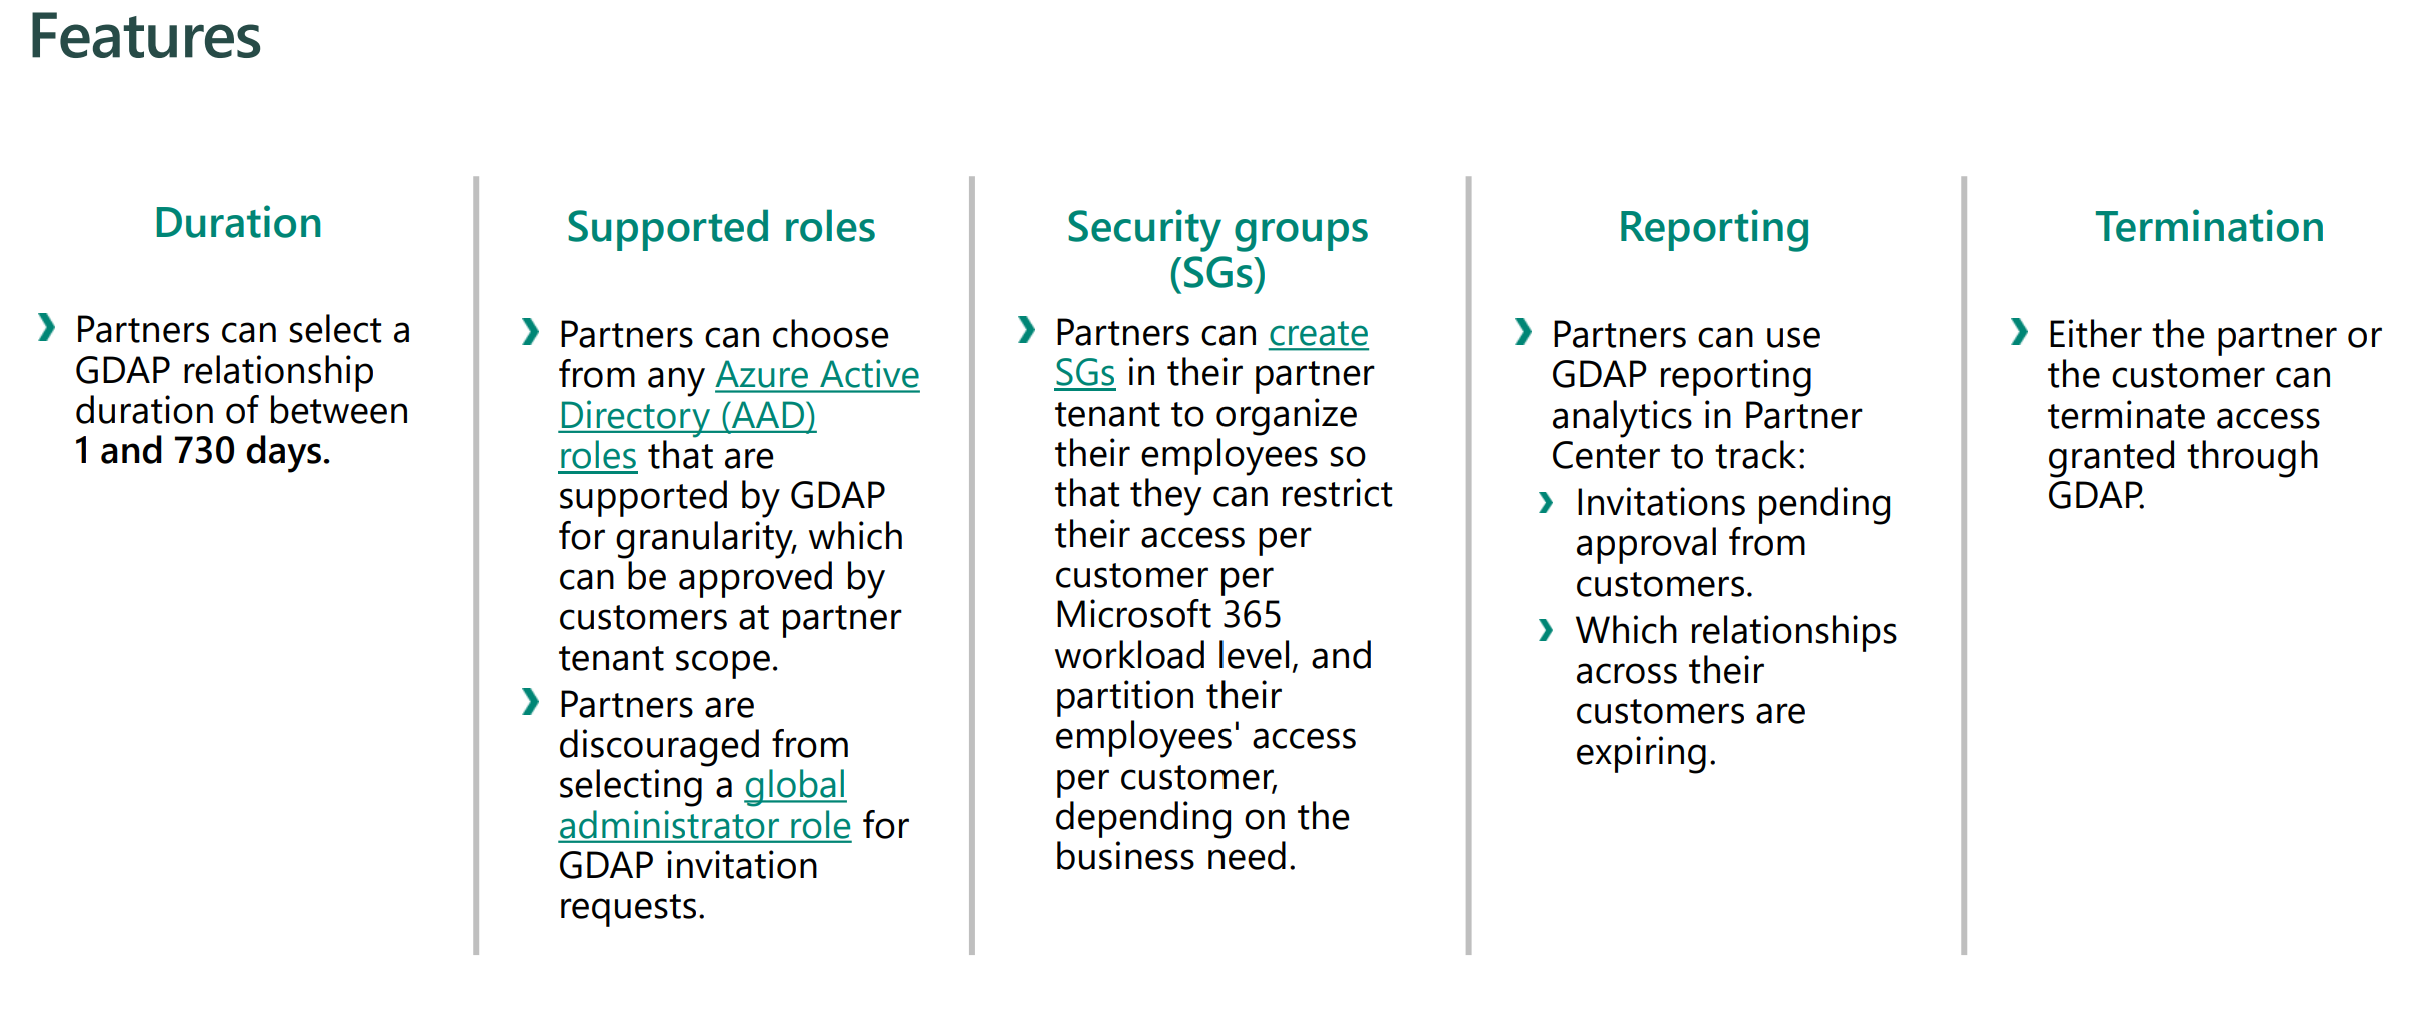
With GDAP, you can create one to many admin relationships with customers. Whenever you set these relationships up, you set a duration (max of 2 years) and you add granular AAD roles for that relationship. In your AAD, you can establish new security groups or leverage the existing ones (like Admin Agent, Helpdesk Agent, etc.). These security groups are assigned to the roles across customers. As you can see in the diagram, you can get as granular as you want here.
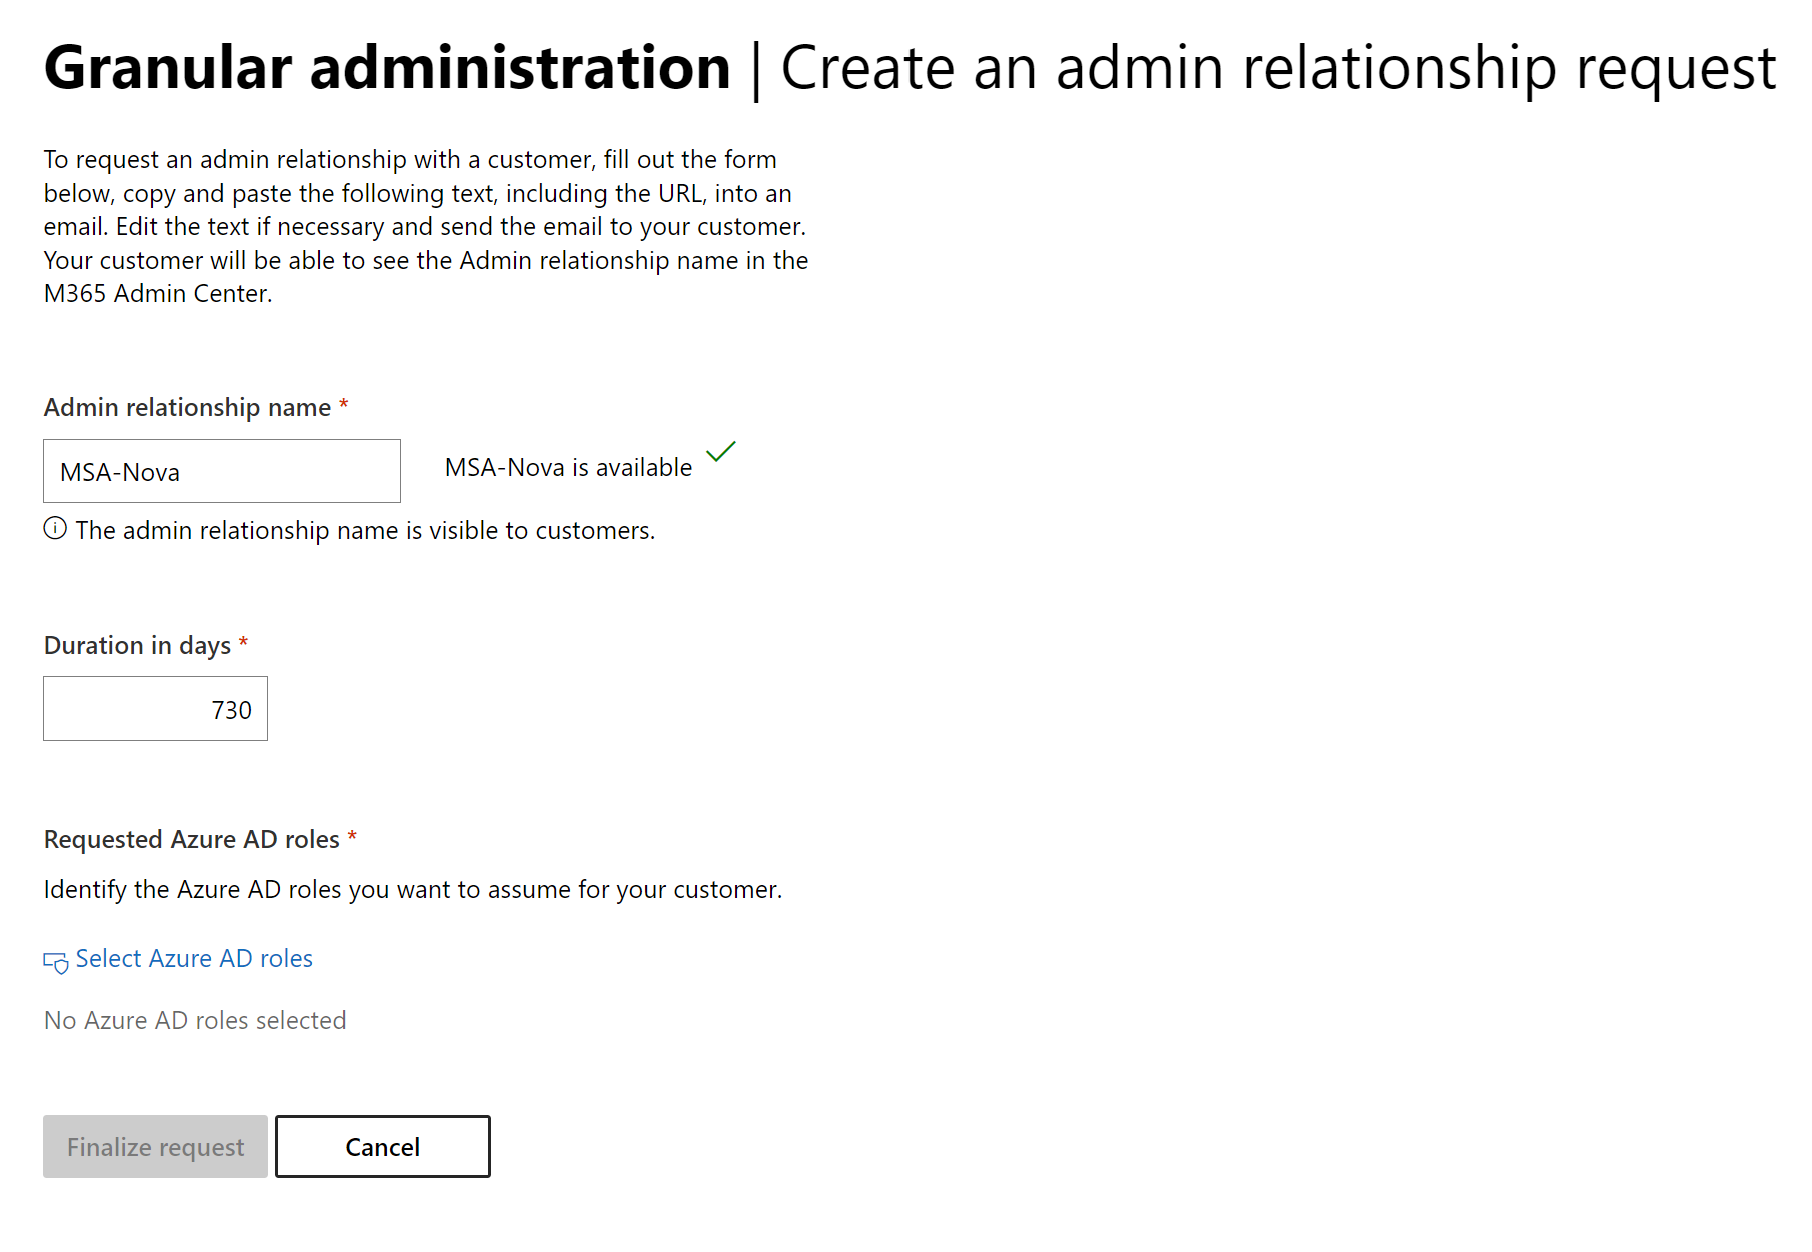
Here you will need to fill out the name, duration, and Azure AD roles. For the name, I would recommend going with a standard naming convention that you use with all customers to keep things organized. In my example here I just have the format of MSA-<customerName>. You can chose whatever you like here, just know that the same name cannot be used more than once in your tenant.
The duration has a maximum for two years but you may want to establish short term relationships for things like contract work.
I think selecting the Azure AD roles is where GDAP can start to get overwhelming since you’ve never likely gone this granular in SMB. As an MSP, you are not going to want to set up a relationship, only to figure out you didn’t add all the necessary permissions to be able to support the customer. I will be doing a separate article with recommendations here as there is a lot to consider.
You can select the roles from the pop-out window.
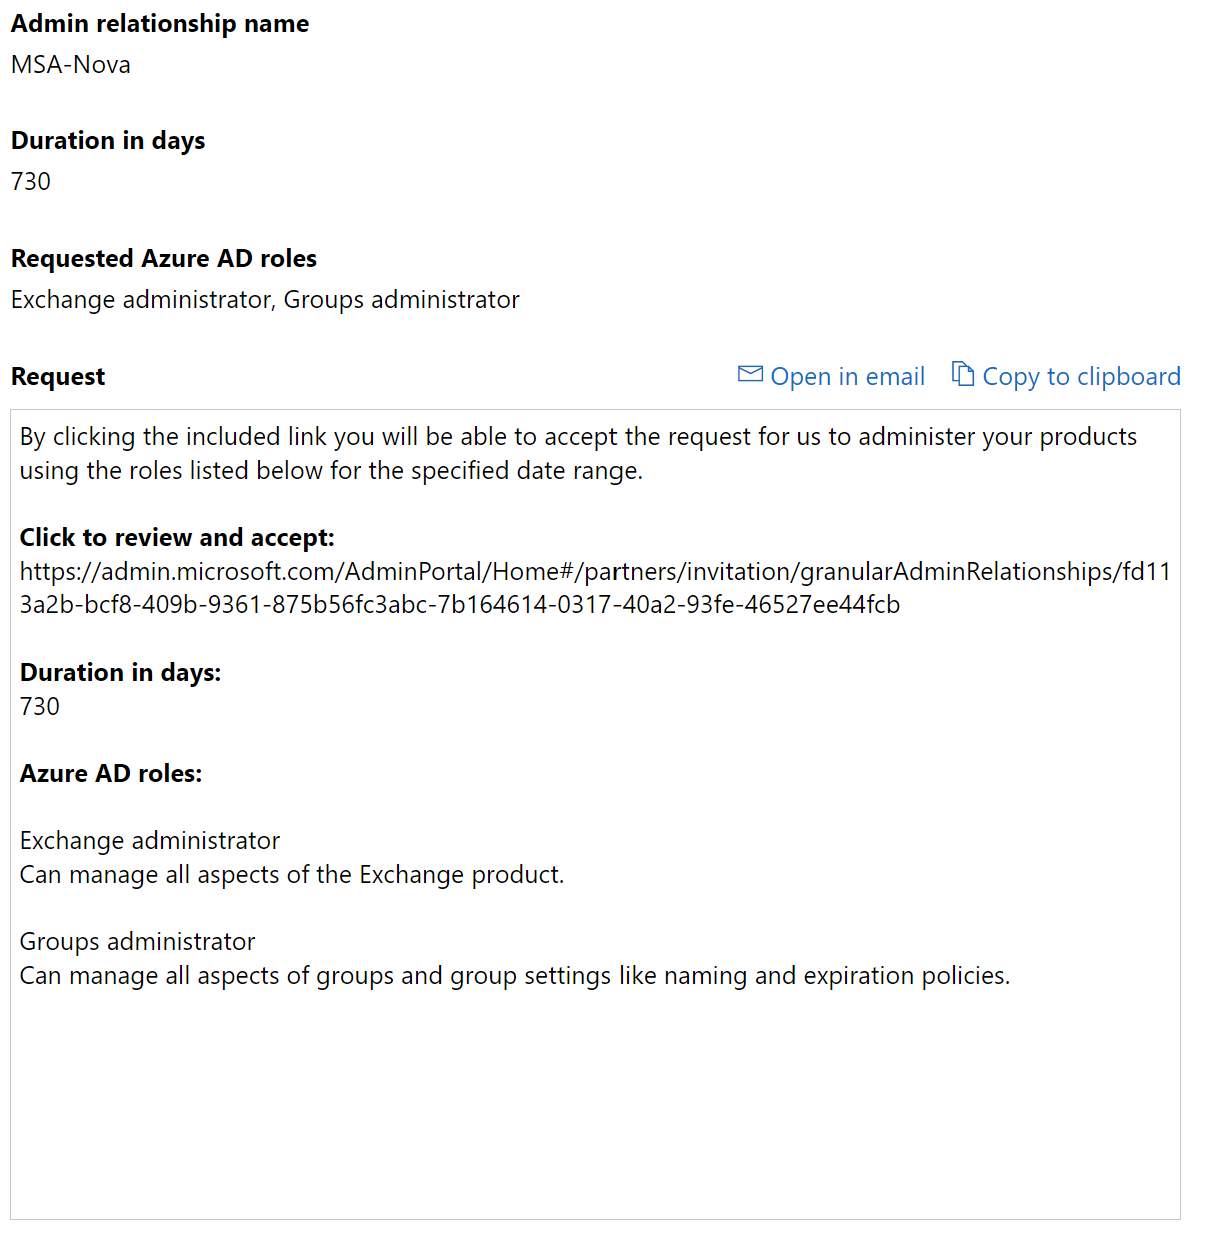
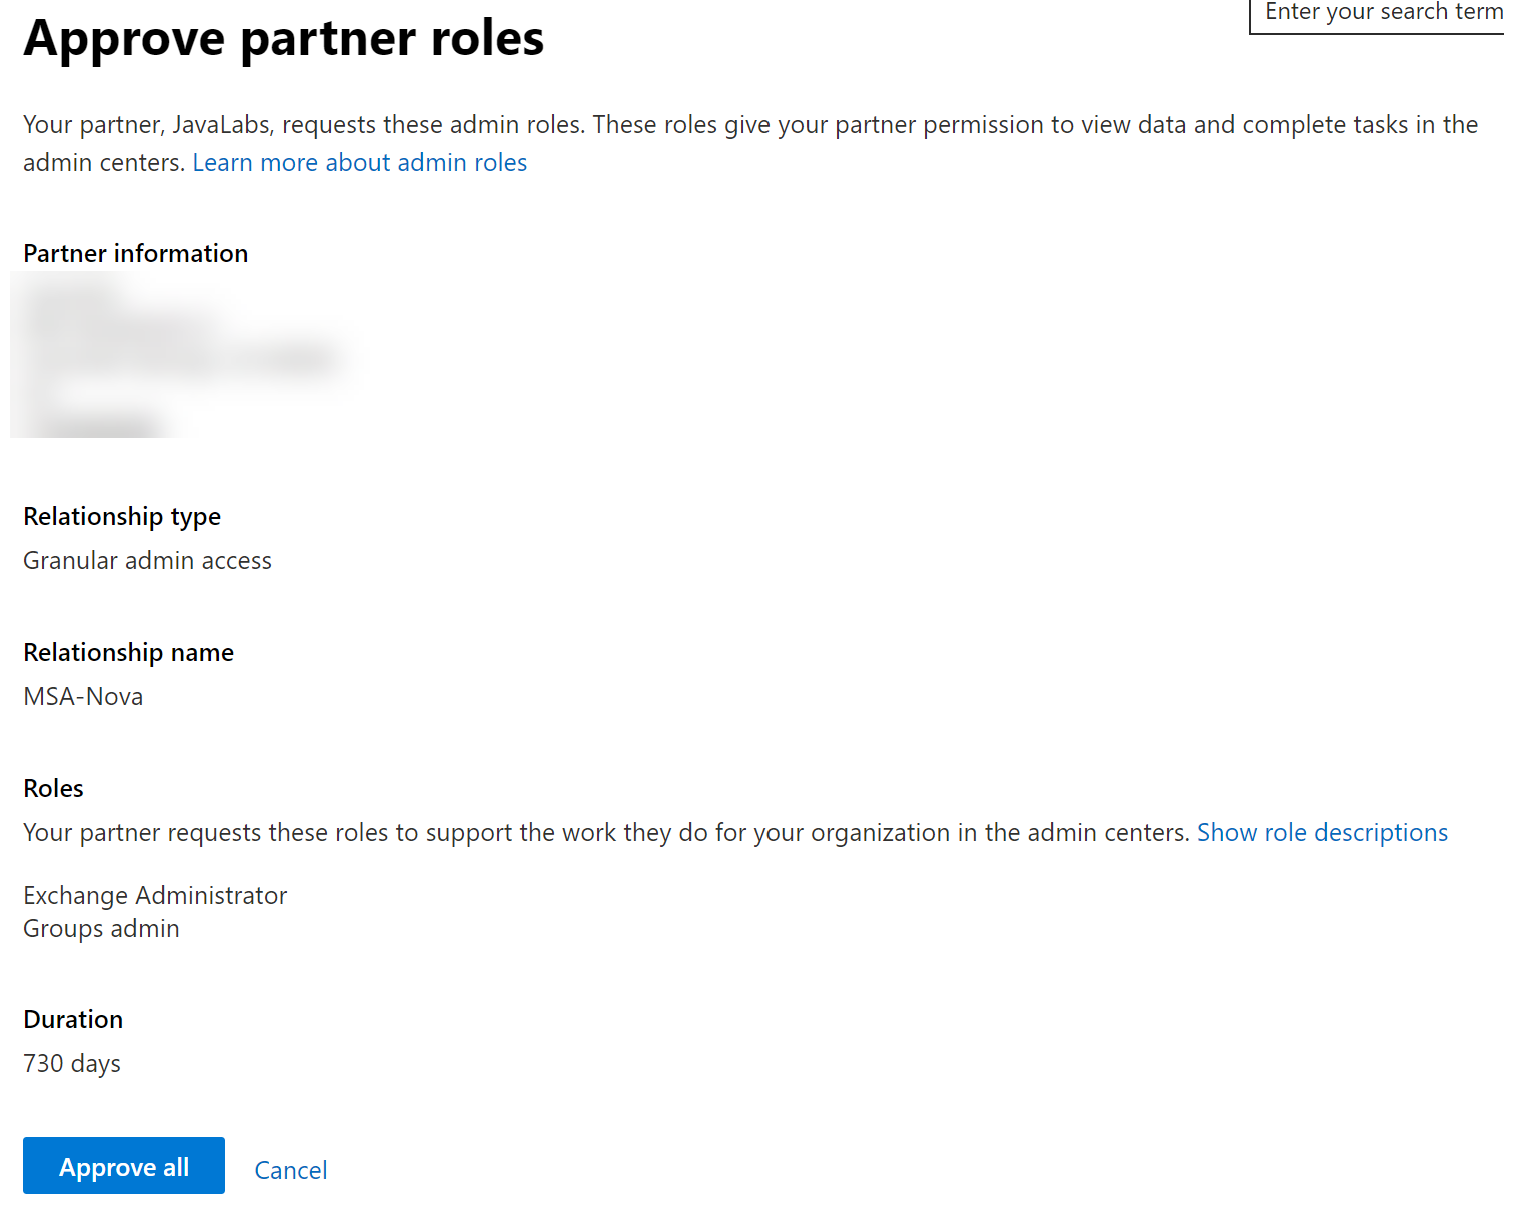
When you are done selecting roles, you can select Save at the bottom of the pop-up and choose Finalize Request. A template email is generated with a custom invitation link and a description of the duration and roles. This link is what the customer has to accept. It requires a Global Admin in the customer tenant to approve the request.
When a customer uses the link as a Global Admin they will see the following:
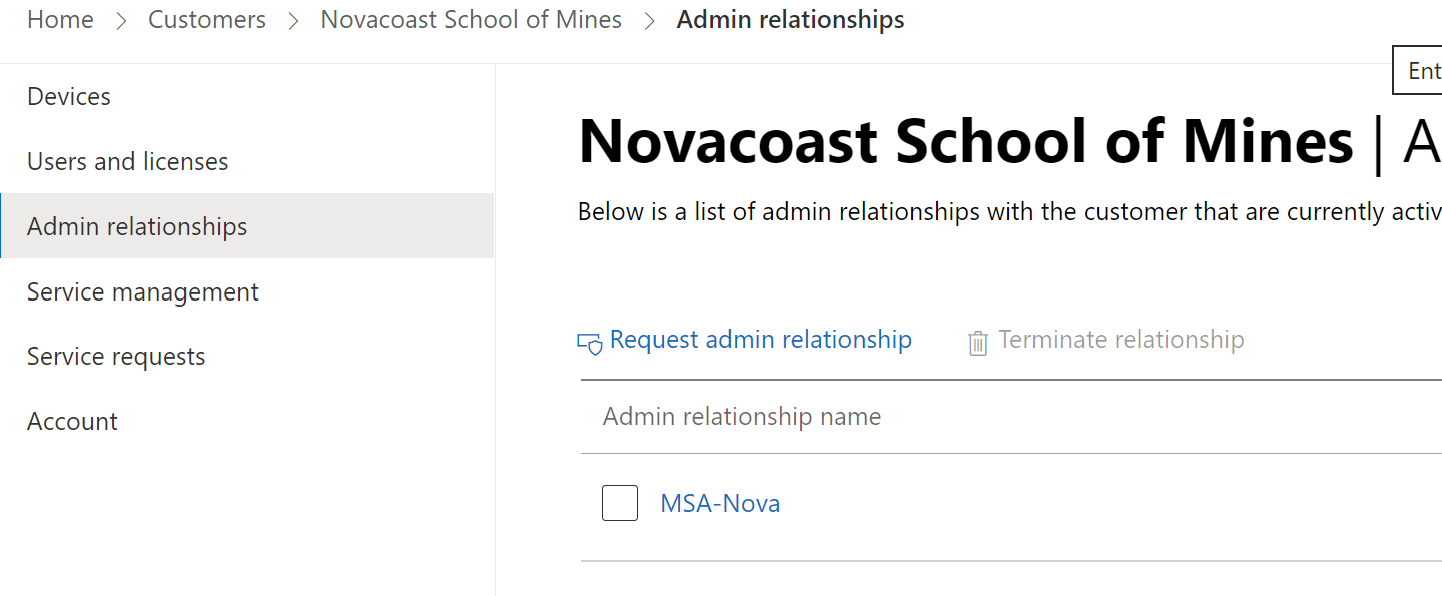
In the Settings>Partner Relationships section for this customer tenant, you will see the following after refresh
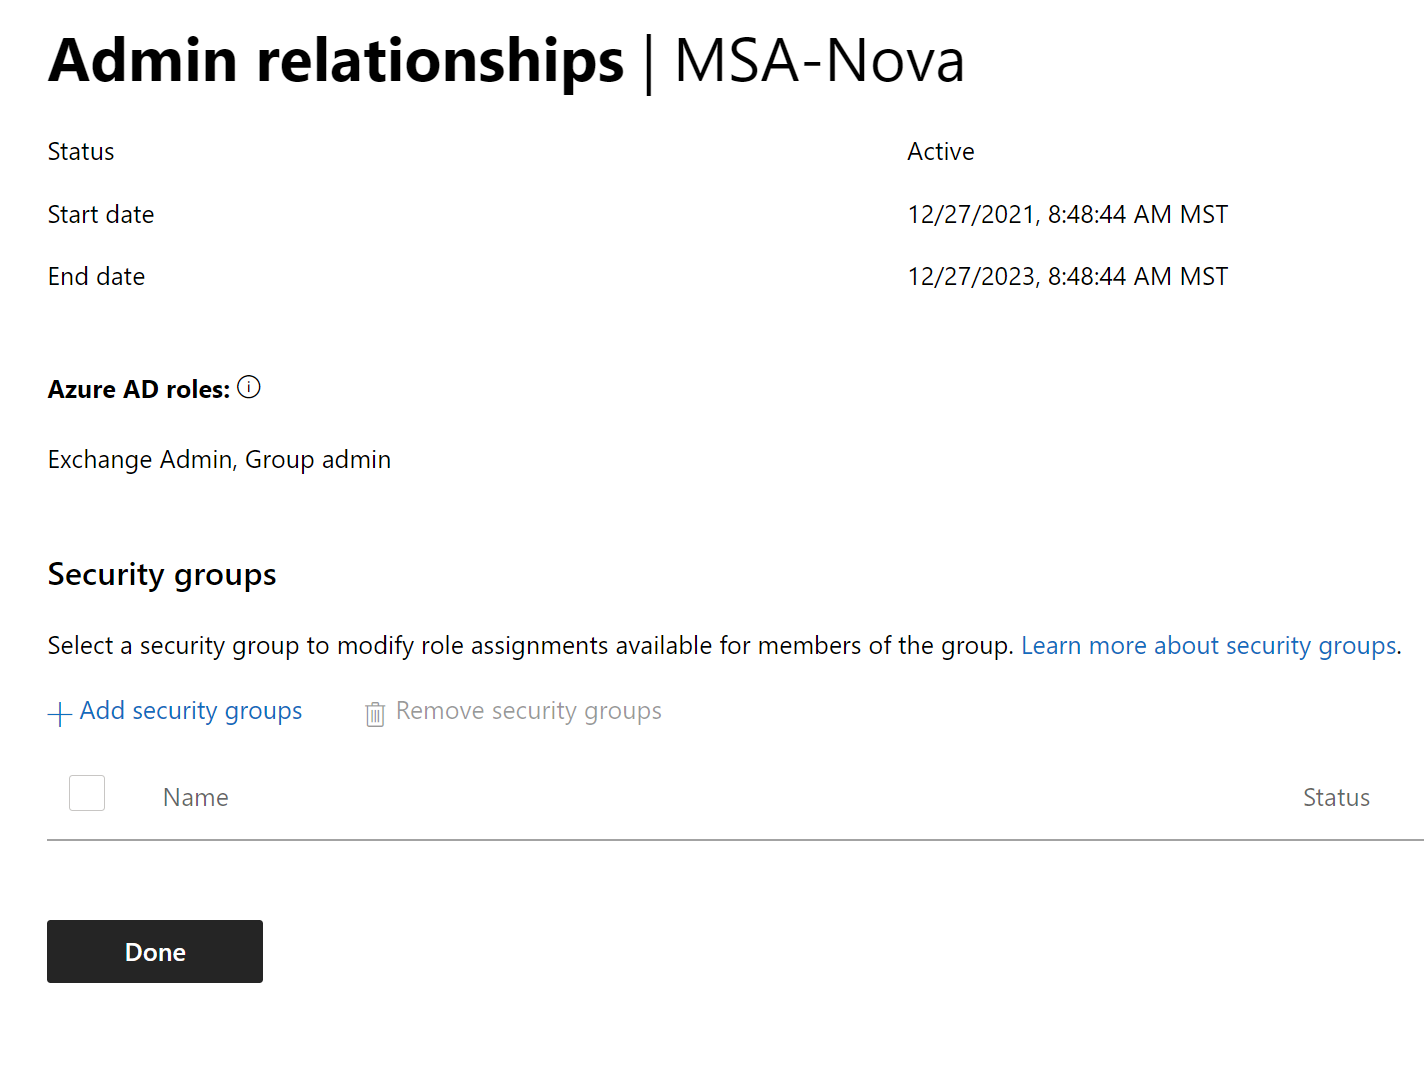
Its important to note that the customer accepting the GDAP link is not the end of the process. You will now need to go in and assign security groups to that relationship in Partner Center.
You can go to the customer page for the customers that have accepted GDAP relationships and click on Admin relationships to view existing GDAP configurations.
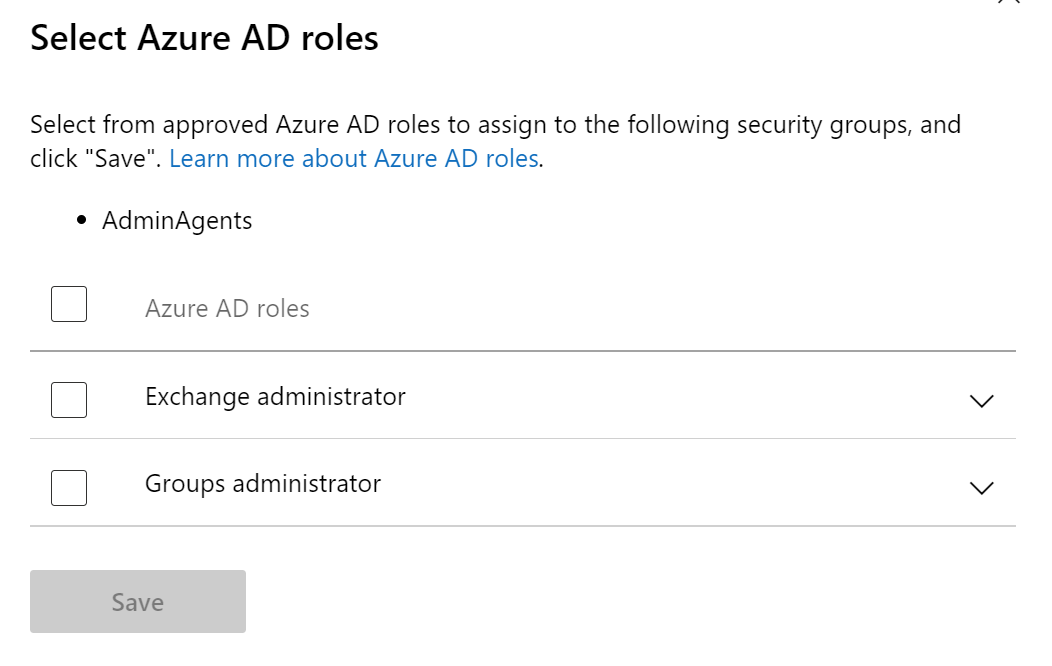
Here you can click on the + Add Security Group to bring up a popup of your existing security groups to choose from. If you need to create new security groups, you will need to do that in the AAD.portal.azure.com portal. After you have selected a SG, you can then add one or many of the AAD roles that were part of the relaitonship
Don’t make the mistake of locking yourself out of certain admin centers because you are testing GDAP.
Microsoft has a bulk migration tool available now till the end of November. The guys over at CIPP have also developed a migration tool as well. Check out this post to see more information.