
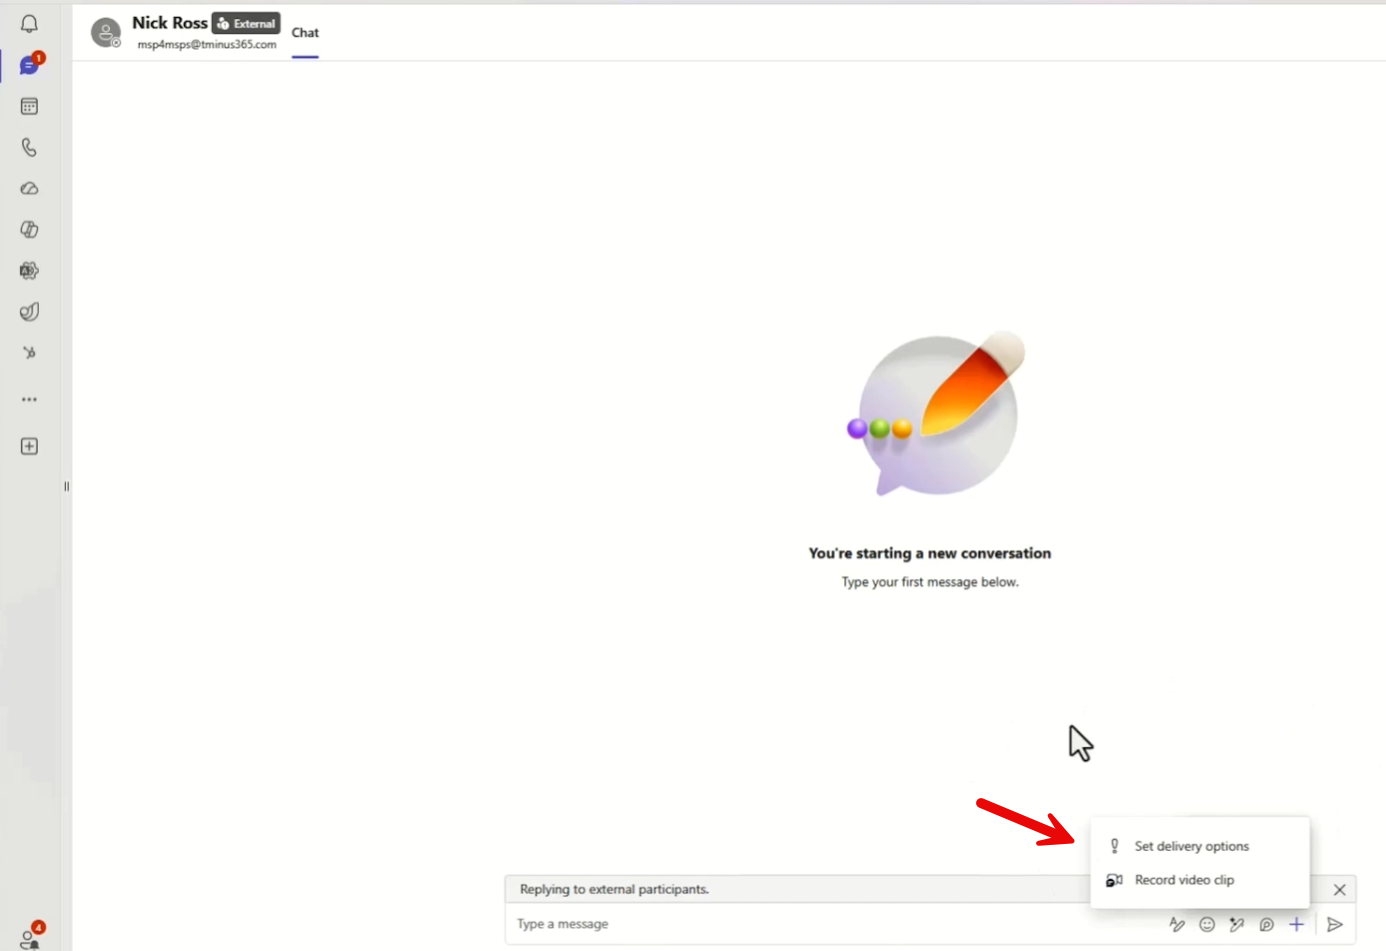
You’re in a Teams chat with an external contact, a client, a vendor, a partner. You need to send them a file. So you click the plus icon at the bottom of the chat to attach it.
The option isn’t there.
You try dragging a file from File Explorer into the chat. You get a red X — blocked.
It’s not a glitch. It’s a policy. By default, Microsoft Teams prevents users from attaching files directly in chats that include external participants. Most IT admins and end users have no idea this setting even exists.
The good news: it’s a quick fix. In this post, I’ll walk you through exactly how to enable it using PowerShell.
Why Can’t Users Attach Files in External Teams Chats?
Microsoft Teams controls file-sharing behavior through something called a Files Policy. One specific setting inside that policy, FileSharingInChatsWithExternalUsers, determines whether users can attach files when chatting with someone outside your organization.
By default, that setting is Disabled.
The result: users in an external chat lose the native file attachment experience entirely. They can still paste a SharePoint or OneDrive link into the chat manually, but the ability to click the plus icon and attach a file directly? Gone. Drag and drop? Blocked.
For teams that collaborate regularly with clients, vendors, or partners, this becomes a daily friction point. People start emailing files, using personal cloud storage, or finding workarounds — none of which are ideal from a security or workflow perspective.

The Fix: Enable File Sharing via PowerShell
At the time of writing, this setting is not configurable through the Teams Admin Center UI — it requires PowerShell. Here’s the full walkthrough.
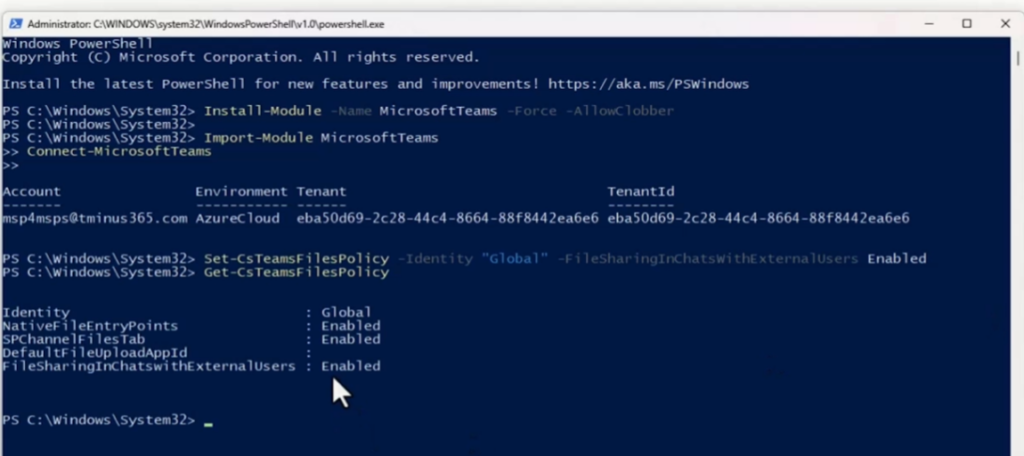
# Step 1: Install the module
Install-Module -Name MicrosoftTeams -Force -AllowClobber
# Step 2: Import and connect
Import-Module MicrosoftTeams
Connect-MicrosoftTeams
# Step 3: Check current policy
Get-CsTeamsFilesPolicy
# Step 4: Enable external file sharing
Set-CsTeamsFilesPolicy -Identity “Global” -FileSharingInChatsWithExternalUsers Enabled
Field Notes: What to Know Before You Run This
- Global means everyone. Modifying the Global policy applies this change across your entire tenant. If you only want specific users or groups to have this capability, create a custom policy and assign it to those users — don’t modify Global.
- Propagation takes time. In larger environments, changes can take an hour or more to propagate through Teams. In practice, waiting up to 24 hours before concluding something went wrong is a safe approach. Run your Get-CsTeamsFilesPolicy check first to confirm the command ran — if the value shows Enabled, the change is in flight.
- SharePoint and OneDrive settings are separate. This policy controls the file attachment experience inside Teams chat. Whether those files can actually be accessed by external users also depends on your SharePoint external sharing settings, which are managed independently in the SharePoint Admin Center.
- Always verify after. A quick Get-CsTeamsFilesPolicy after setting the policy is good hygiene. It confirms the command executed successfully and gives you a record of the current state.