
1. Check Prerequisite Qualifications/Limitations
Before you start any configuration or planning, be sure to go over the prerequisites to see what limitations you may be working with or if your environment is even compatible with AD connect. For instance, Windows Server 2012 R2 Essentials is not compatible with the tool itself. If you try to instal, it will give you an error message saying your OS is not compatible. For this reason, always check out the article to the right:
2. Add your Domain To Office 365
You will need a “verified” domain in office 365 to complete the setup wizard. Go to Setup>Domains>Add Domain to add your domain to the portal and verify with a TXT record
3. Prepare Active Directory Environment
Make sure there is a routable domain
In your local directory environment, you will want to go to ‘Active Directory Domains and Trust’ and make sure that you add an alternative UPN if the domain listed is non-routable such as .local or .lan. If you do not add an alternative UPN then all users will populate in office365 with the .onmicrosoft.com domain. You can follow this support article for steps on how to get this done
Audit users attributes in Active Directory
By default, AD Connect will use the UPN attribute to map all users to the cloud. This means that their UPN in Active Directory will be their login ID for office 365. In some cases, the formatting will be off from what you want their login to be. For example, Jim Smith is listed in AD as j.smith for their UPN. We want Jim’s login and primary SMTP record to be jsmith@domain.com. We need to change the default attribute selected to get this done.
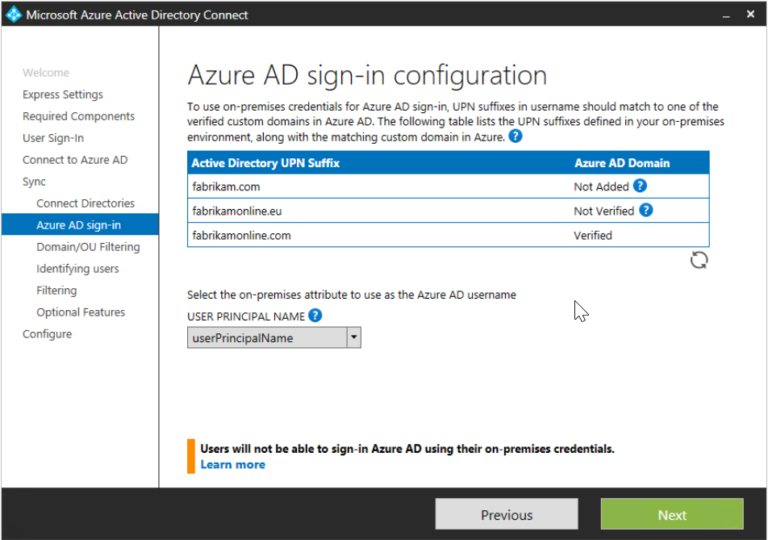
If you do not want to use UPN as the default attribute that you are syncing to, then i recommend using custom settings in the AD connect setup wizard. You will be able to change the default attribute listed at the “Azure AD sign-in configuration” step of the wizard.
I prefer to use the “Mail” attribute in most cases if i do not want to use UPN.
Determine the OUs you will be syncing to the cloud
In the setup wizard, you will be able to drill down into your directory, and select certain OUs to sync. If all of your users are not already in one or two OUs, I would suggest consolidate and cleaning this up before syncing. It is ok to have unlicensed users in office 365 but the environment will be a whole lot cleaner if you just select OUs of which you want to populate in the cloud. Keep in mind that once the sync is in place, users cannot be deleted in the 365 portal. They either have to be moved outside of an OU that is syncing or removed via powershell.
4. Understand if this is an existing 365 Environment or Net New
If you are starting fresh in office 365 then there aren’t as many aspects of the sync you need to audit. If there is already an existing 365 tenant in place with active users, then there is some prep work you should follow to avoid dirsync errors or create duplicate users in your portal.
When you install Azure AD Connect and you start synchronizing, the Azure AD sync service does a check on every new object and try to find an existing object to match.
- Azure AD matches the incoming object using the sourceAnchor attribute to the immutableId attribute of objects in Azure AD. This match is called a Hard Match.
- By default, if you already have users in 365 then this is not going to match so it falls back to use the ProxyAddresses and UserPrincipalName attributes to find a match. This is called a soft match.
- The Soft Match is designed to match objects already present in Azure AD (that are sourced in Azure AD) with the new objects being added/updated during synchronization that represent the same entity (users, groups) on premises.
- If the softmatch recognizes the same UPN/Proxy Address of a user but that user has a different immutableID in office 365 than in AD then the sync will fail and that use will be listed under “dirsync errors”
For this reason, i like to use the “mail” attribute again instead of the defaulted UPN to sync. Additionally, you can update you 365 users’s ImmutableID to what the ObjectGUID is in AD with the following cmdlets:
Connect-MSOLService
Set-MSOLUser -UserPrincipalName user@domain.com -ImmutableID (Insert ID from ObjectGUID attribute in AD)”
5.Use Staging Mode or Use one Test User
One thing we want to avoid is syncing everyone at one time and realized that we selected the wrong attributes or that there are many dirsync errors. For this reason, I always advise using “staging mode” or using one test user before moving into full production
Staging Mode
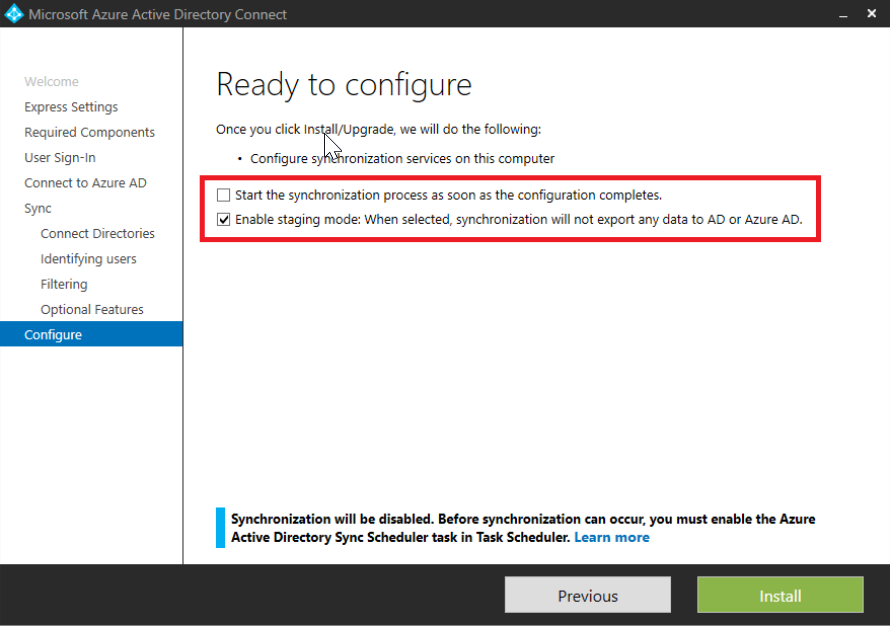
On the final page of the AD Connect Setup Wizard, you will have the option to selecting staging mode:
In staging mode,you can make changes to the configuration and preview the changes before you make the server active. This is beneficial if you want to test the synchronization, but not export any data to 365. It is also beneficial if you want to remove certain attributes being synced by editing them in the Synchronization Service Manager.
Using One Test User
I always like to make the first sync with one test user with a mailbox in my exchange environment to see if they successfully provision in 365 the way i want. This includes checking:
- UPN
- Primary SMTP Address
- Alias’
- Successful Mailbox creation in Office 365
This allows me to see if all users will populate successfully with the correct attributes, error free. It’s very easy to remove that test user either through powershell or moving them out of my test OU rather than my entire directory.
6.Set msExchMailboxGuid to Null
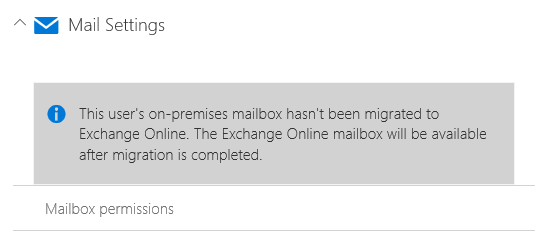
The Deadly Attribute
In some environments, when you sync users to the cloud and license them, you will receive the message you see to the right. This is extremely tedious to fix and with this in place, no user will have a mailbox created in 365. Follow the steps below to avoid this error.
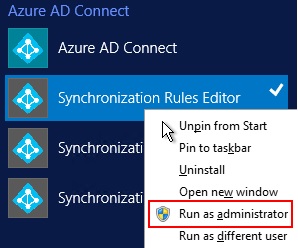
Run the Synchronization Rules Editor as an administrator.
Click on In from AD – User Exchange to edit the Inbound Rule Type
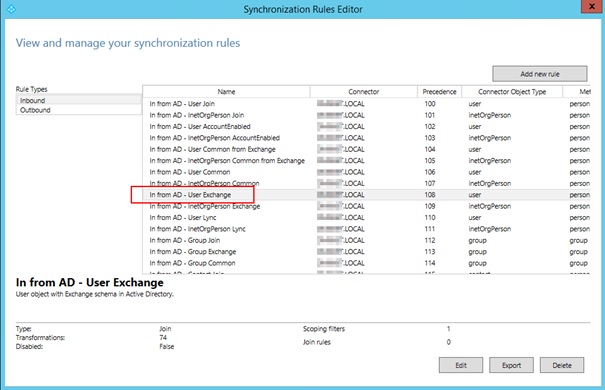
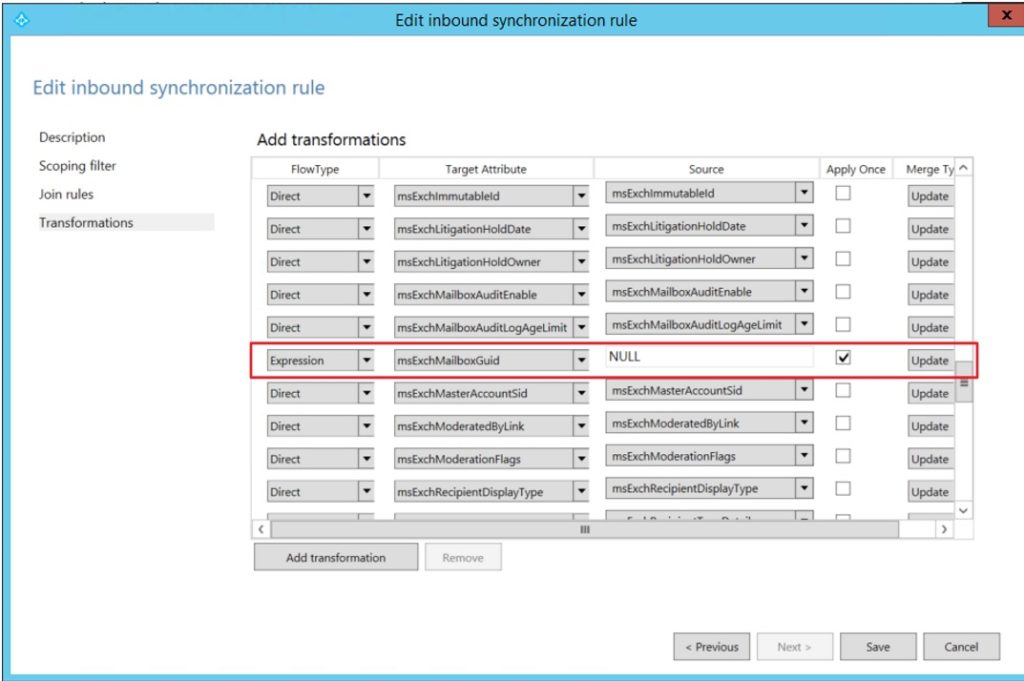
Select Transformations. Find the msExchMailboxGuid attribute.
Change it to the following: Expression - msExchMailboxGuid - NULL - Checkmark Apply Once - Click on Update.
Start the Sync with Test Users
Make sure the user's mailbox successfully propagates without error.