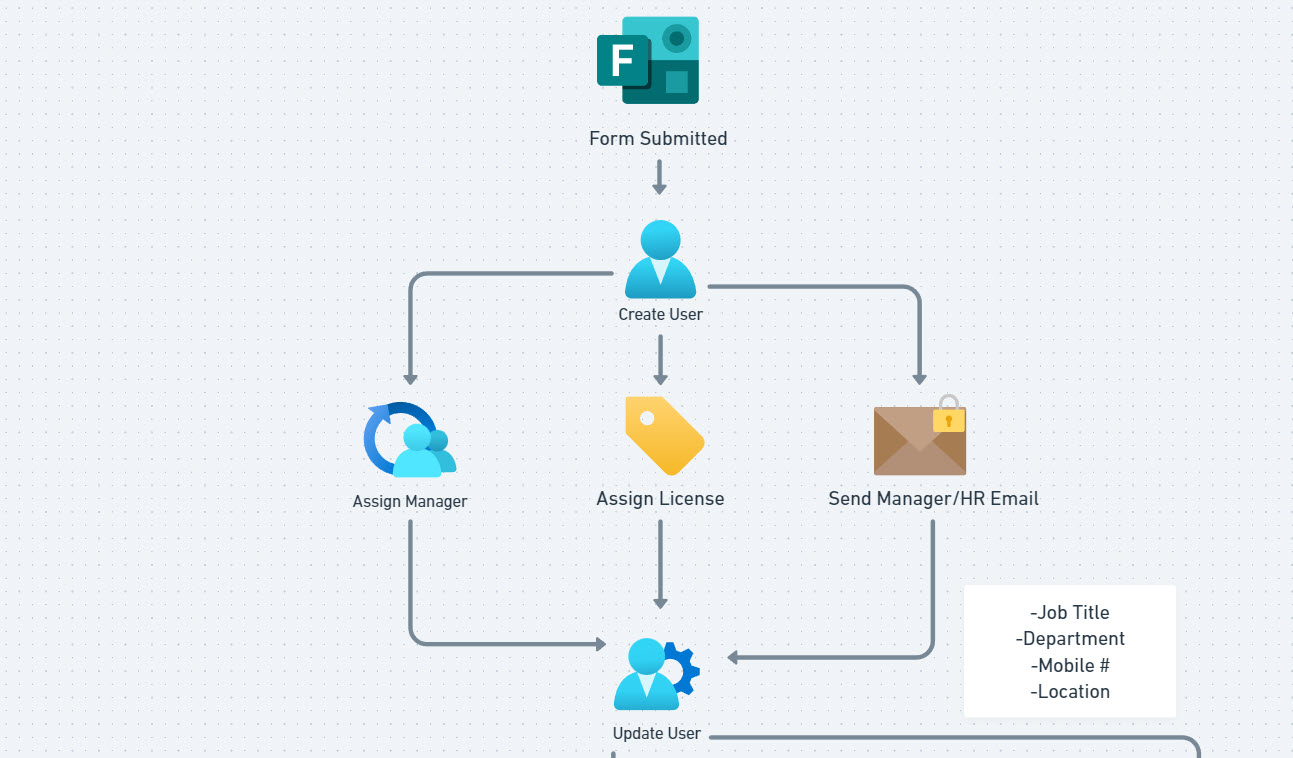
Employee onboarding can be both time consuming and prone for human error across our technicians. In this article, I am going to show you how to create a tailored onboarding form for a customer that can perform the following automations:
- Creating the user in Microsoft
- Assigning a License to the User
- Assigning a Manager
- Adding attributes like Job Title, Department, mobile #, employee hire date, location, etc.
- Mirroring the group access of another user
- Adding the user to groups (tied to SP sites, Teams, etc.)
- Adding the user to business systems
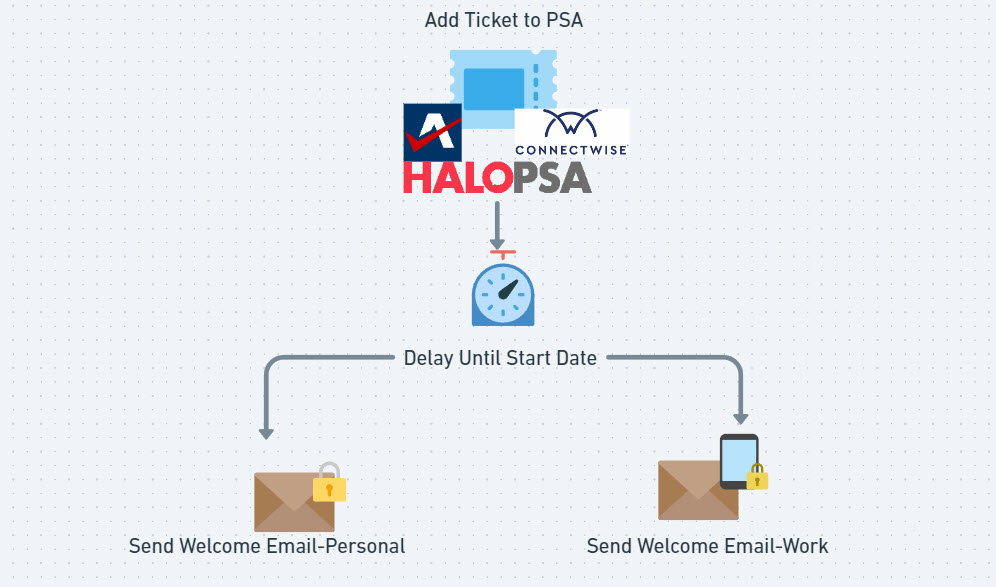
- Creating a ticket in PSA with all of the details
- Sending a welcome email to the employee with instructions on how to set up Microsoft authenticator.
We are going to perform these actions with a combination of Microsoft Forms and Power Automate. In the end of the article, I provide a template you can download for what I show in this blog. To be clear this is a Form you will create on a PER TENANT BASIS. It is not set up for multi-tenancy.

Prerequisites
- I recommend creating a service account for the flow and licensing them with a basic license like business basic or business standard. While you can create this with a regular user so that you do not have to assign another license, I like to direct these to service account to avoid any breaking functionality if that user were to leave. The service account needs to be assinged the User Admin and Group Admin roles to perform the steps in the automation.
- For the emails being sent out in the automation, I like to send them from a shared mailbox like support@domain.com or employeelifecycle@domain.com
- For the license assignment, I am using a group to perform the assignment, something like “Microsoft 365 Business Premium Users” which automatically assigns licenses to the members of the group. Assign licenses to a group – Microsoft Entra ID | Microsoft Learn
- Try to clean up Entra as much as you can first with things like Dynamic Groups for membership or SSO (if possible) so you can minimize the steps you take in the automation.
Creating the Form
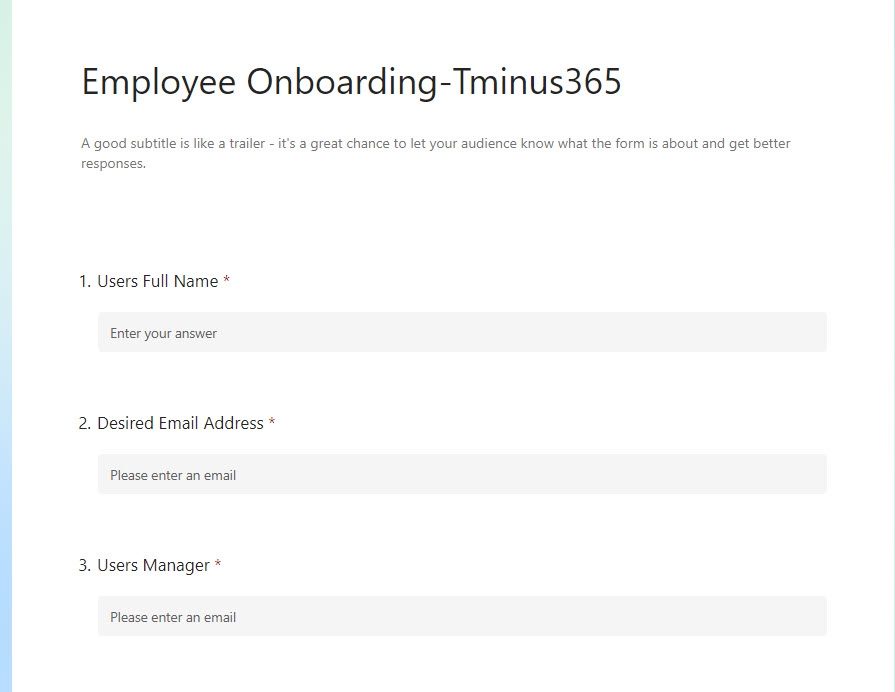
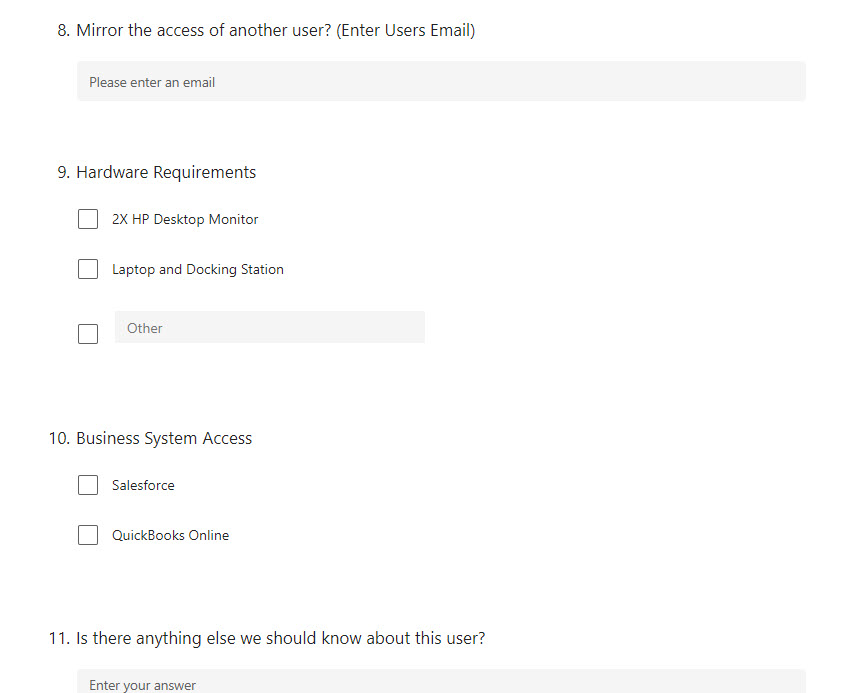
The form itself can be tailored to any business but here are some examples of what I am absorbing in the template. Check out the video below for the full tutorial.
Power Automate Template
You can upload the following template into a tenant and customize. Check out the full tutorial video below to see how I create all of these actions.
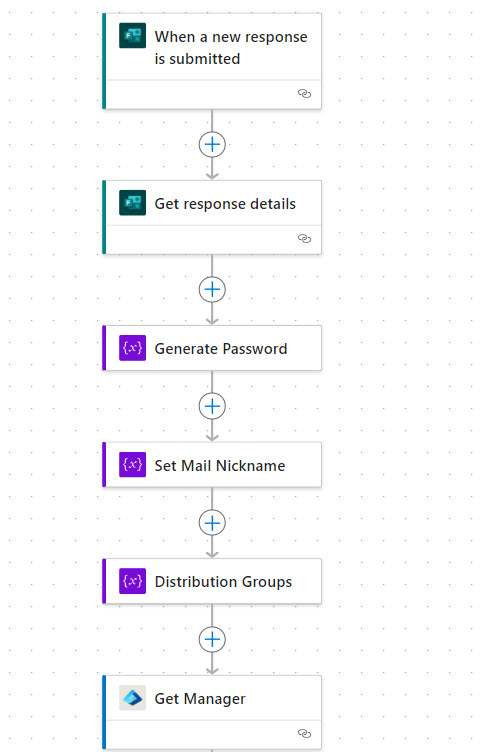
When a user submits a form, we can dynamically pull out the values to perform various actions.
QUICK NOTE ON THE PASSWORD:
- I am using a sensitivity label to encrypt the email that is sent with the users password
- I would love to use a TAP but that would require a much more advanced config
- You could use the Twilio connector to send the password over SMS to the user
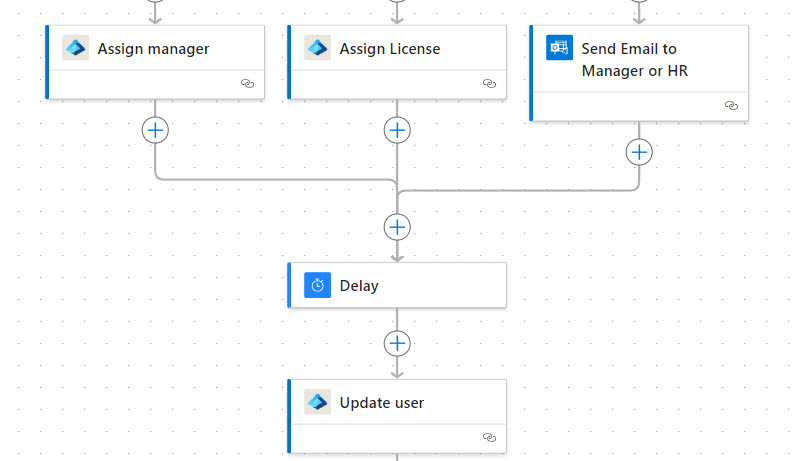
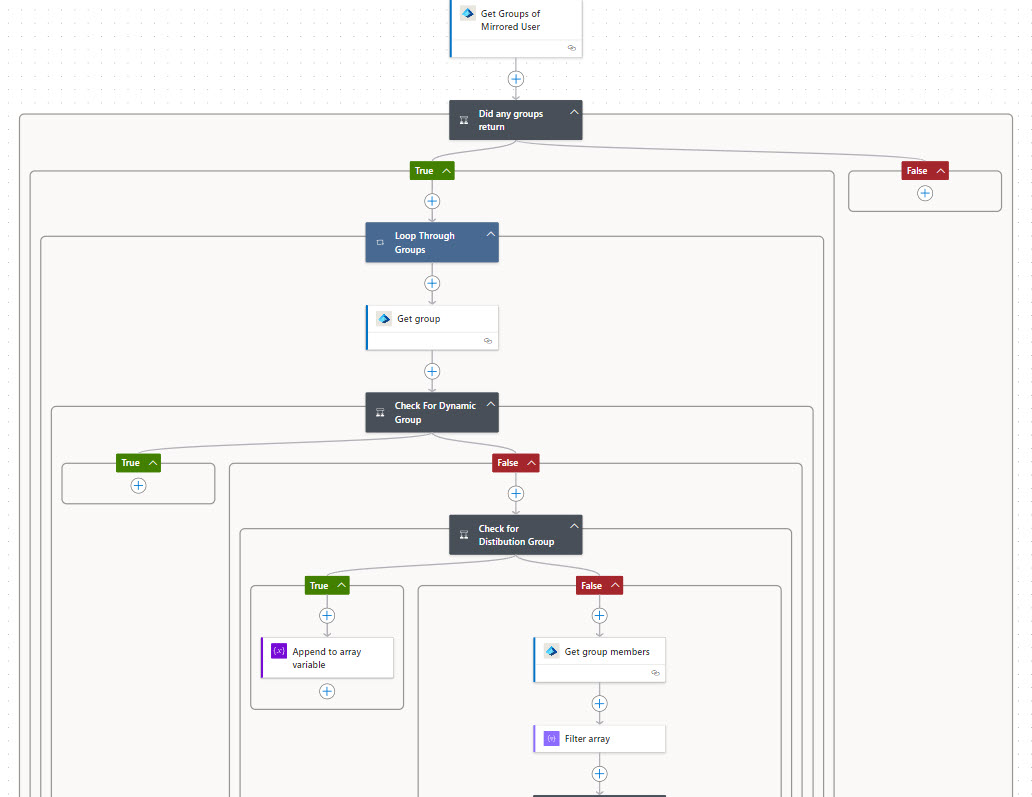
For mirrored access we are looking for the various group types to avoid failures.
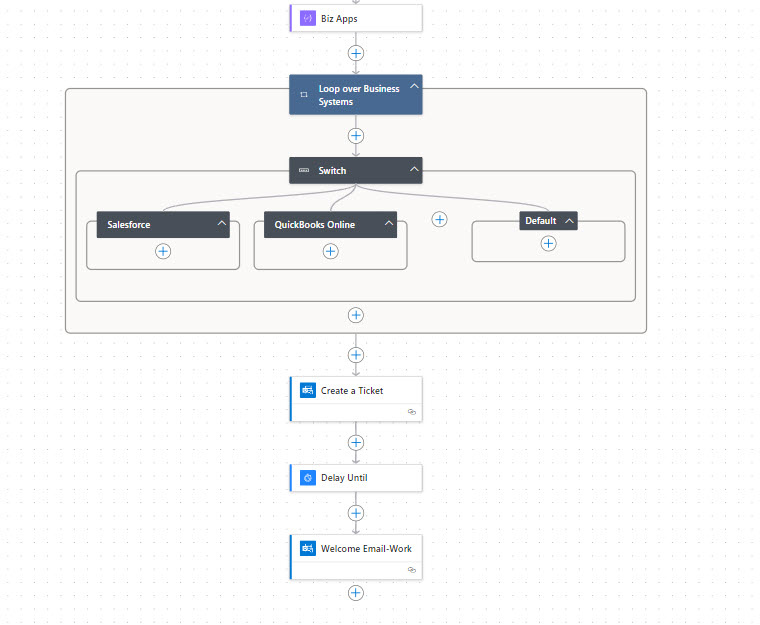
The switch statements can really be use to perform you own custom actions on certain business systems.
