


Are you looking to streamline vendor onboarding requests in your organization? In this post, I’ll walk you through an end-to-end automation built in Power Automate that allows users to submit vendor onboarding requests, routes them through approval in Microsoft Teams, and—if approved—adds the software to a central inventory, notifies procurement, and even opens a ticket with IT.
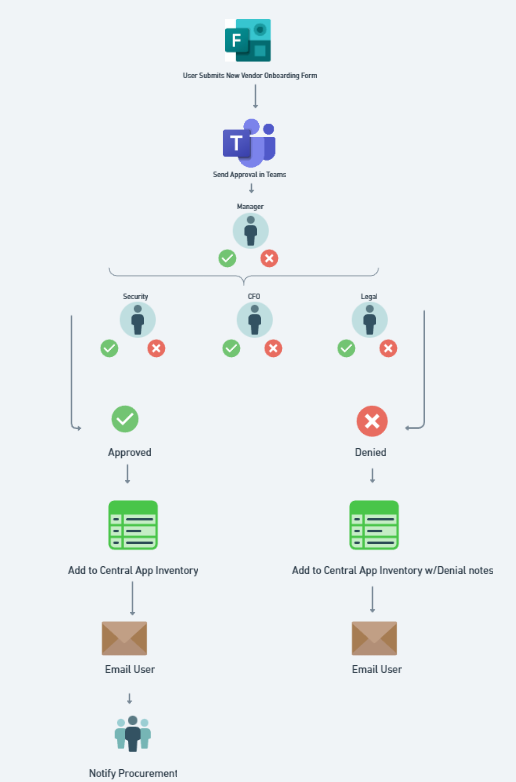
Let’s start by giving you a quick overview of this automation:
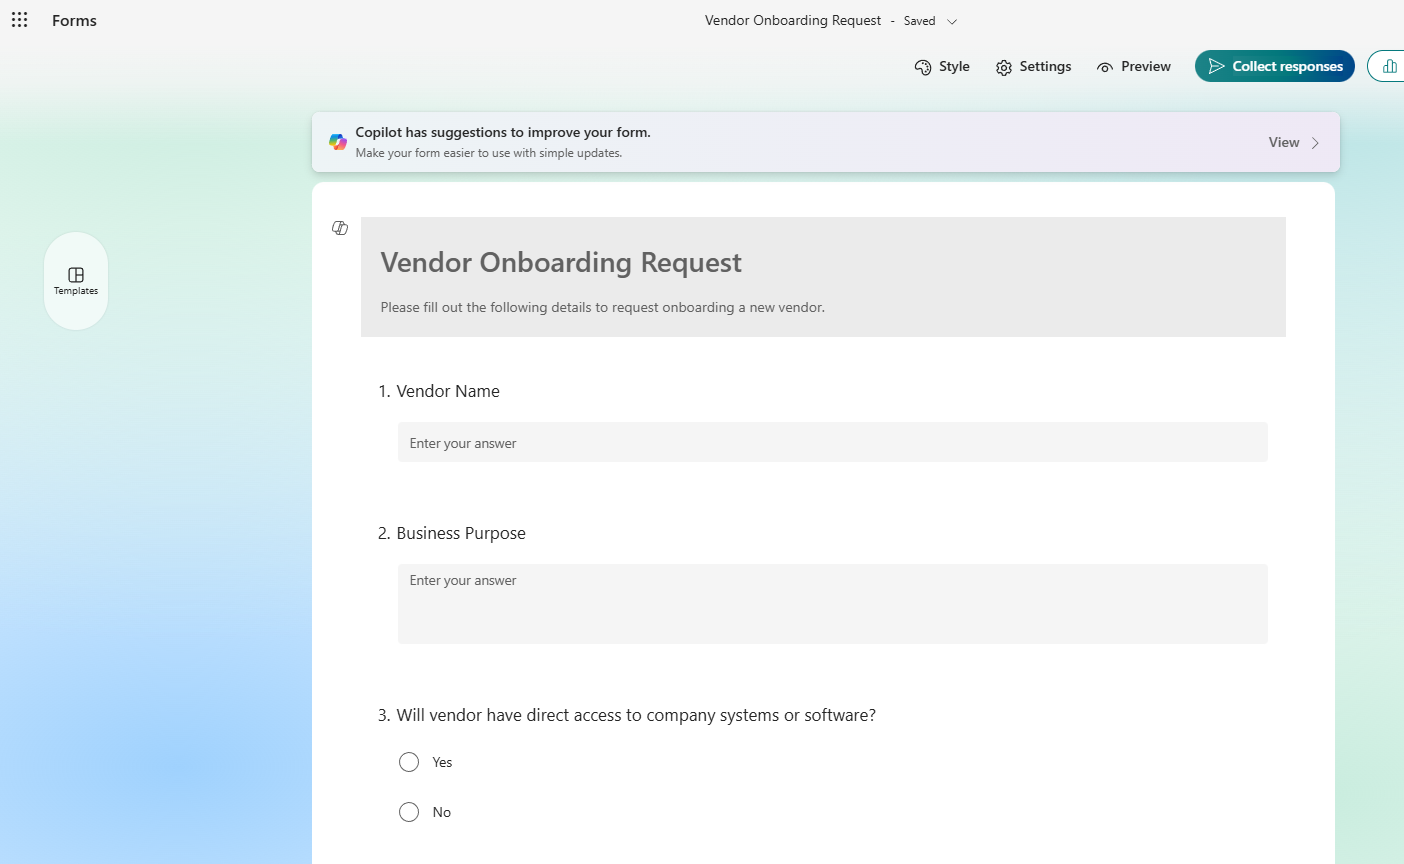
Step 1: A Microsoft Form collects vendor details.
Step 2: Requests are routed to multiple approvers via Teams.
Step 3: Upon approval, the software is logged in a SharePoint-based software inventory.
Step 4: Procurement is notified, and a support ticket is automatically created.
Before building, you’ll need:
A defined onboarding process. Map out your approval flow: who approves what? CFO? Procurement? Legal? Sketch this on a whiteboard.
A dedicated service account for the automation. Called something like Automations@domain.com
Microsoft Form. Head to forms.microsoft.com to create your form with fields for vendor name, website, estimated cost, department owner, and IT requirements
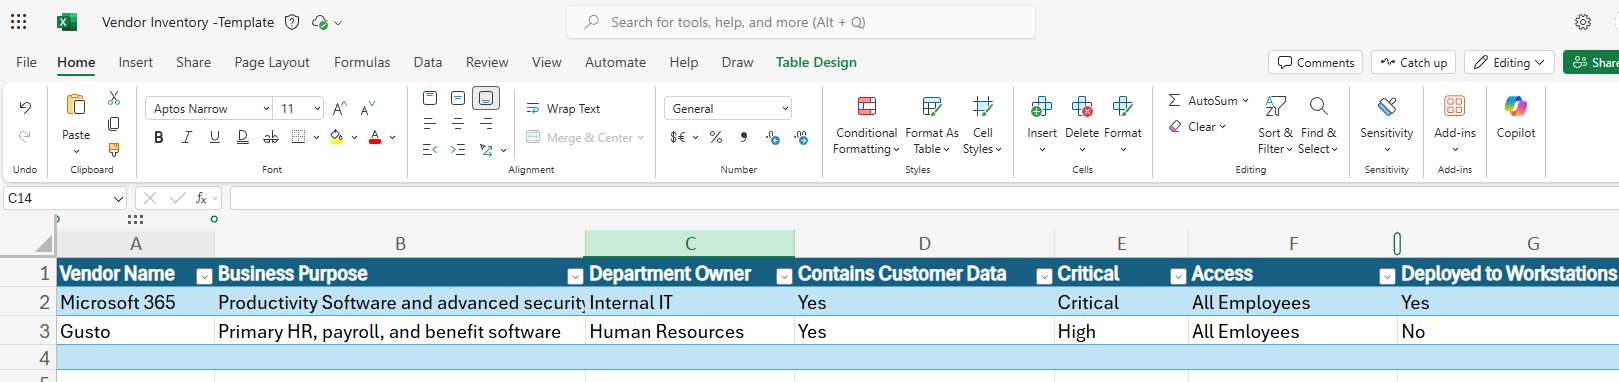
4. Software Inventory. I’m using an Excel file hosted on SharePoint with predefined columns that match the form responses.
5. Shared Mailboxes. Emails come from a shared address (like support@yourdomain.com), which your automation service account should have access to.
Import my free template to get started
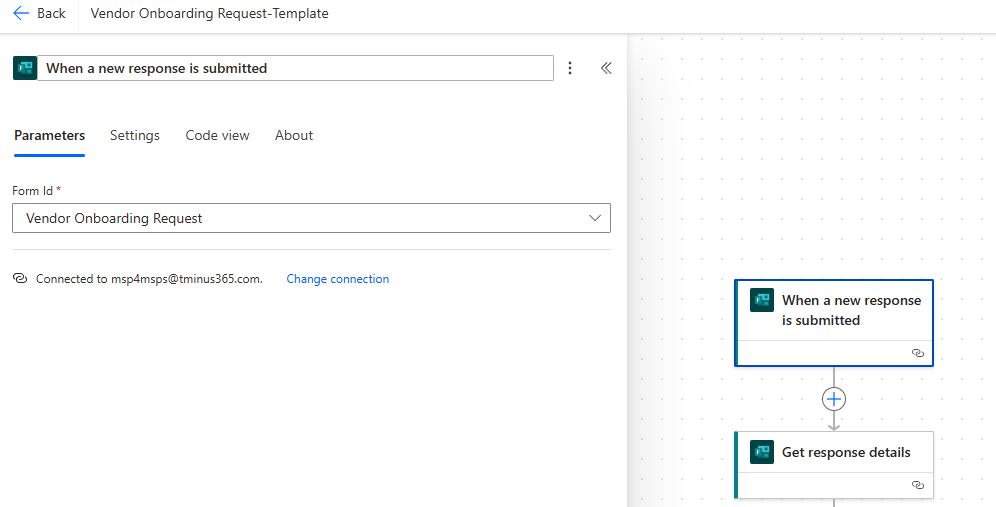
Head over to make.powerautomate.com >My Flows>Import>Import ZIP OR Start an automated cloud flow with the trigger: When a new response is submitted (Microsoft Forms).
Select your form (Vendor Onboarding Request).
Add the action Get response details.
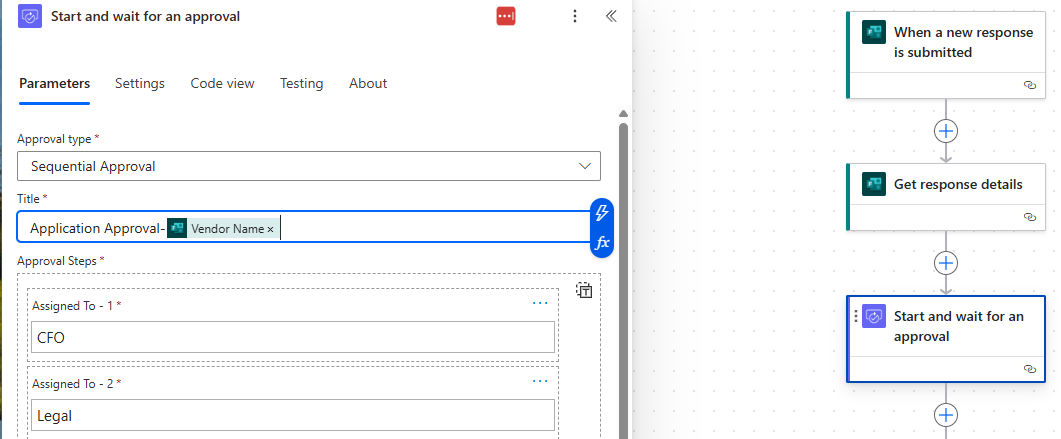
Add Start and wait for an approval (Sequential approval).
Populate title dynamically with the vendor name.
Assign approvers (CFO, legal, security, etc.). These can be hardcoded or dynamic.
Customize the message content for each approver if needed.
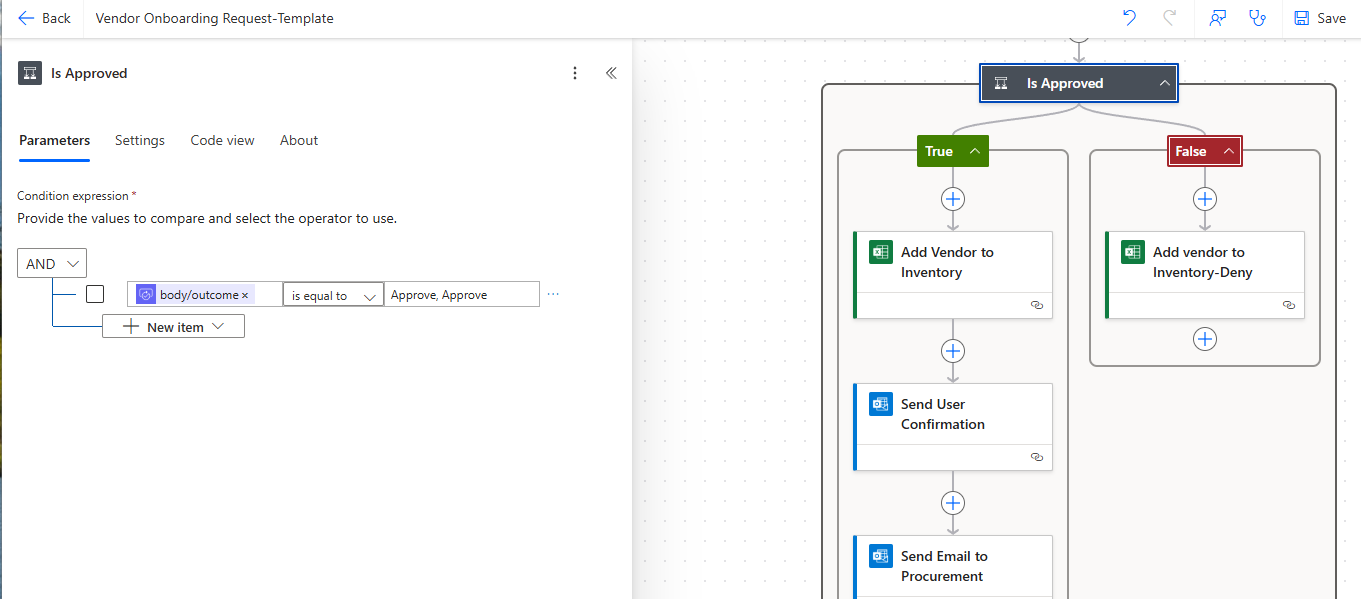
Add a Condition to check if the outcome is “approved, approved” (for multi-stage approvals).
If approved:
Add a row to your Excel software inventory with form responses, approval details, and timestamps.
Use Power Automate expressions or Copilot to format dates.
If denied:
Add a row marking the request as denied.
Send confirmation email to the requester.
Notify procurement with relevant request details.
Open a support ticket by sending an email to your IT support address.
Gate access to the form for managers or directors only.
Embed the form on your SharePoint site for easy access.
Use shared mailboxes and service accounts for all automation.
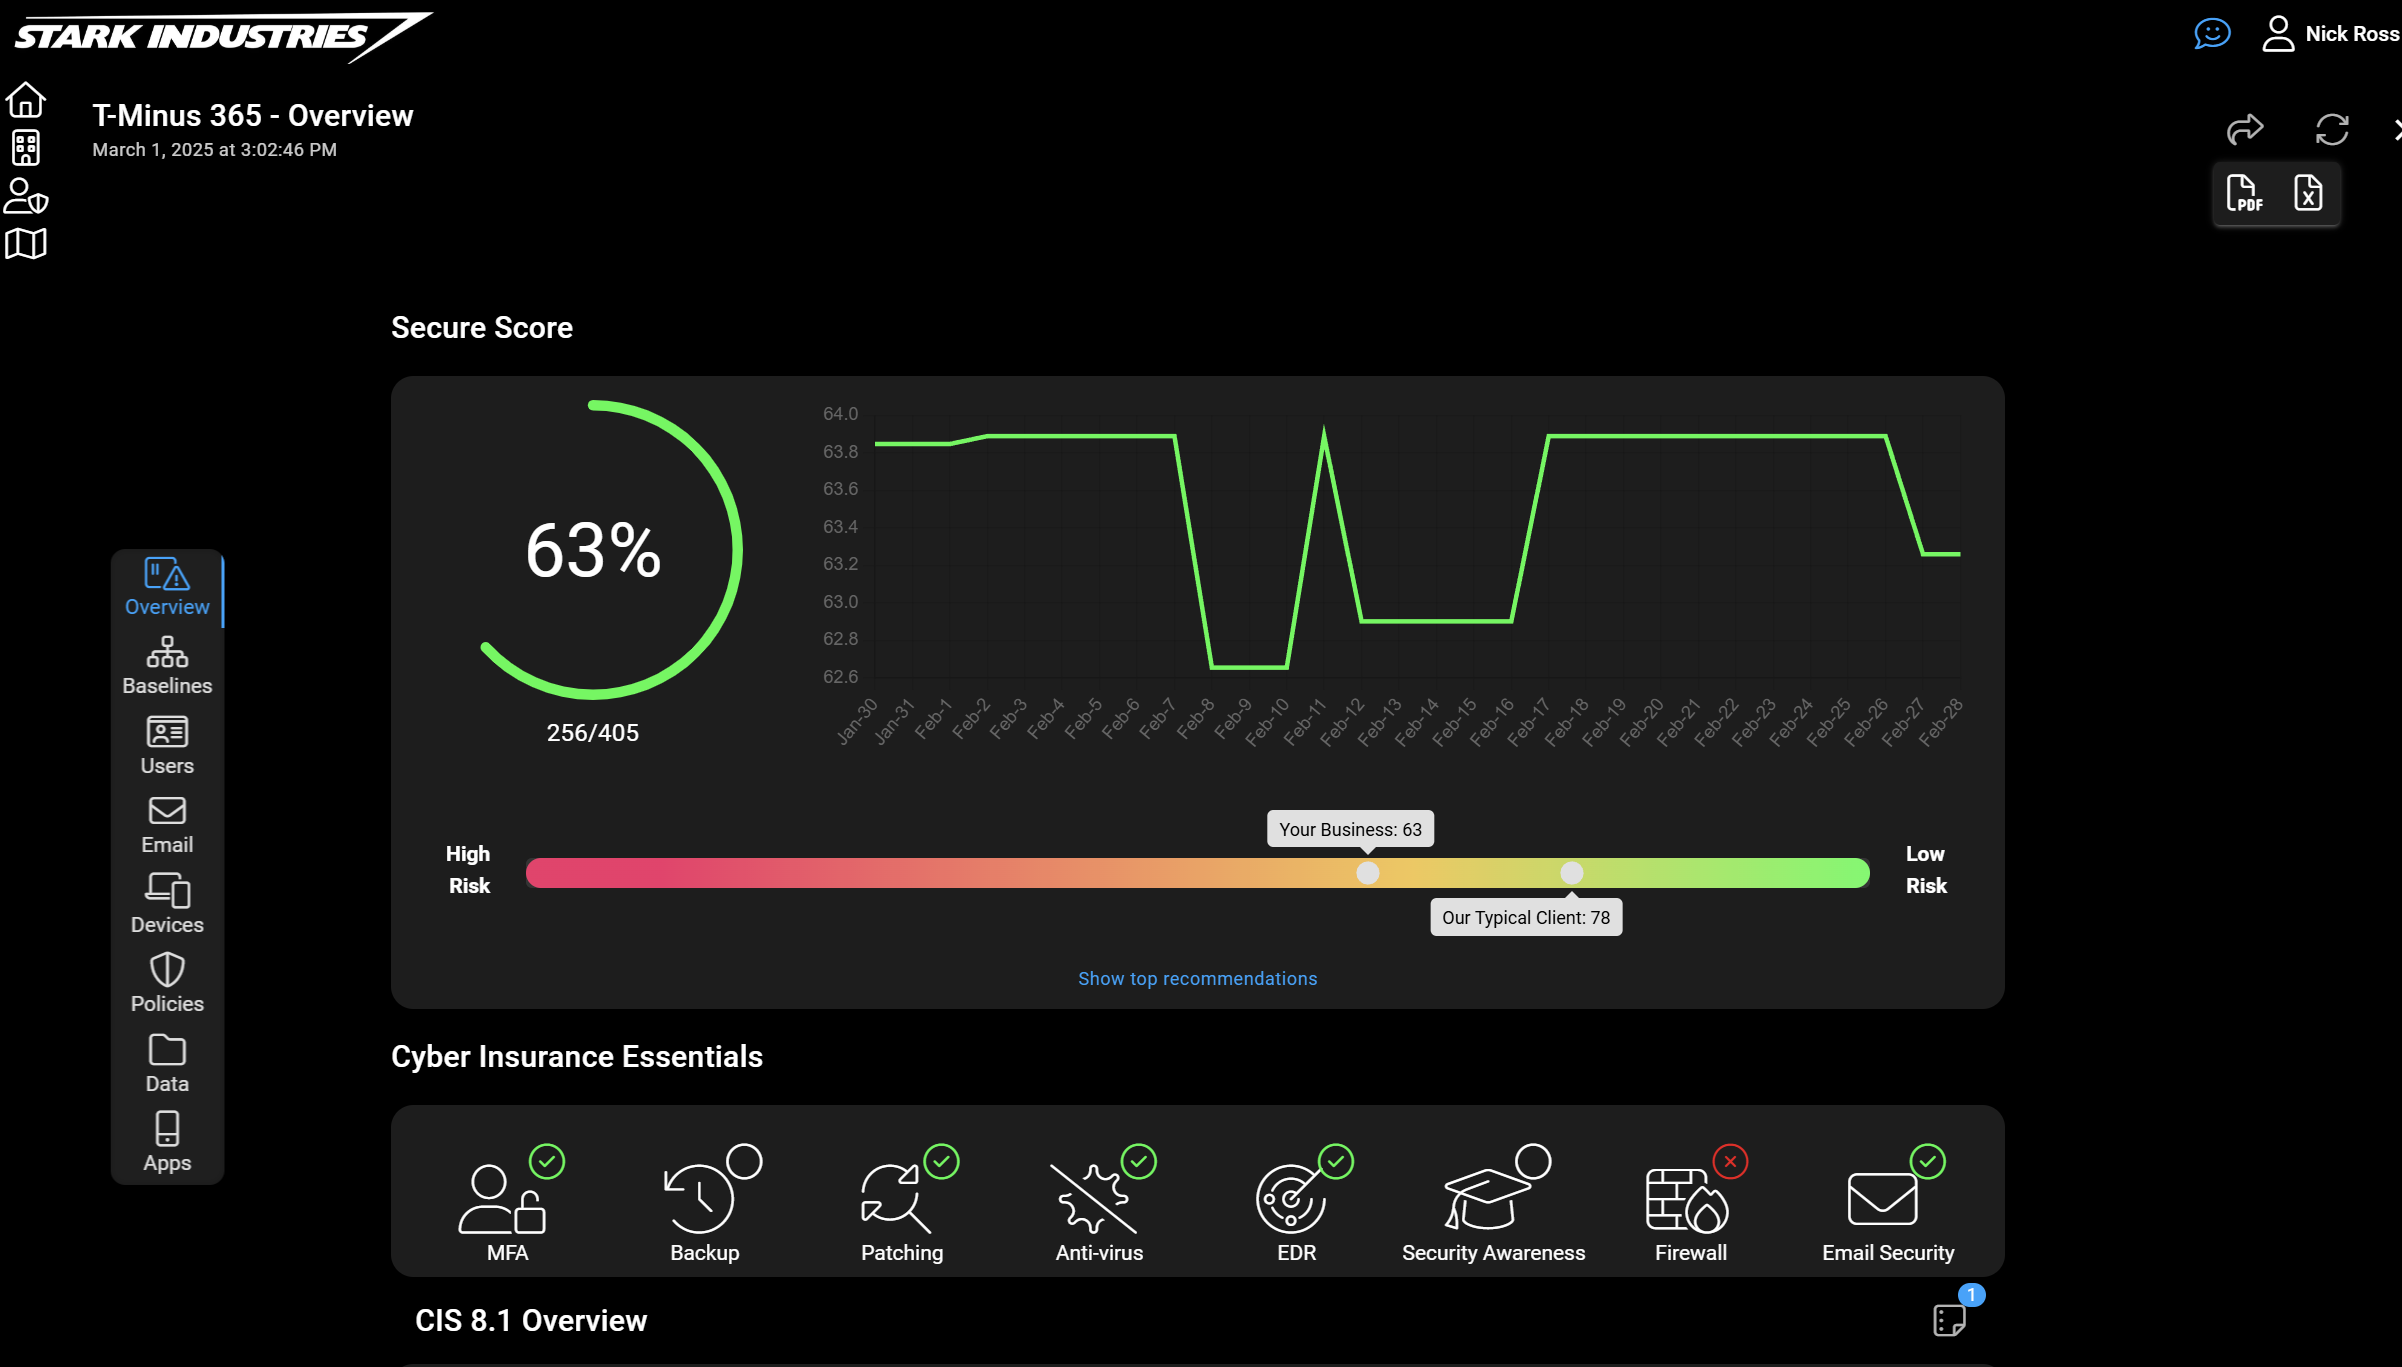
If you’re enjoying this automation, check out CloudCapsule.io, a tool I built that automates Microsoft 365 security assessments in under 90 seconds. You’ll get reports mapped to frameworks like CIS Controls, and you can sign up with Microsoft credentials.