In a previous post, I showed you how to automate user onboarding via a Microsoft Form and Power Automate flow. Today we are shifting the focus to user offboarding. When managing employee offboarding, it’s crucial to ensure the process is both efficient and secure. The manual tasks, from revoking user access to transferring email permissions, can be repetitive and time-consuming. But what if you could automate most of these processes with a custom workflow? Today, we’re going to dive into how you can integrate Microsoft Forms and Power Automate to automate your employee offboarding process, from security tasks to administrative duties. I am also going to be providing you a template that can automate the following actions:
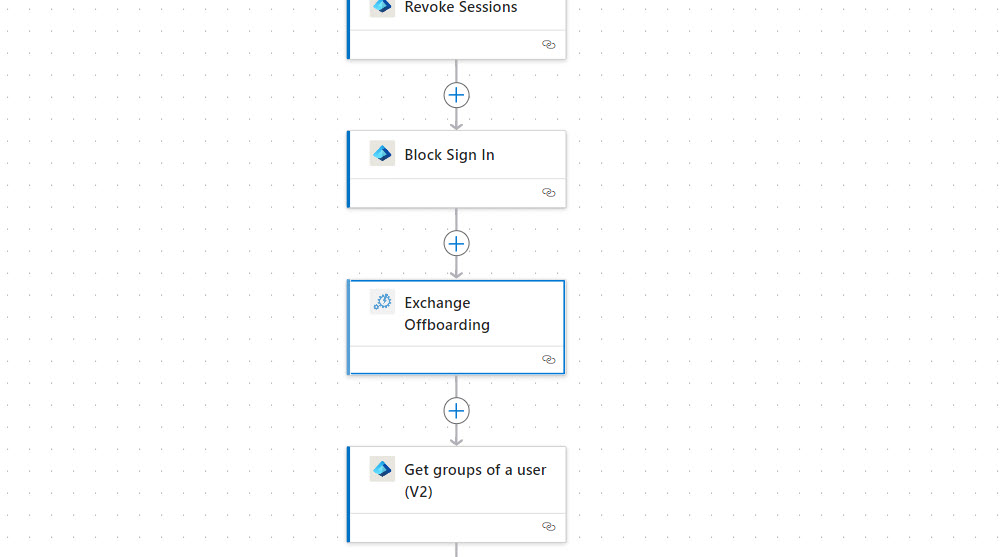
- Revoking the user sessions
- Blocking User Sign-In
- Converting the user to a shared mailbox
- Providing access to the mailbox to another user
- Hiding the user from the GAL
- Removing the License from the user
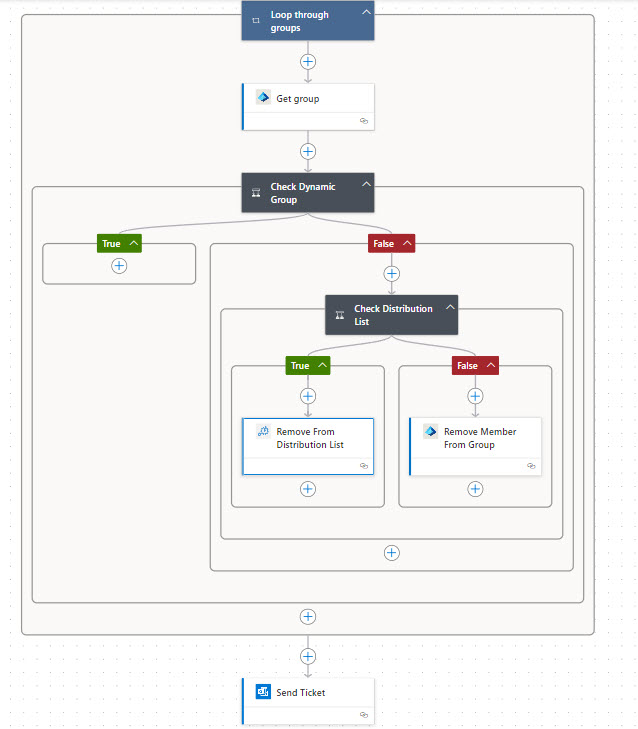
- Removing the user from all groups
- Sending a Ticket to PSA
The architecture
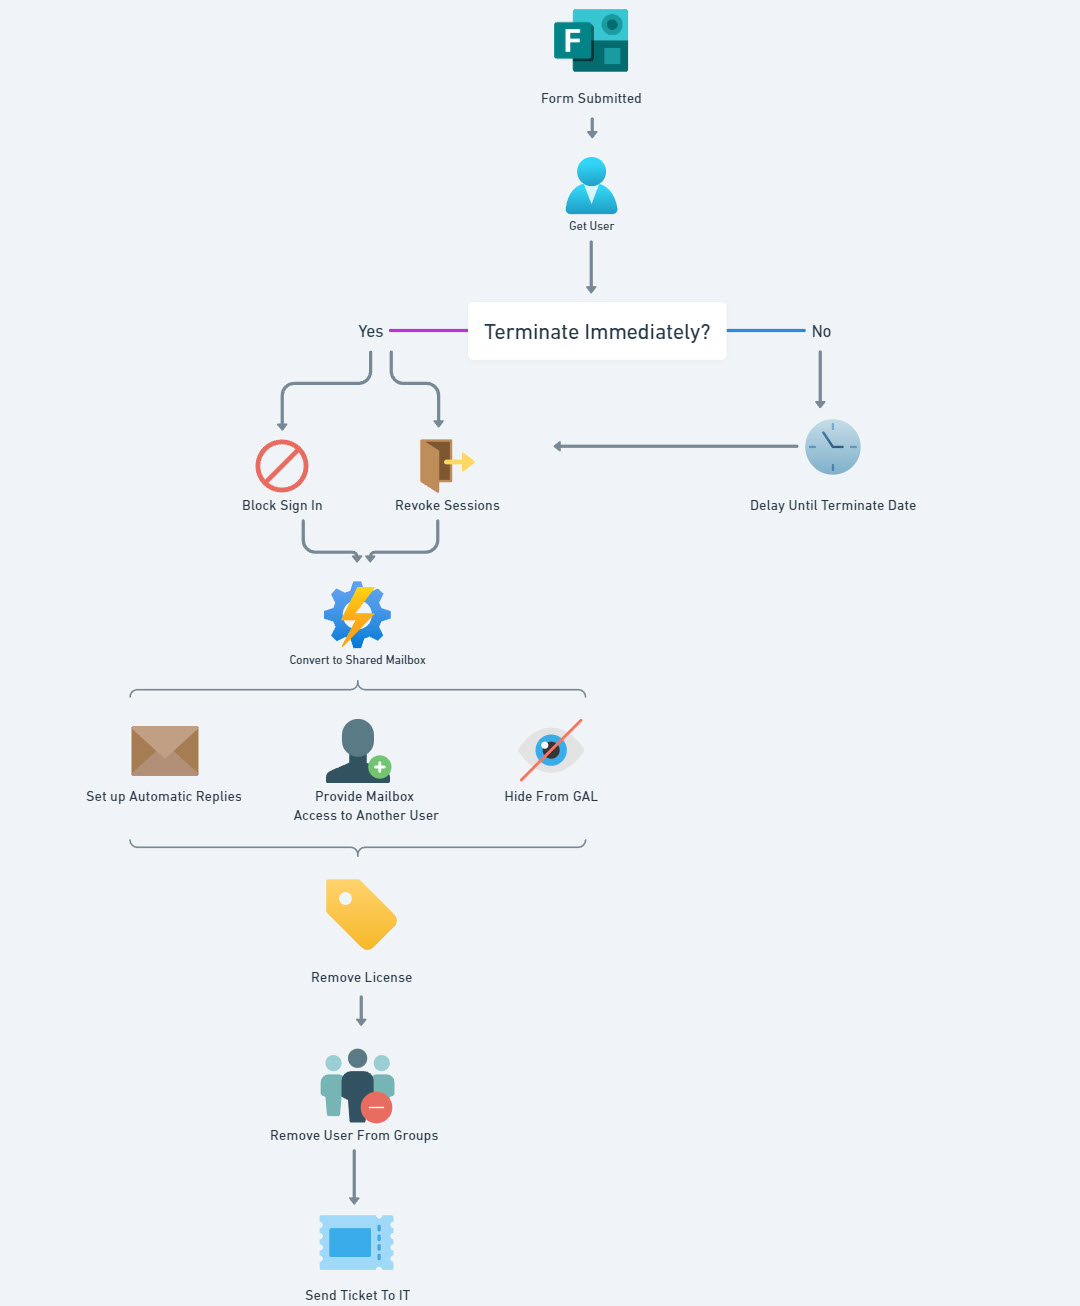
- Approved members of HR/staff have access to a form within their tenant
- When the form is submitted, if the user is set to terminate immediately, the automation will run instantaneously. Otherwise, it will delay until the termination date set in the form
- An Azure Automation account is leveraged to run Exchange PowerShell for the updates to the user mailbox
- Native connectors are leveraged to perform the rest of the actions in the automation
Prerequisites
- A service account for the automation => While you could use a regular user here, I recommend using a dedicated service account for auditing purposes and to not have things break if a regular user ever leaves over time. This user needs:
- A Power Automate Premium License (we need this for the Azure Automate action as it is a premium connector. You only need one license)
- To be assigned the User admin and Group admin role in Entra
- To have access or a license for Microsoft Forms.
- An Azure Subscription => This is used to create an Automation Account. The runbook we create here for PowerShell cost pennies to run if anything at all.
- A group for license assignment => I am using a group membership to assign and unassign licenses to users. Something like “Microsoft 365 Business Premium Users” which automatically assigns licenses to the members of the group. Assign licenses to a group – Microsoft Entra ID | Microsoft Learn This is supported in the M365 Admin Center
- A shared mailbox => I like to use this to send emails from, whether that be for if things are erroring out or to send the ticket to PSA via an email connector. I usually call this something like “support@domain.com” or “employeelifecycle@domain.com”
Creating the Form
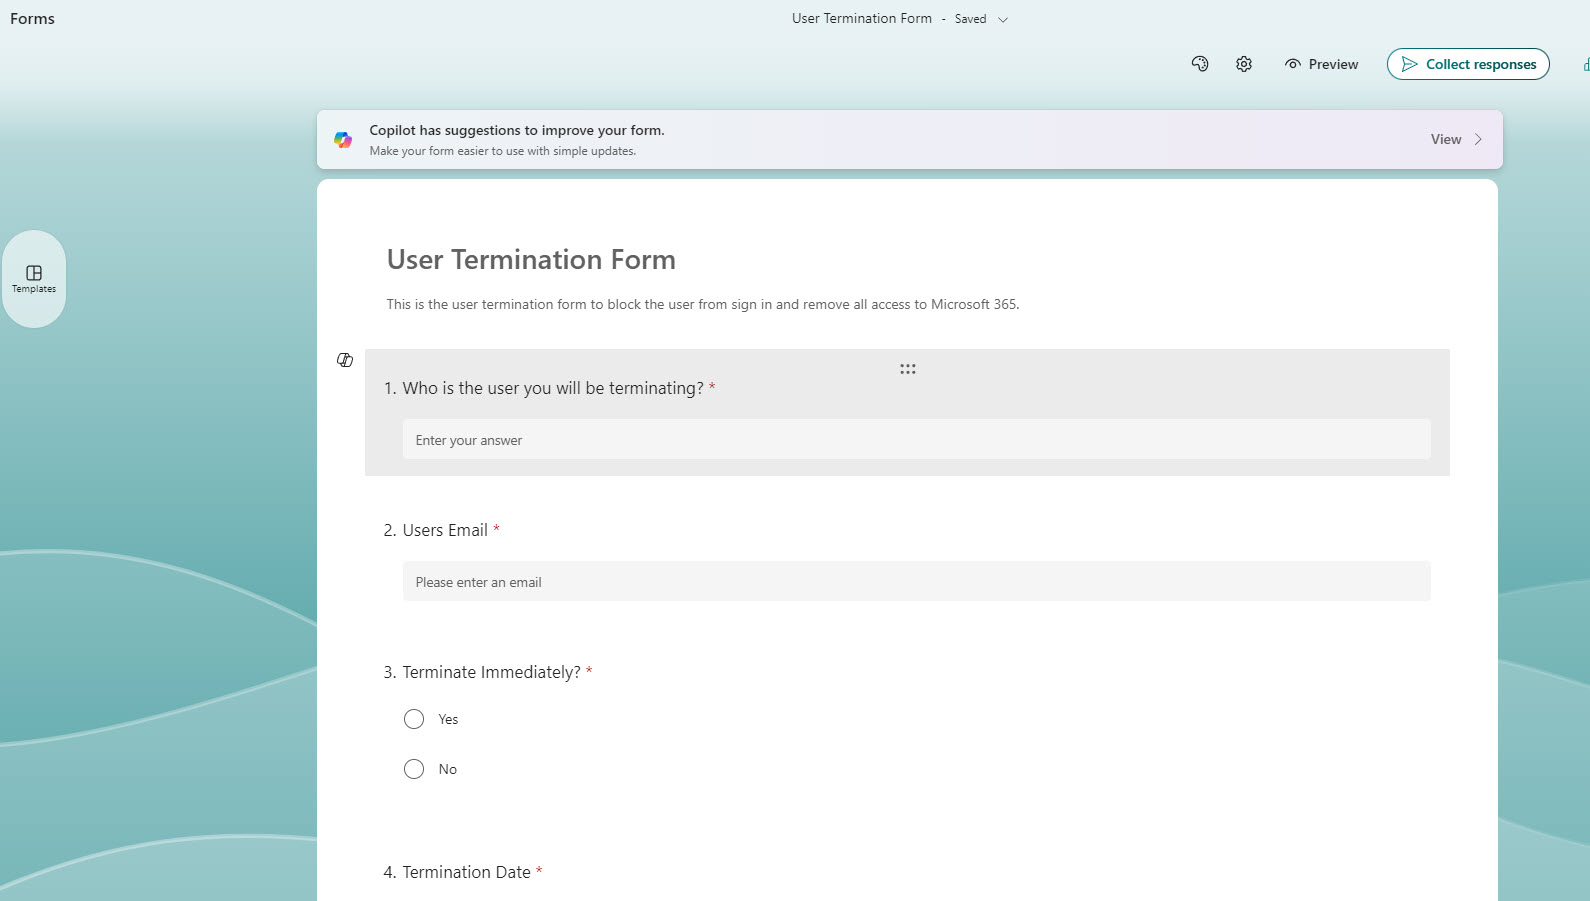
The form itself can be tailored to any business but here are some examples of what I am absorbing in the template. Check out the video below for the full tutorial.
Creating the Azure Automation
The Azure automation account is pretty cool because it allows us to run PowerShell in the tenant as automated triggers. I’ve used this for SharePoint, Exchange, Graph, Teams, and Entra Cmdlets in the past.
- Quickstart – Create an Azure Automation account using the portal | Microsoft Learn
- Adding the managed Identity to the Proper roles: Use Azure managed identities to connect to Exchange Online PowerShell | Microsoft Learn => See the video tutorial below for the full steps.
The Scripts
Exchange Offboarding:
Param
(
  [Parameter (Mandatory= $true)]
  [string] $identity,
  [Parameter (Mandatory= $true)]
  [string] $user
)

#Connect to Exchange Online
Connect-ExchangeOnline -ManagedIdentity -Organization "tminus365com.onmicrosoft.com"

#Set Automatic Replies
Set-MailboxAutoReplyConfiguration -Identity $identity -AutoReplyState Enabled -InternalMessage "The user you are trying to reach is no longer with the company." -ExternalMessage "The user you are trying to reach is no longer with the company." -ExternalAudience All

#Convert to Shared Mailbox
Set-Mailbox -Identity $identity -Type Shared

#Hide from GAL
Set-mailbox -Identity $identity -HiddenFromAddressListsEnabled $true

#Add Mailbox Permissions if set
if($user){
  Add-MailboxPermission -Identity $identity -User $user -AccessRights FullAccess -InheritanceType All -AutoMapping $true
}

Disconnect-ExchangeOnline -Confirm:$false
Remove User from Distribution List:
Param
(
  [Parameter (Mandatory= $true)]
  [string] $identity,
  [Parameter (Mandatory= $true)]
  [string] $member,
)

#Connect to Exchange Online
Connect-ExchangeOnline -ManagedIdentity -Organization "tminus365com.onmicrosoft.com"

#Remove Member
Remove-DistributionGroupMember -Identity $identity -Member $member

Disconnect-ExchangeOnline -Confirm:$false
Power Automate Template
You can upload the following template into a tenant and customize. Check out the full tutorial video below to see how I create all of these actions.
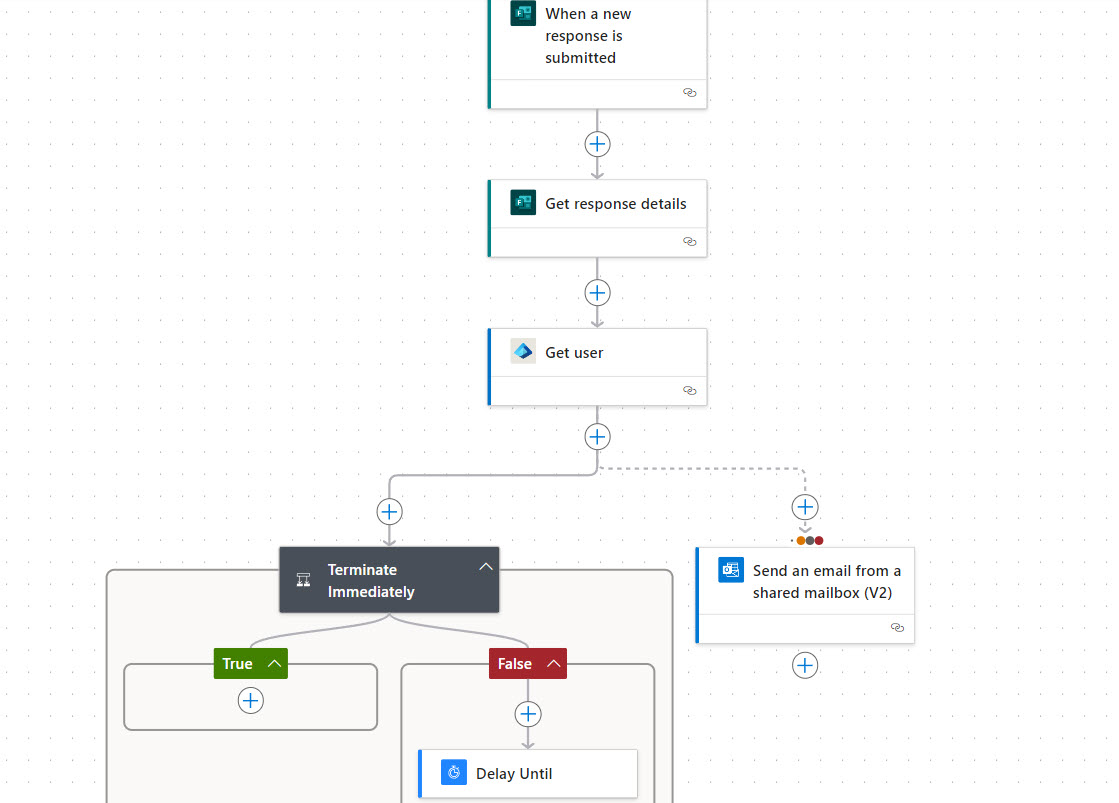
If terminate immediately is true, we simply move on to the next action in the chain. Otherwise, we delay the automation till that time.