
Many of us have set up a geo-blocking conditional access policy to prevent sign ins from unapproved countries. If you haven’t already, look to implement this as it gives you great protection against potentially malicious sign ins. This policy inevitably creates a support burden when users are traveling to a country that is not approved (in most cases because they are going on vacation) and they want to access work email/resources. I came across this great article that showed how to automate these request using Access Packages in Entra: Secure your users when they go on vacation – Agder in the cloud
While access packages are great, they do require an Entra P2 license which most of our customers are not going to have. For that reason, I wanted to provide a solution you could create in any tenant leveraging Microsoft Forms and Power Automate to automate these requests. In this article, we will cover this solution and I provide you a zip file you can use to import the Power Automate flow as a template in your customer environments.
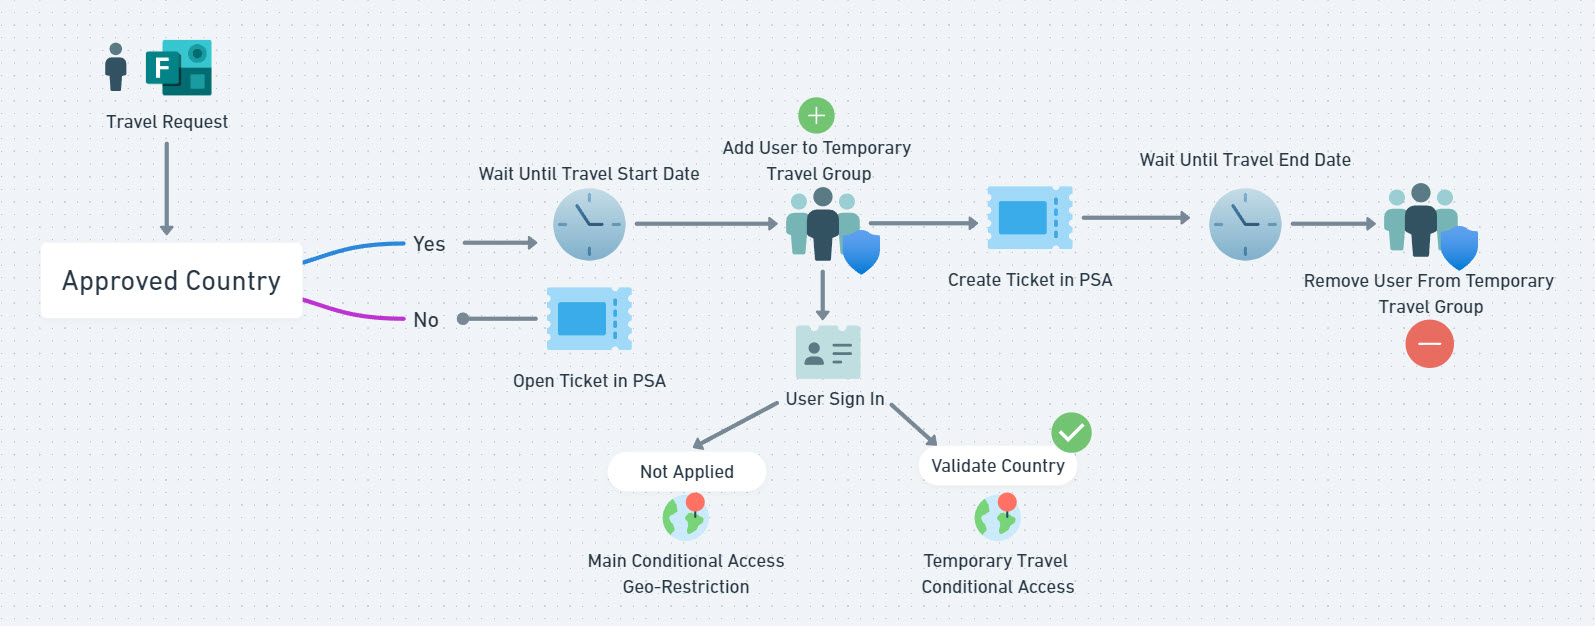
What we are accomplishing:
Let’s look at a hypothetical example of what we are performing in the tenant:
1. A conditional access policy is set up to block all logins from outside the US
2. A user will be on vacation in Italy for 2 weeks. The user submits a travel request via a form that includes the country they will be traveling to and the start and return dates. A ticket is created in PSA.
3. The country requested is verified as an “approved country” for travel. On the start date, the user is added to a “Temporary Travel” group that is being excluded from our geo-blocking CAP and included in a “Temporary Travel” CAP we have that allows access from approved temporary country locations.
4. On the return date, the user is removed from the Temporary Travel group and no longer has access to sign in from Italy.
Security Benefits
- We are not creating blanket exclusions to our base geo-location policy for users. We are effectively approving a temporary whitelist to a select list of countries for that individual user
- We are not modifying the conditional access policies themselves but rather the group membership part of the exclusions/inclusions
- We automate the flow to avoid human error that leaves holes in our conditional access policy protections over time
Steps:
1. Configure approved countries as a Named Location
- In the Entra Admin Center, go to Protection>Conditional Access>Named Locations> +Countries location
- Provide a name (i.e. Temporary Travel)
- Add your list of approved countries
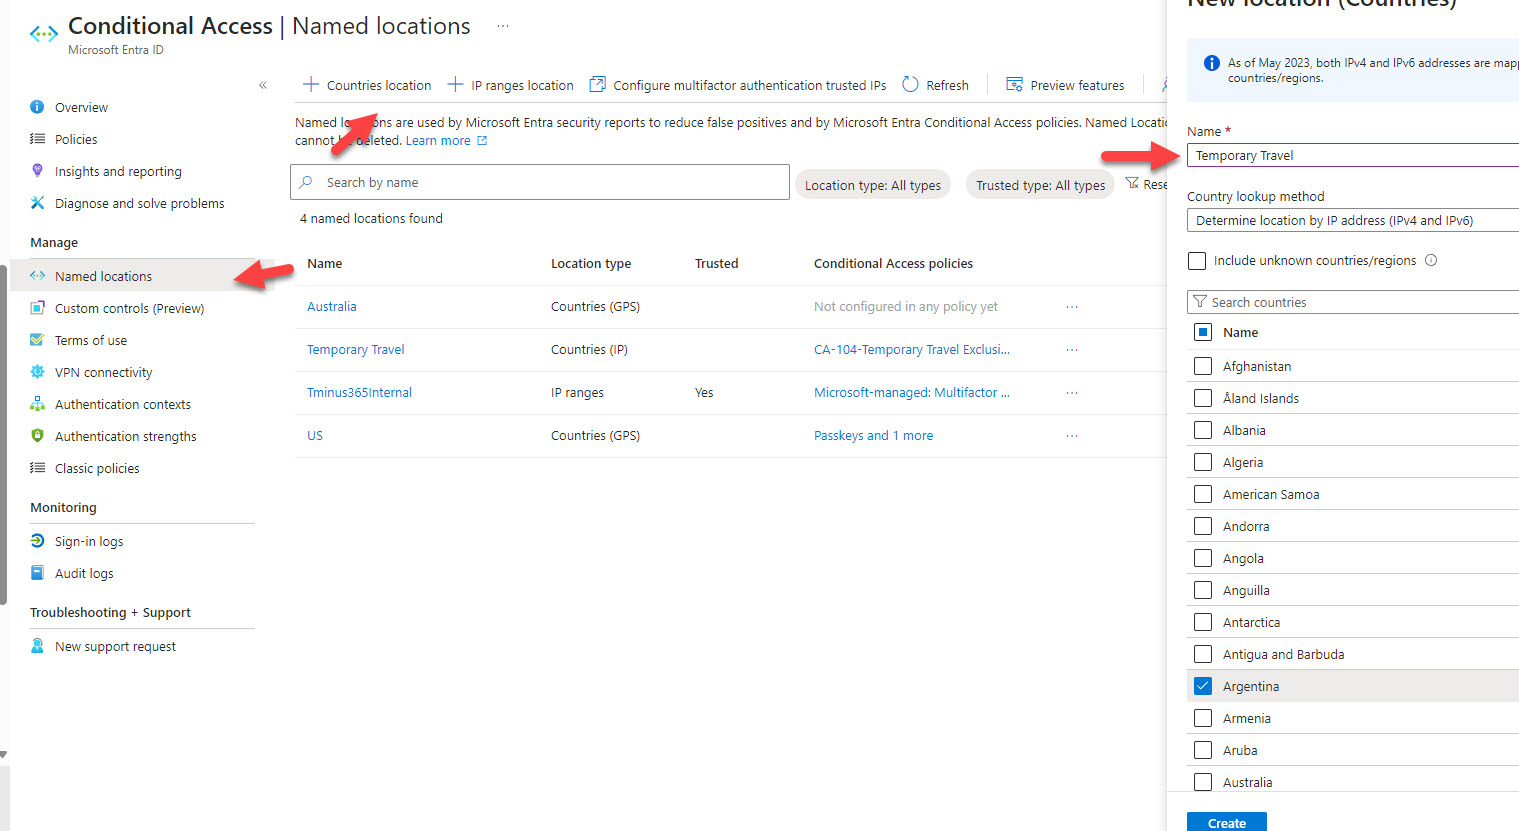
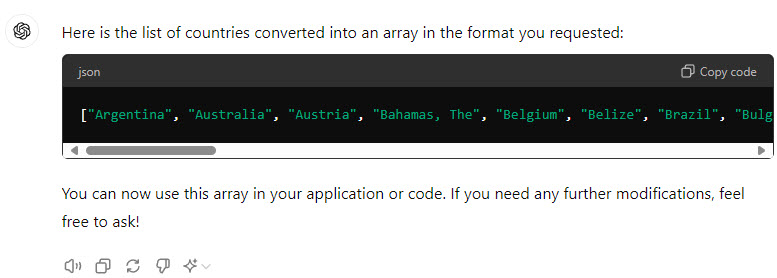
Note that the list here is something you should define as an MSP, taking into consideration potential frequent countries users already travel to in the tenant. In my Power Automate template, you will notice that I have an array defined of about 39 countries. You can add and subtract those as needed.
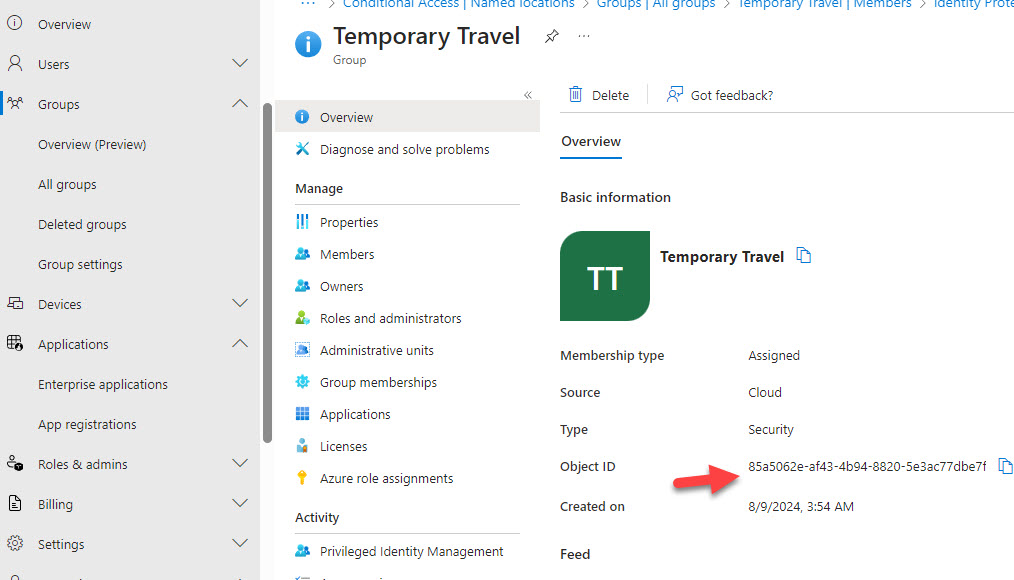
2. Create a group for Temporary Travel
In the Entra Admin center, create a new Security group called “Temporary Travel”. After creation, copy the object ID and paste it in notepad. We will use it later in the Power Automate flow.
3. Create a Microsoft Form
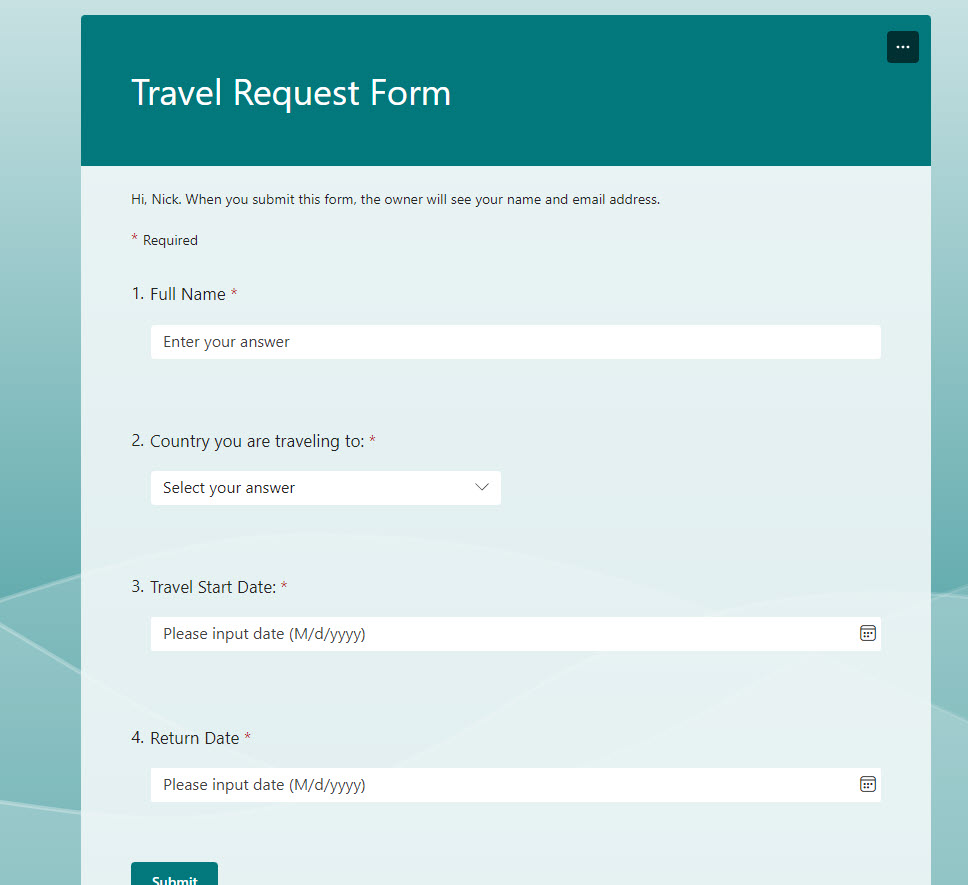
I made this very simplistic but you could add other fields as needed. Note that we will be creating this as a form in each customer environment. If you do that, you have the additional benefit of only authenticated users coming from this environment and you don’t have to request as much info like their email since that will natively come through with the form response as we will see in the Power Automate flow.
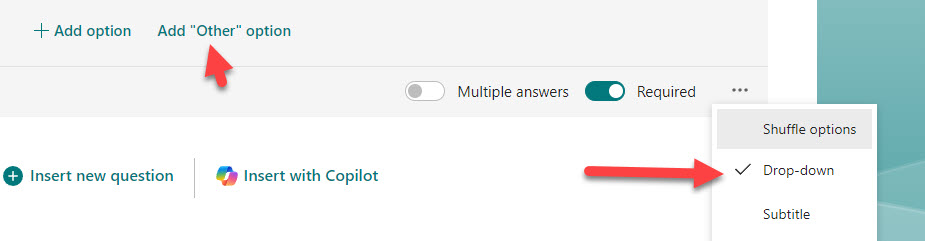
Here you will also use the “choice” selection for the Country List. Add the countries here you defined in your Named Location Policy. I like to add the “Other” option so users can type in the name of the country they are going to if it is not in the approved list. Also, click on the 3 dots on the question to make it a dropdown for the user.
4. Import the Power Automate Template
- Download the zip file here for free (Type $0 at checkout) to get the Power Automate Template: https://store.tminus365.com/p/travel-request-power-automate-template/
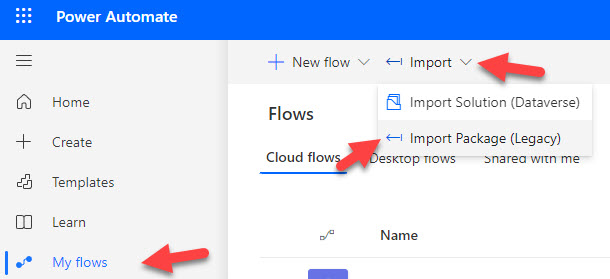
- Go to https://make.powerautomate.com/
- Click My Flows>Import>Import Package
4. Upload the zip file
5. Do not modify the Flow resource. For the connectors, click on “Select during import” for each and modify them to connect to a service account in your environment. If you do not already have one, I would recommend creating a dedicated service account specifically for power automate. They need to have enough permissions to grab the data requested in Entra. The outlook connection needs to have a mailbox associated with this user.
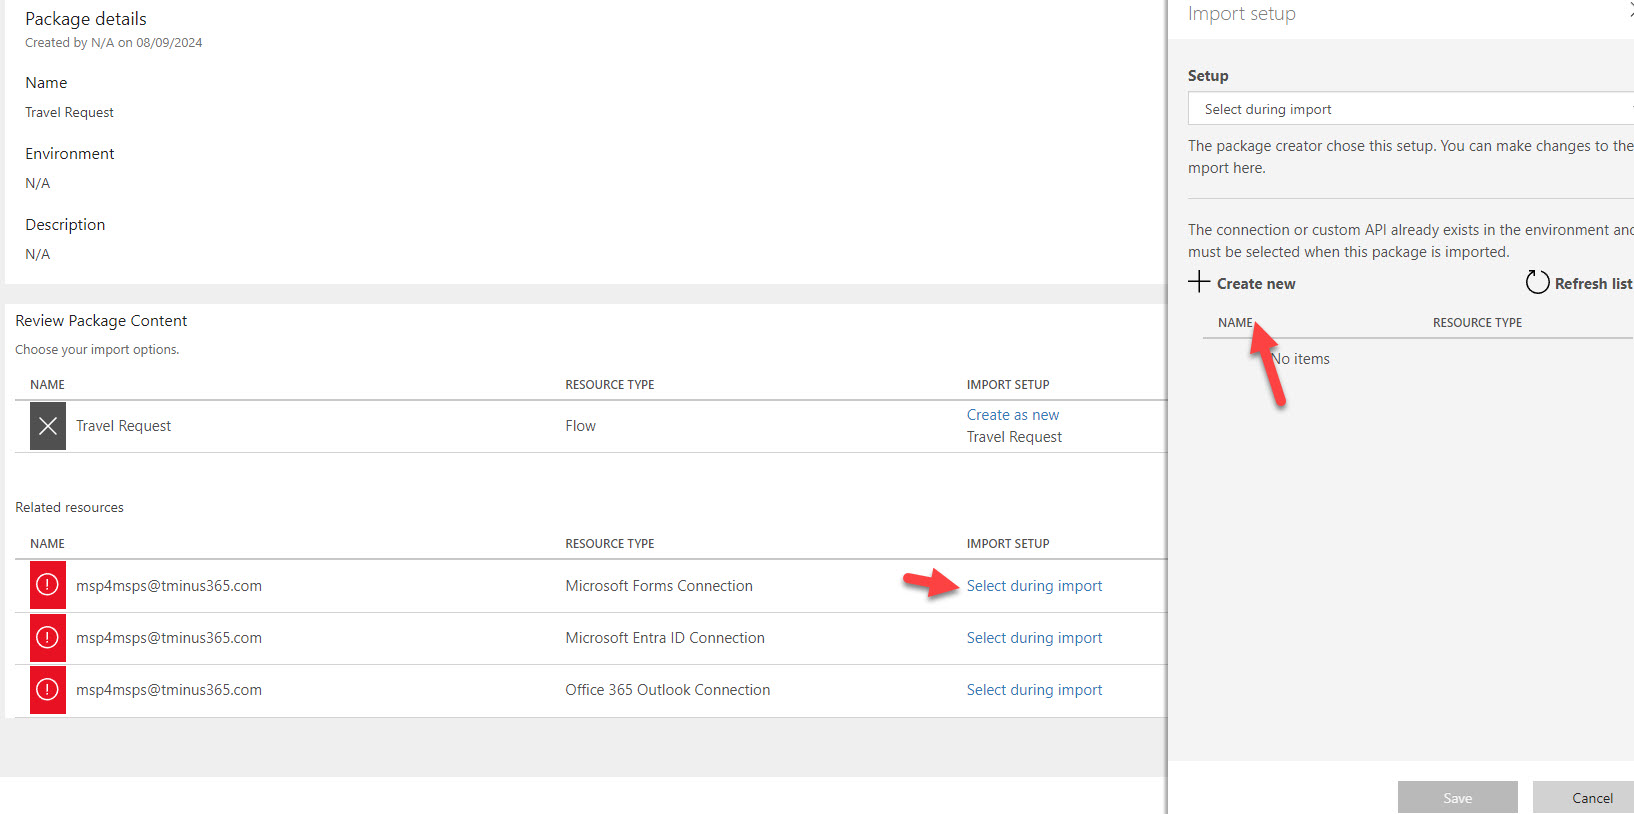
6. Click Import when finished>Click Open Flow after successful import.
5. Modify the template
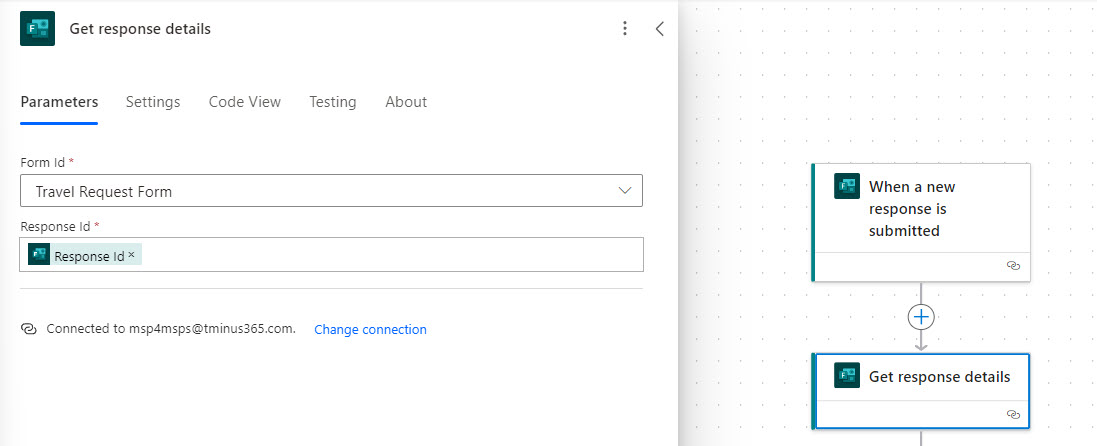
Modify the first action to add the Microsoft Form you created earlier

Modify the Get response details action to dynamically grab the Form from the previous step.
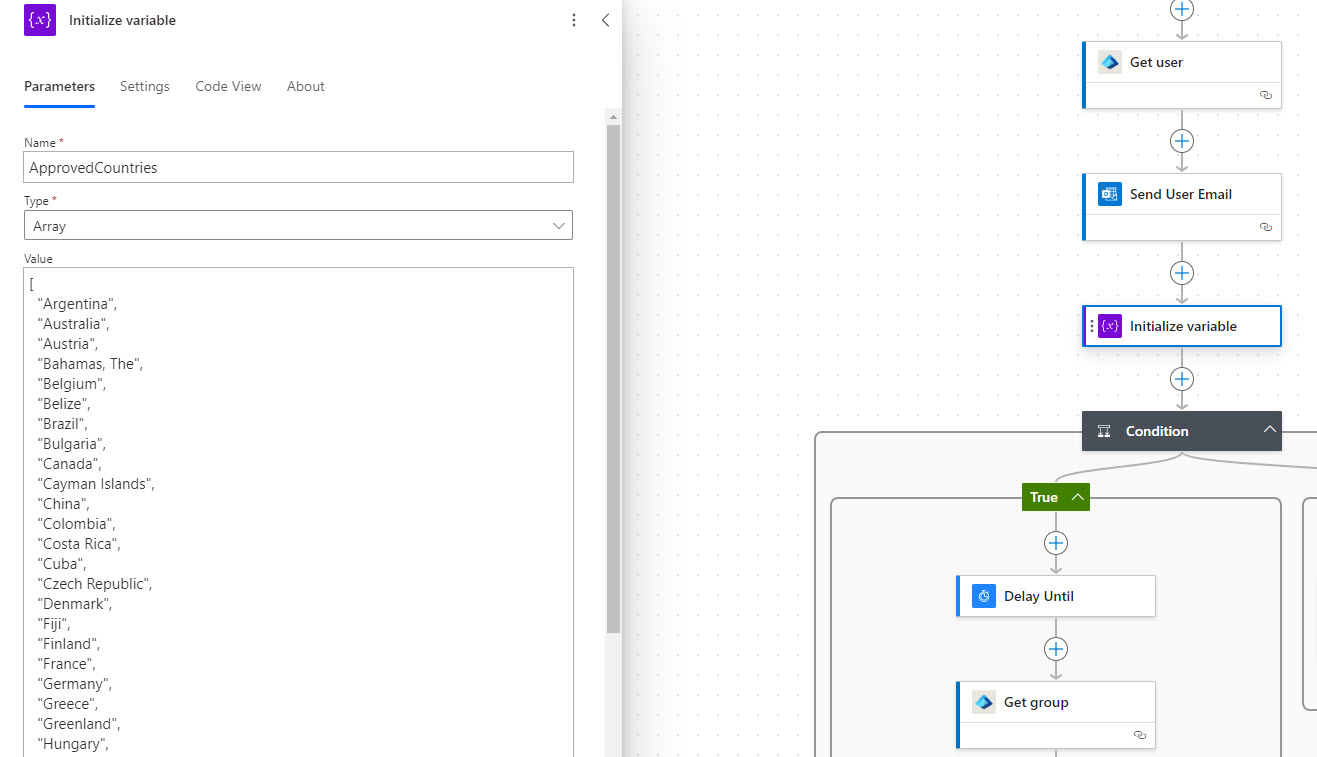
Modify the Array of “Approved Countries” (Optional)
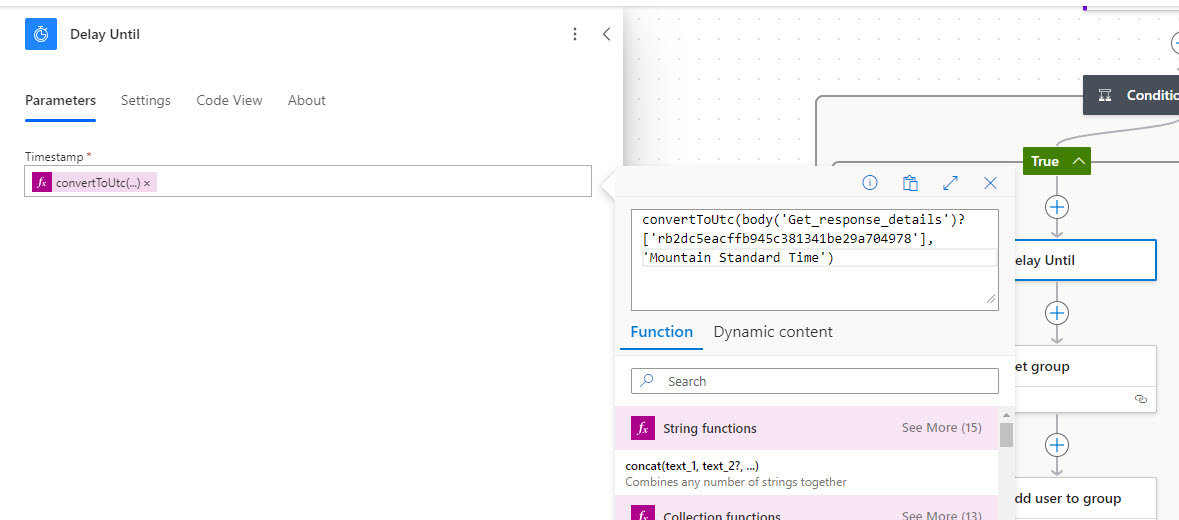
Modify ALL Timer Delay actions (Delay Until & Wait Until Return Date) to your time zone value. Refer to the following for the correct string value: Default Time Zones | Microsoft Learn
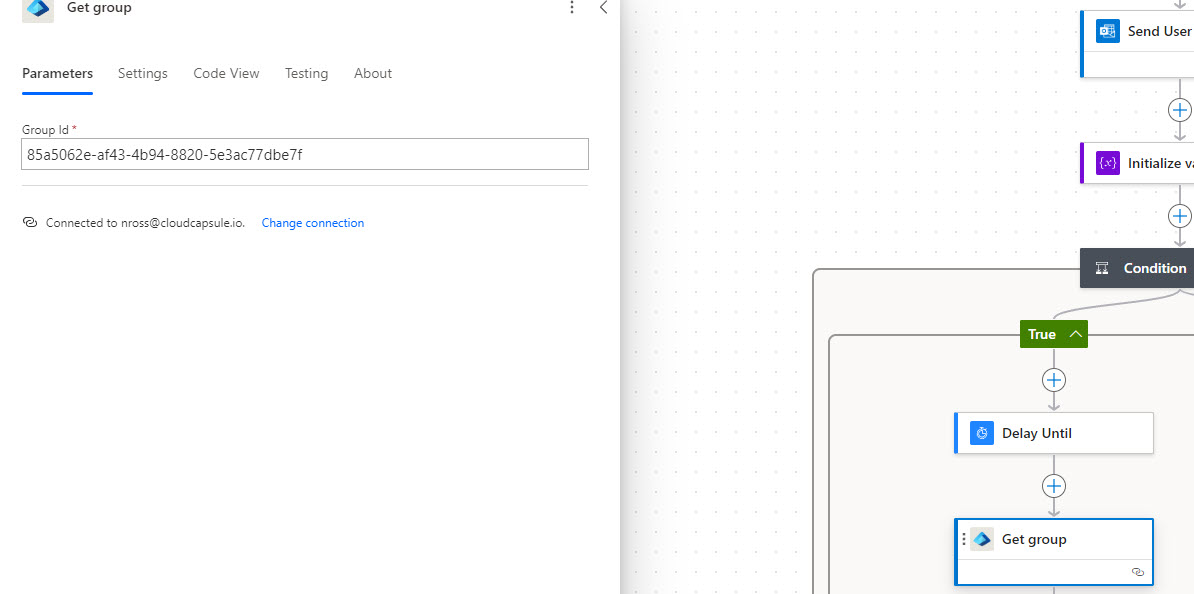
For the Get Group action, replace the guid here with the Object ID you grabbed earlier for your Temporary Travel group.
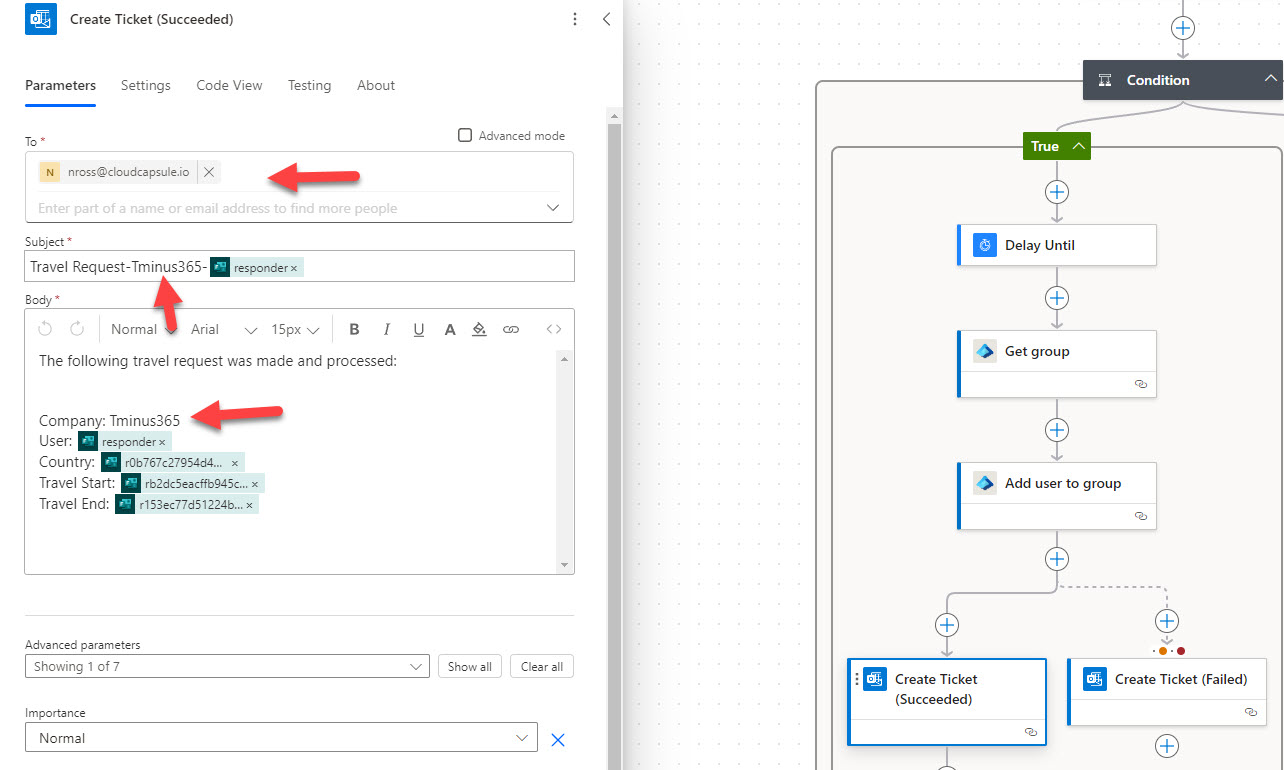
Modify ALL of the “Create Ticket” actions to go to your support email. Change the email template to include the company name in the subject line and body.
6. Test the flow
After you have saved your flow, click on Test in the right corner. Select manual and then submit the form to test to ensure there are no errors.

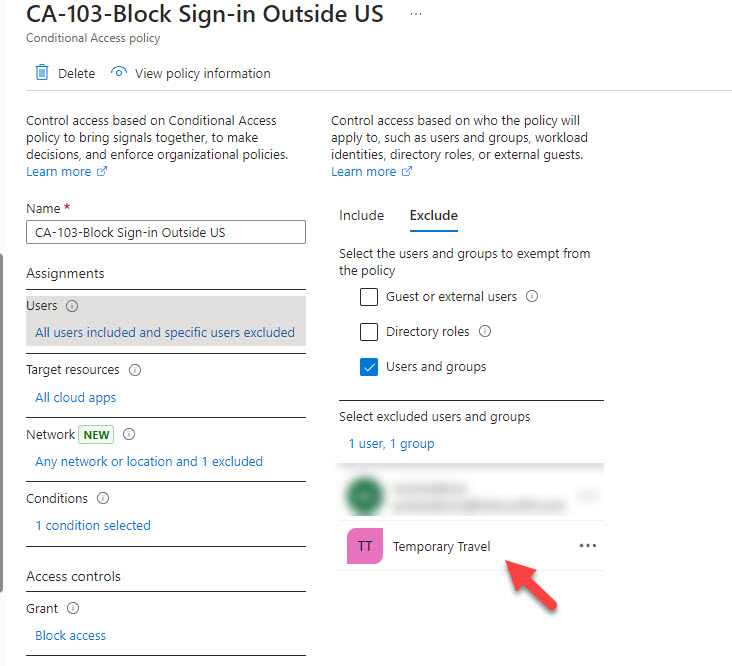
7. Update your existing Conditional Access policy for geo-blocking
In your existing policy, exclude the “Temporary Travel” group.
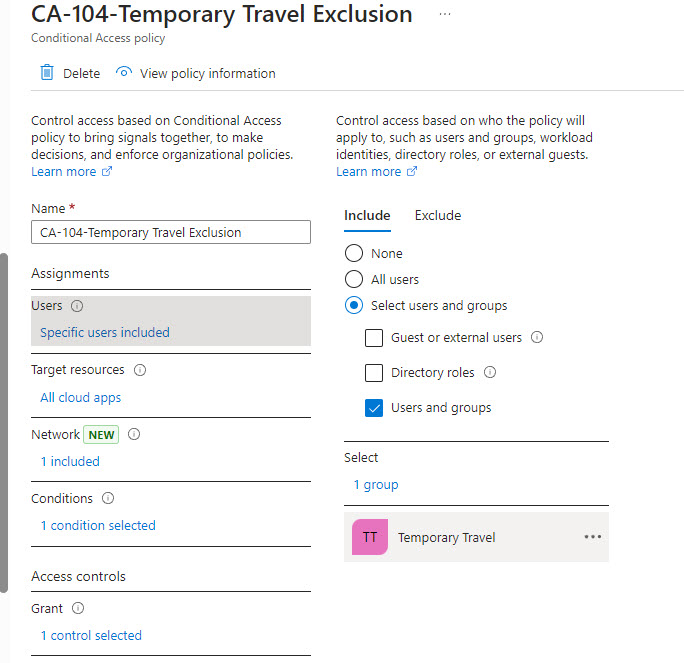
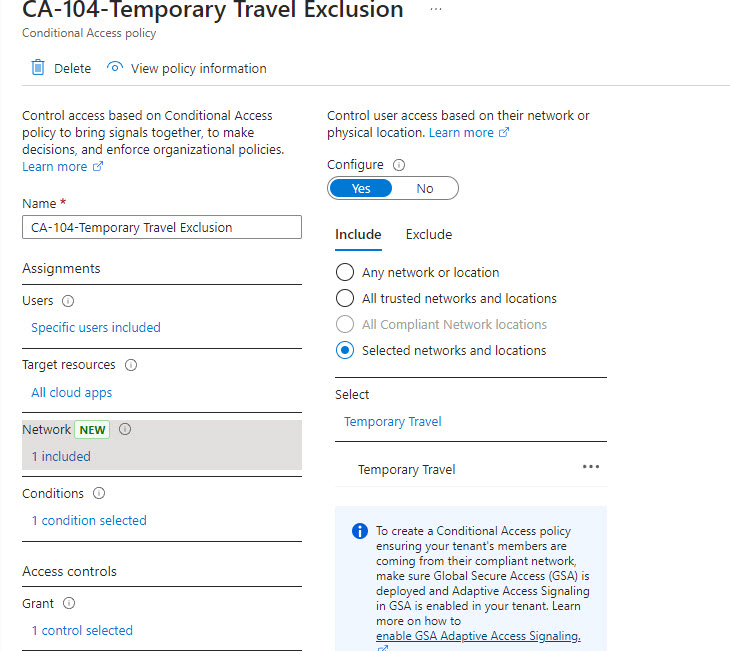
8. Create a new Conditional Access Policy for Temporary Travel
Create a new Conditional access policy that applies the following:
- Assigned to our Temporary Travel Group
- Targets All Cloud Apps
- Includes our Temporary Travel Named location
- Grants access but Requires MFA
Conclusion
I know these steps might seem cumbersome to set up for each customer but think of all of the potential time savings and security benefit from having this entire process automated!
Note: If you do have Entra P2 in tenants, it might be better to follow the Access Package steps outlined in the article I added at the beginning of this post given its built into your licensing.